Tag Archives: Wood

French & Sensibility

Standard

(See what I did there, bibliophiles and Jane Austen fans?!)

For the record, I came up here to the office to blog, and was greeted with this:

Image

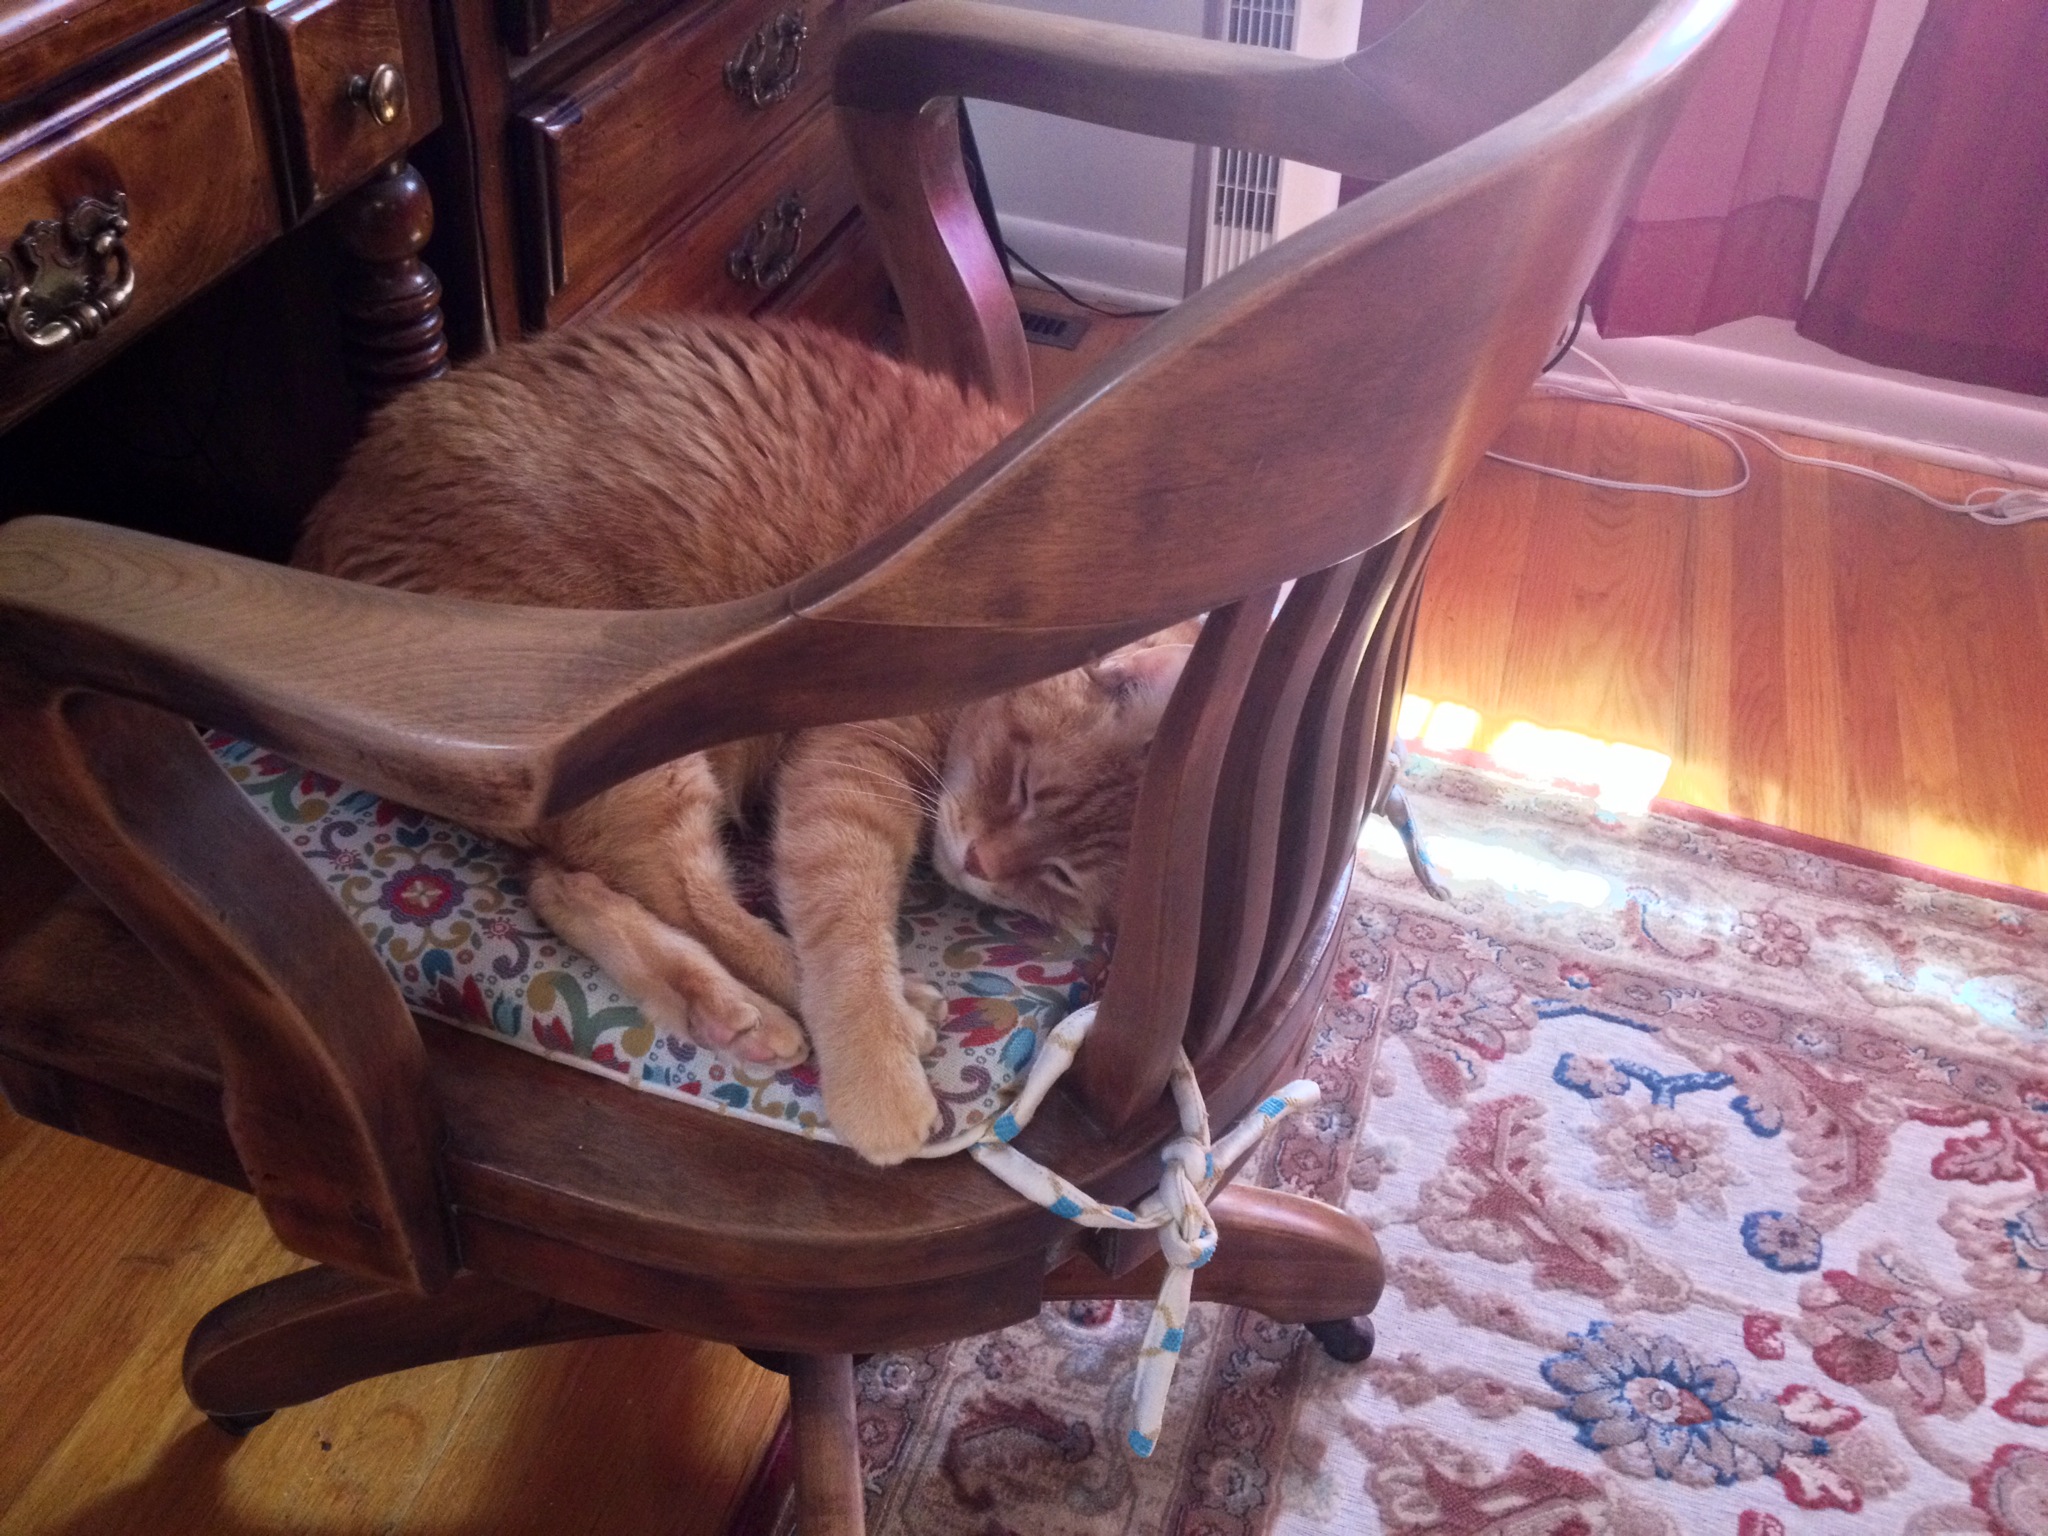
After coaxing him off with treats, I’m ready to go ๐Ÿ™‚

I’ve got TWO projects to blog today ๐Ÿ™‚ I’ll start with showing you the raw materials and starting costs. I found an awesome, thick pine trestle bench/end table at a thrift store. It was $7 and I had to have it! It was rustic and yet reminded me vaguely of a church pew.
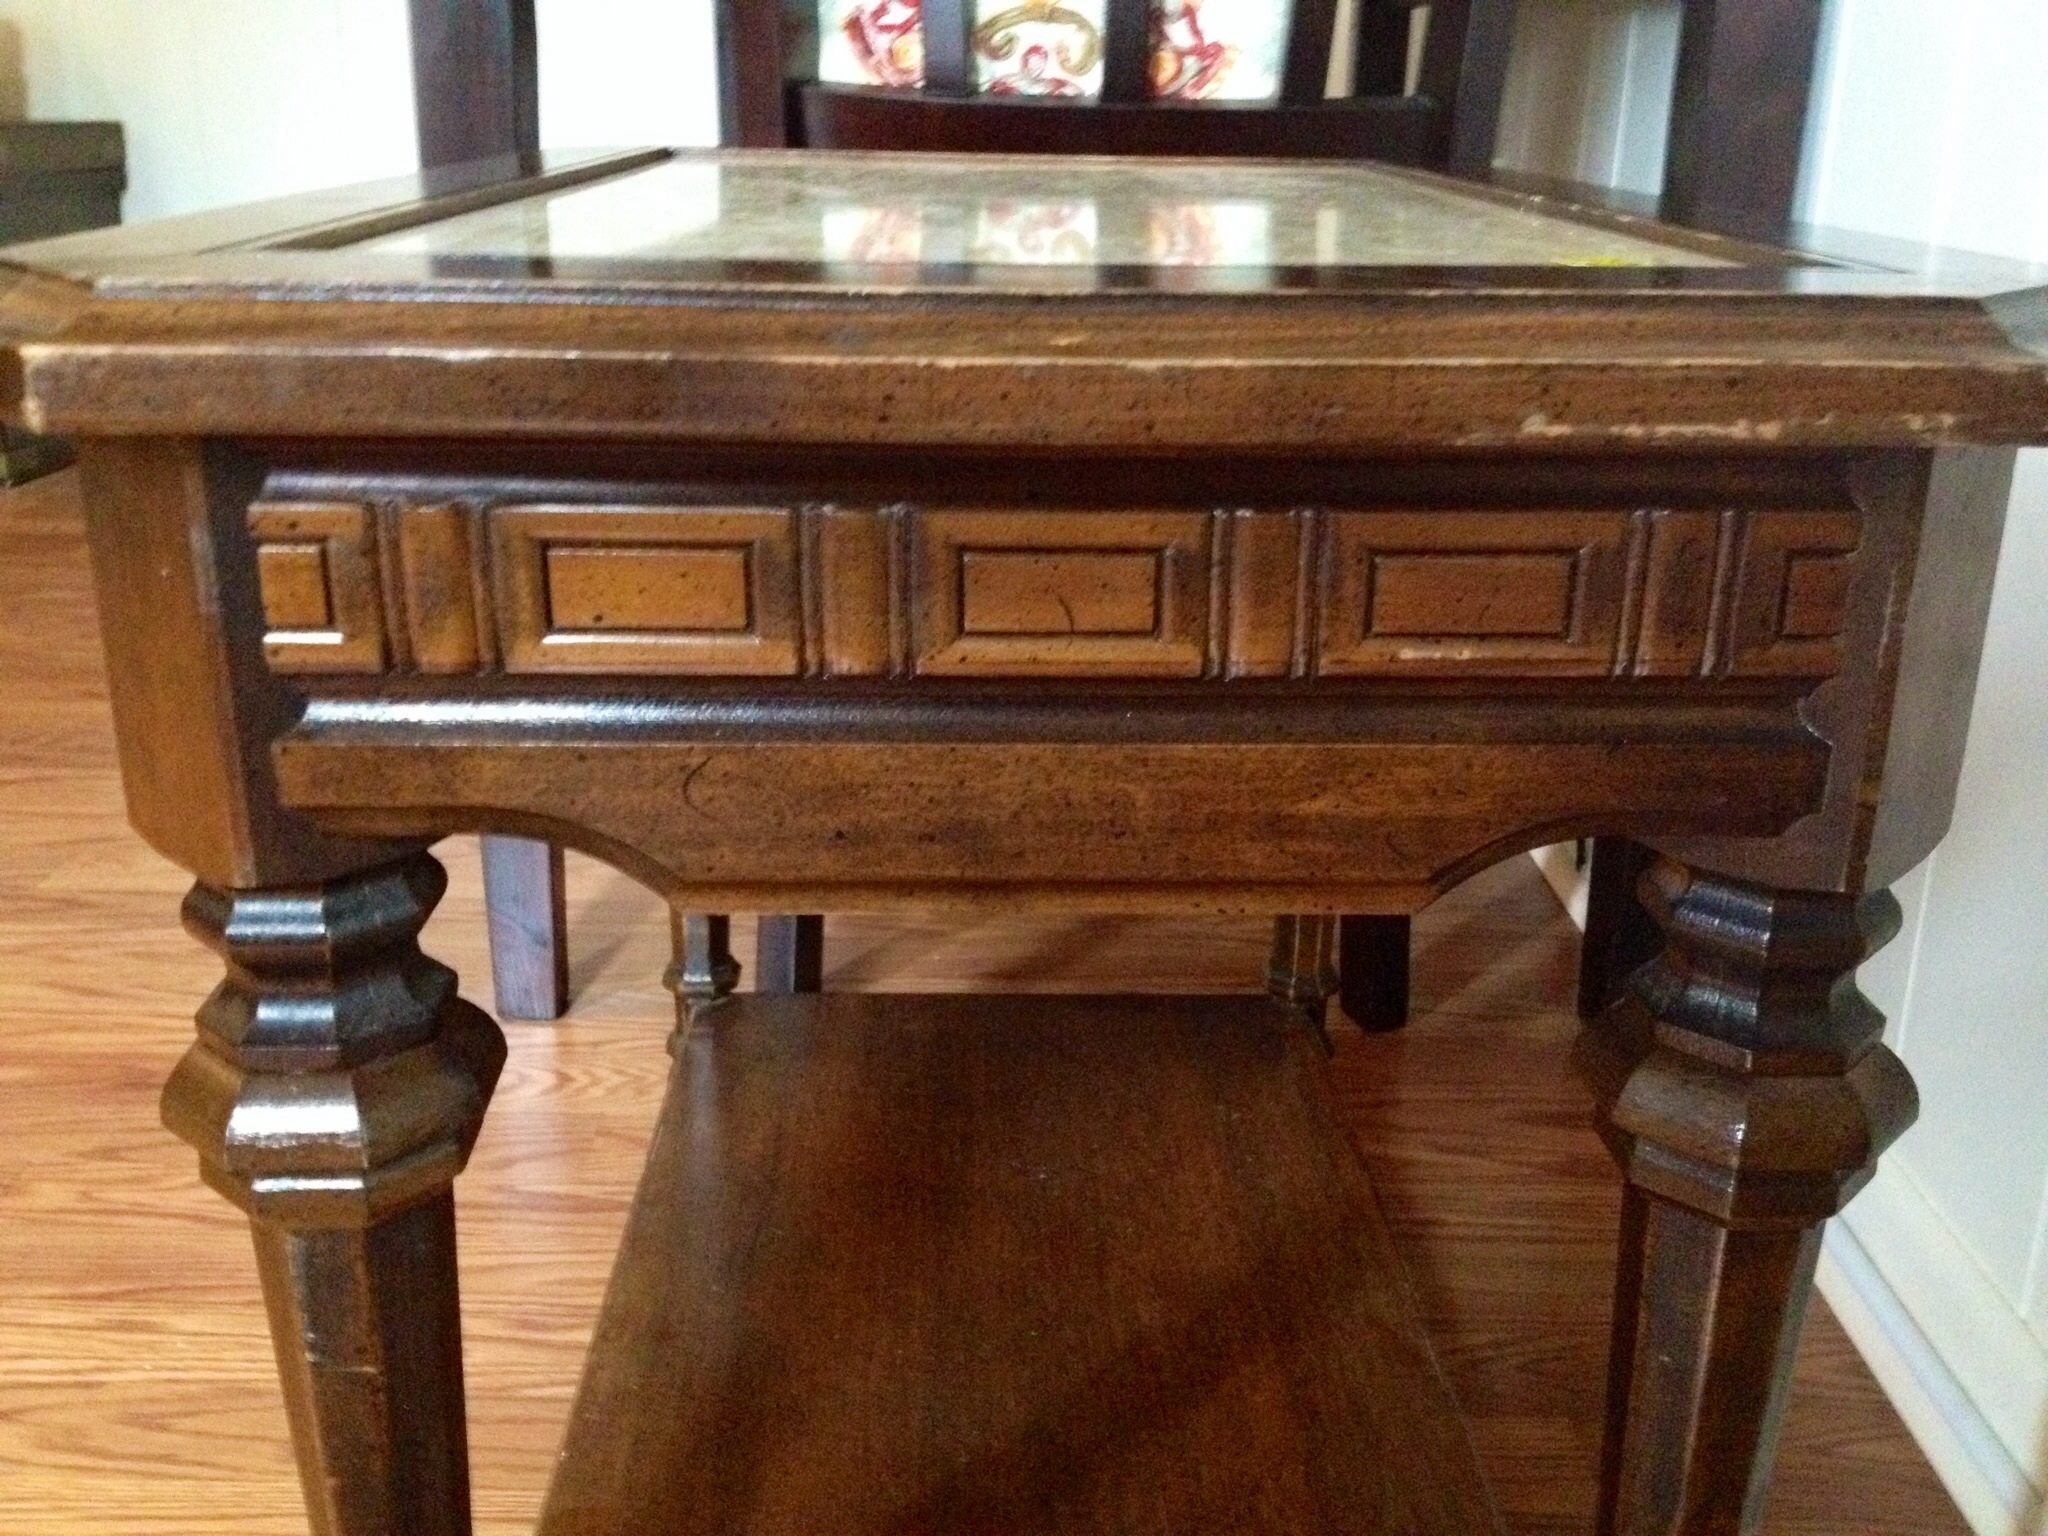
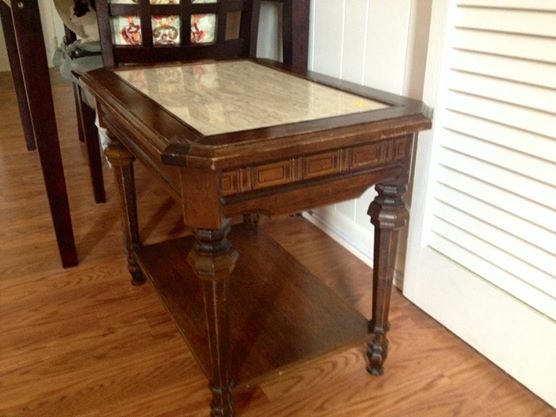
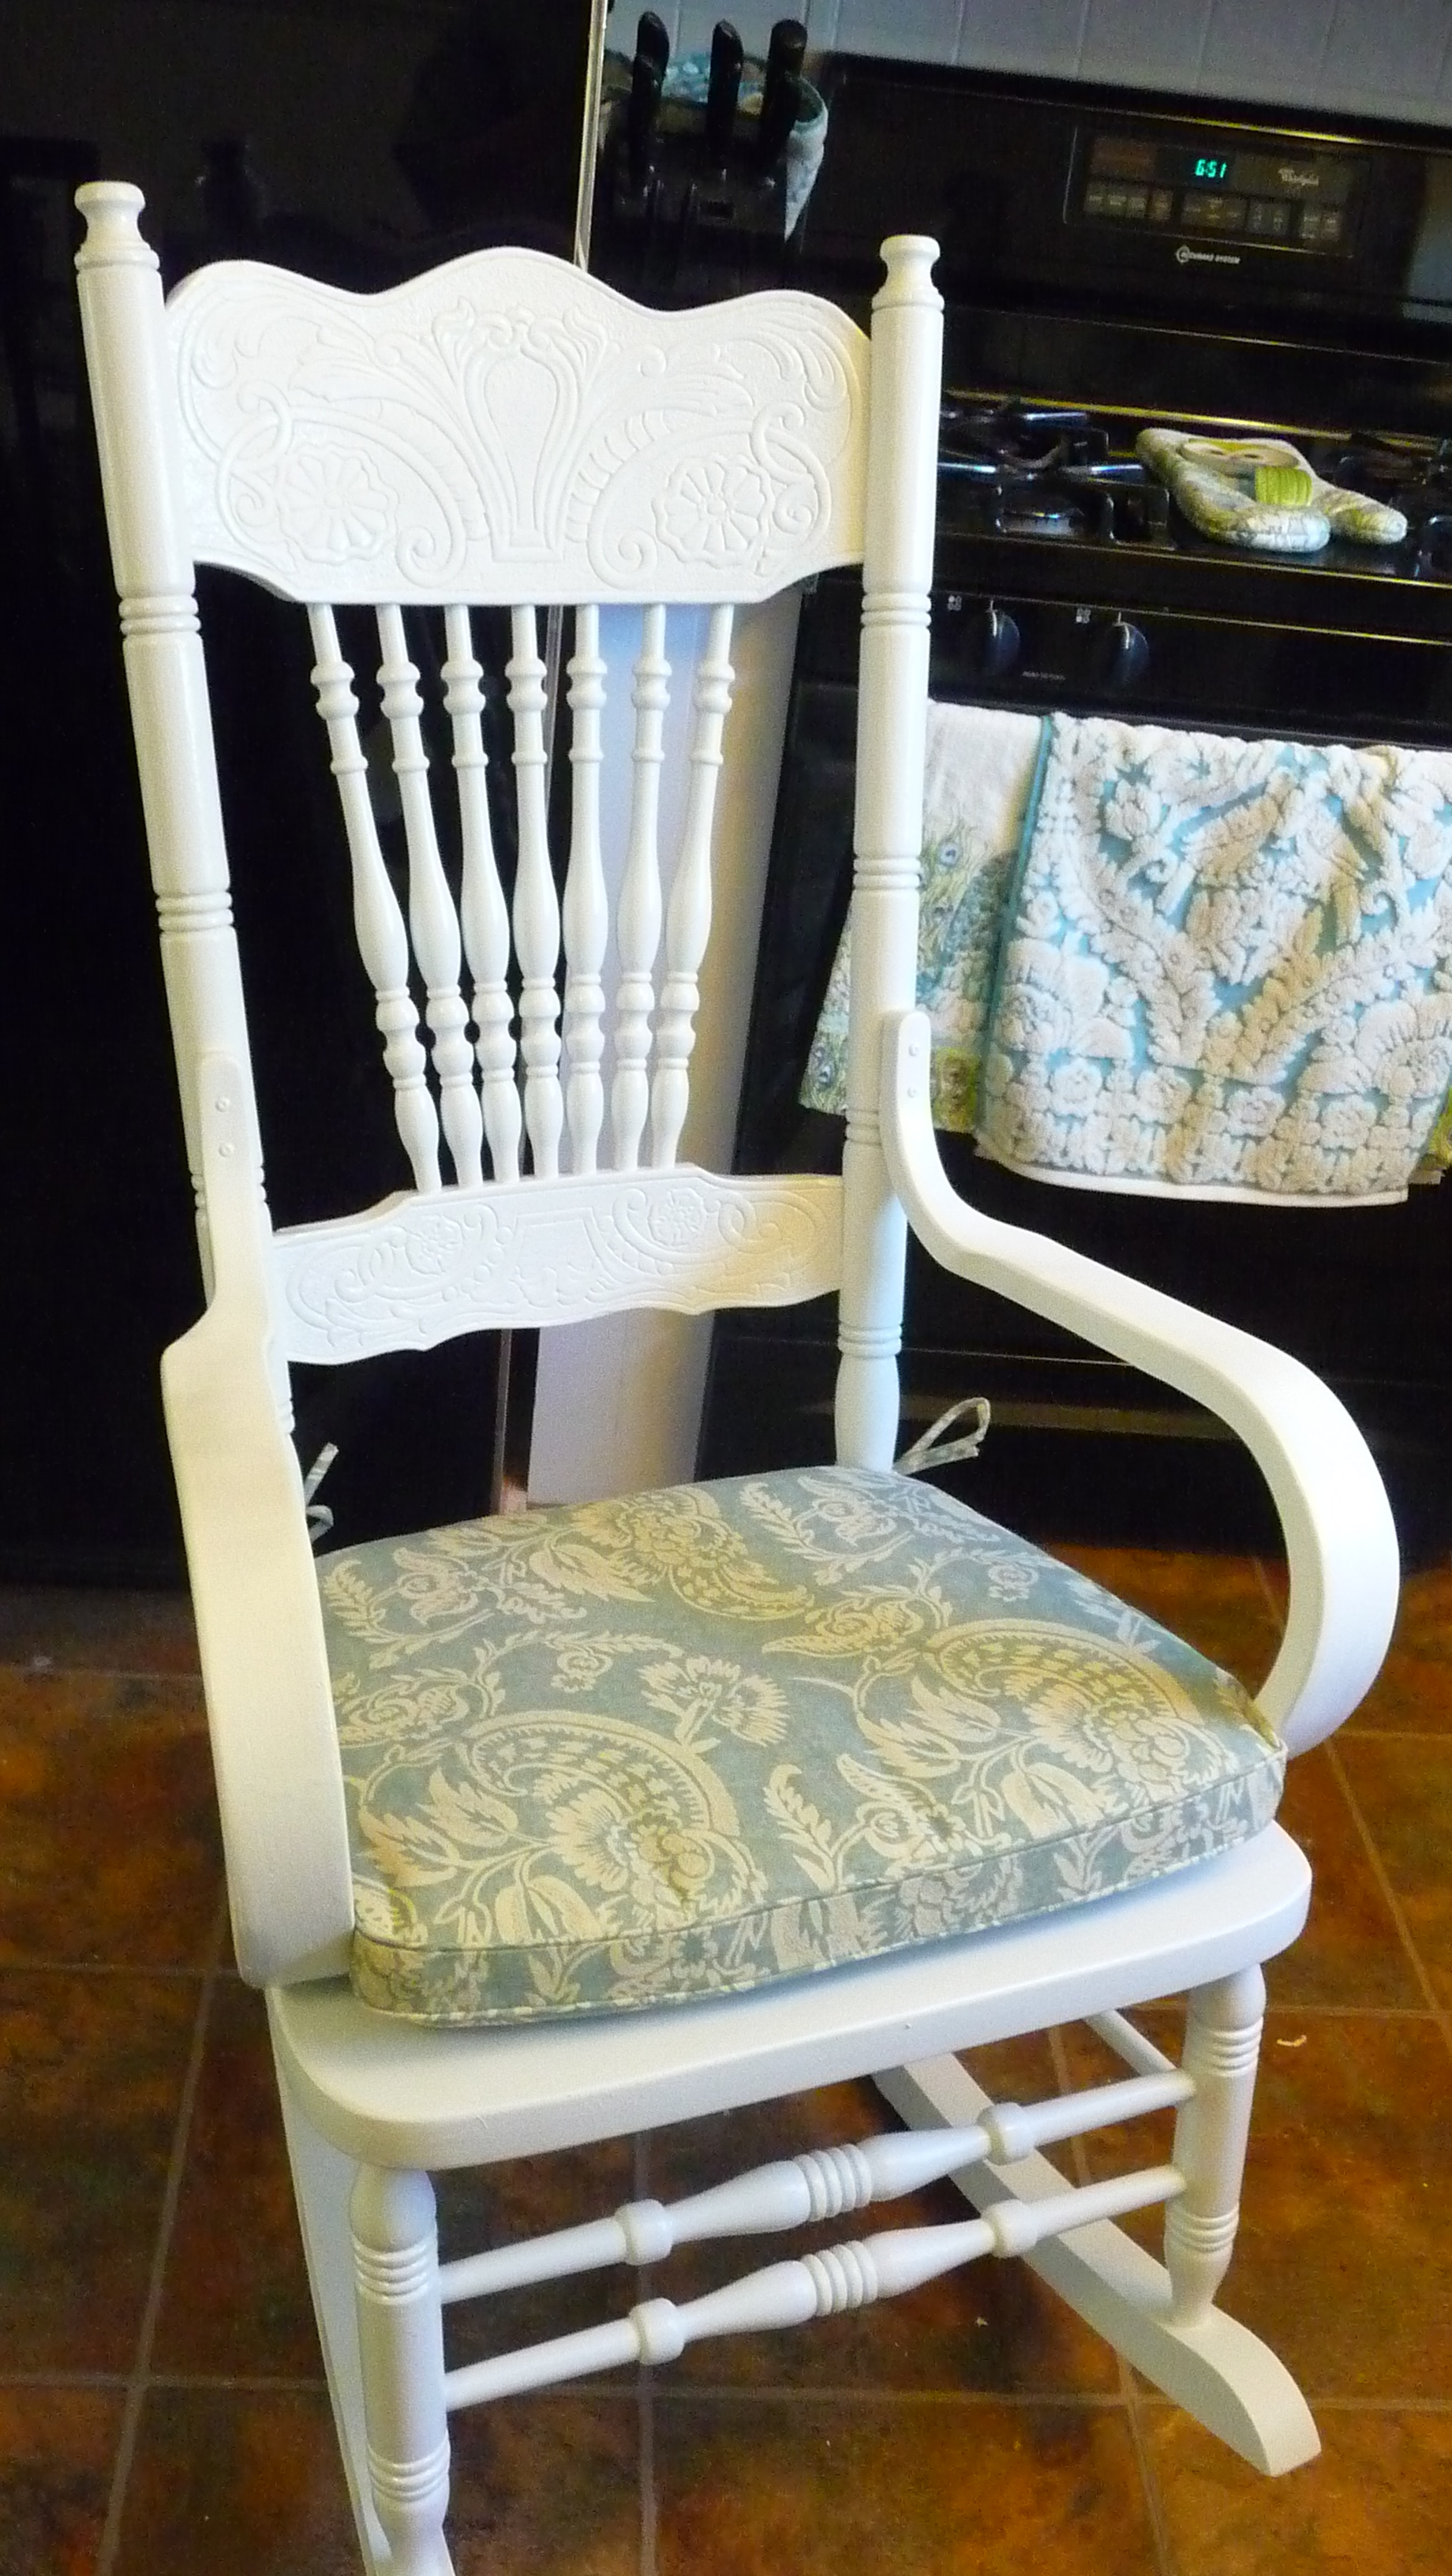
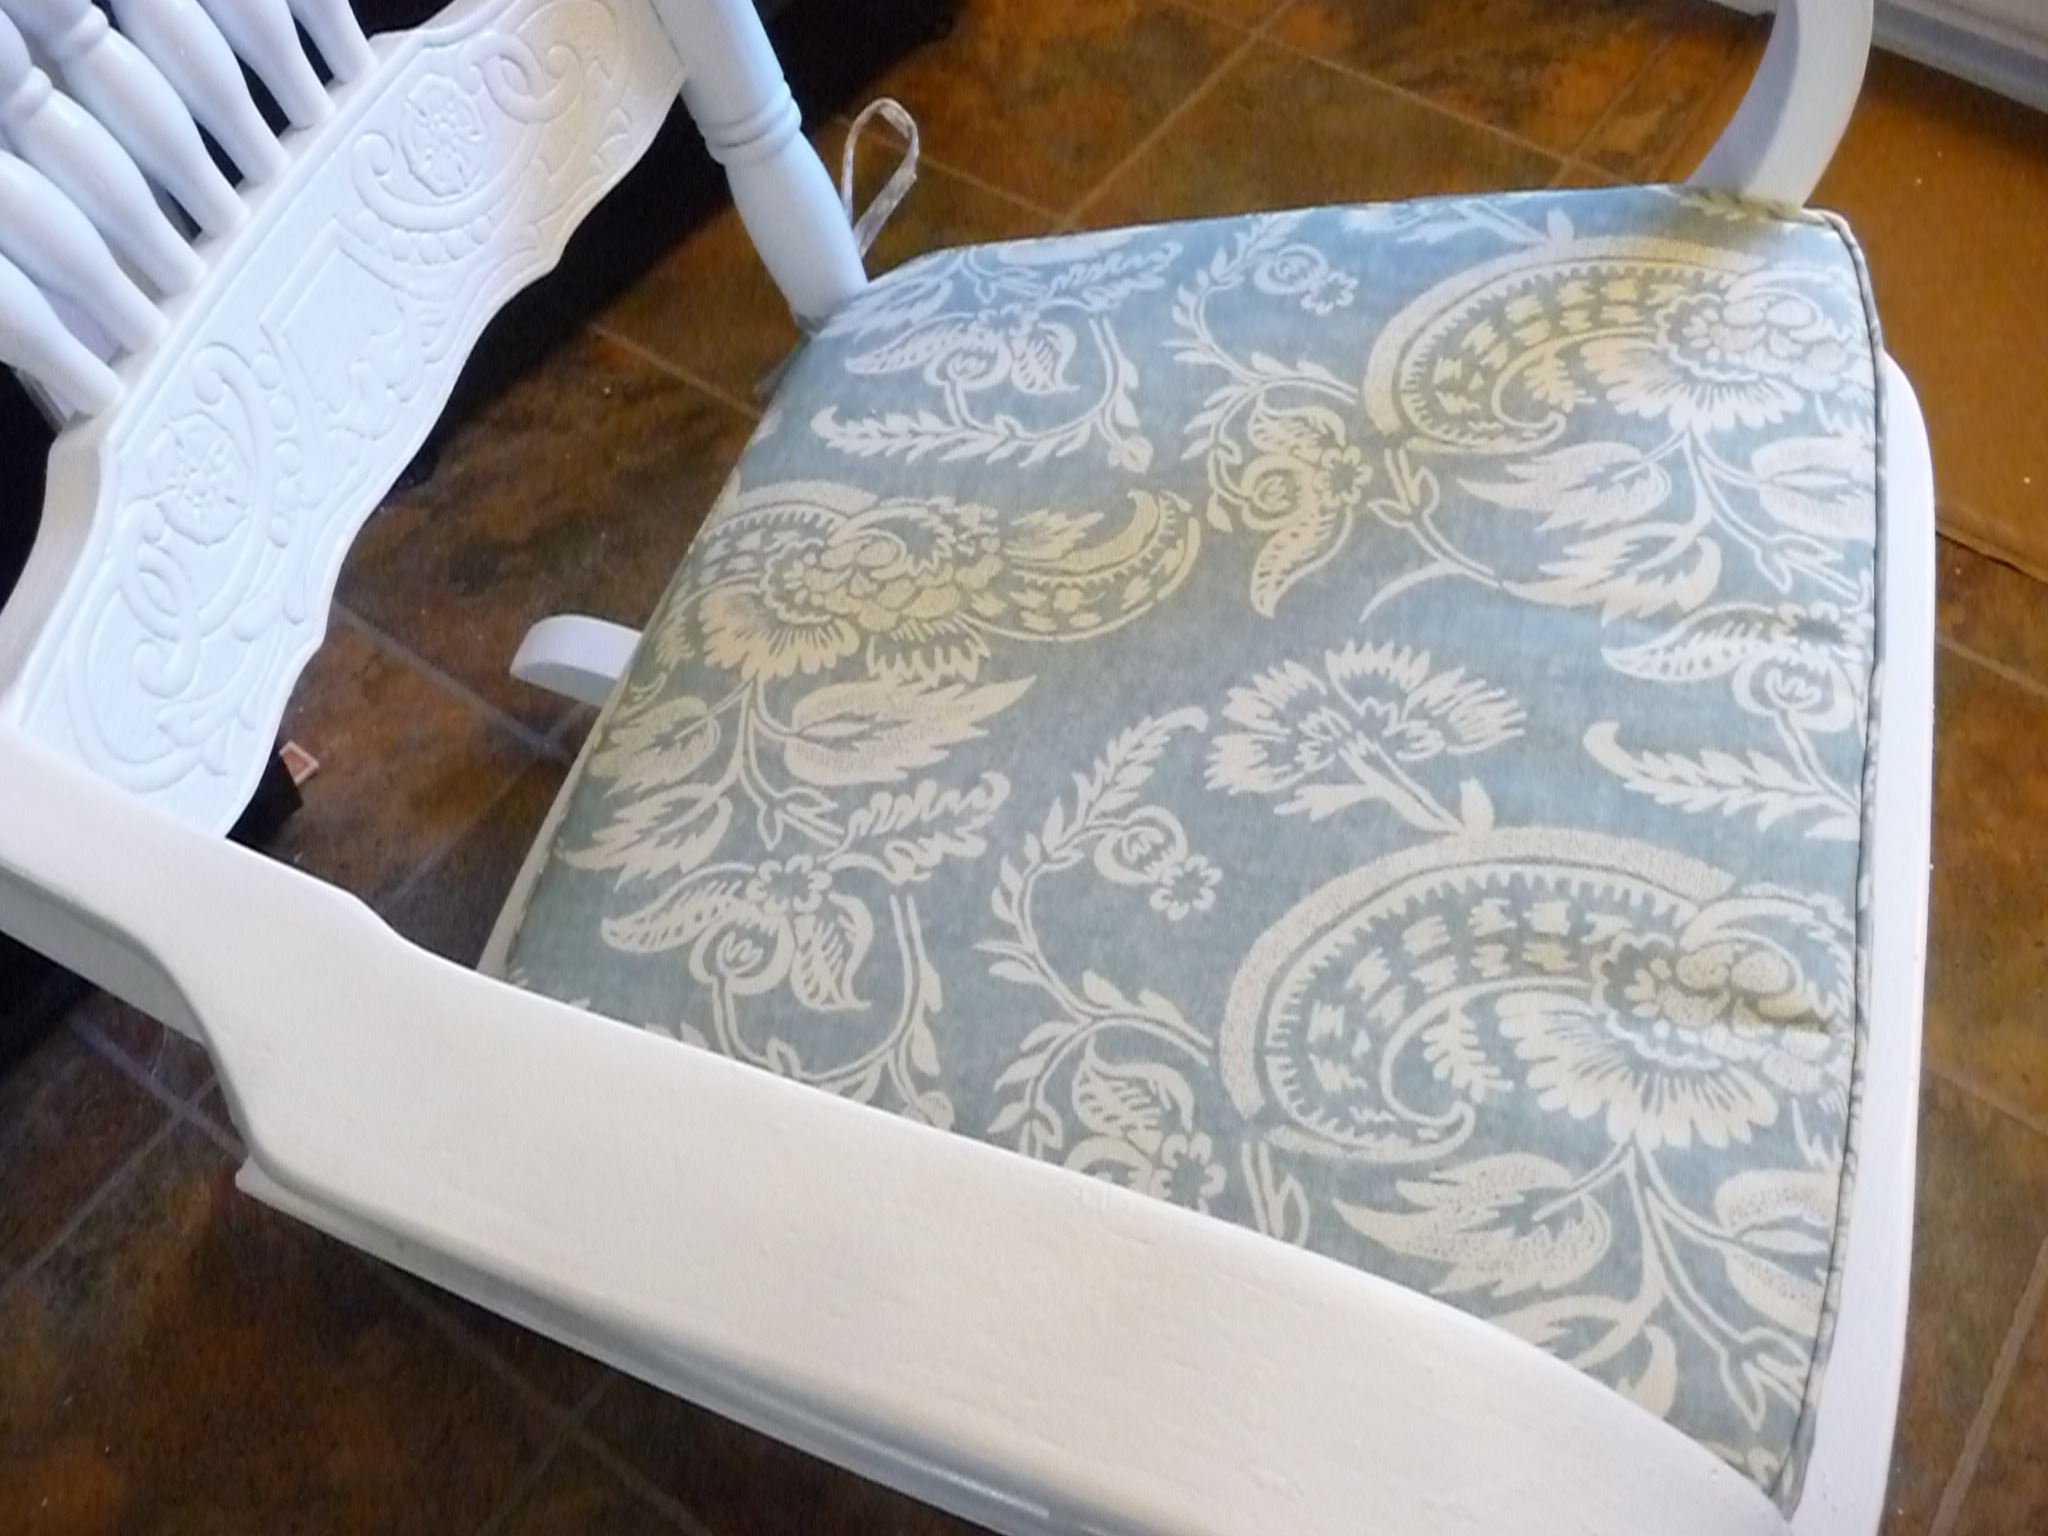
The second piece isย a nightstand that I got for free from one of my upcycle friends. I threw my back out getting it to my car, as it apparently is the heaviest nightstand on earth. The drawers were very swollen from the humidity and it needed a little work, but my goodness…those lines and details! I knew it would really be something when completed.

Here are my two “before” items:

Image

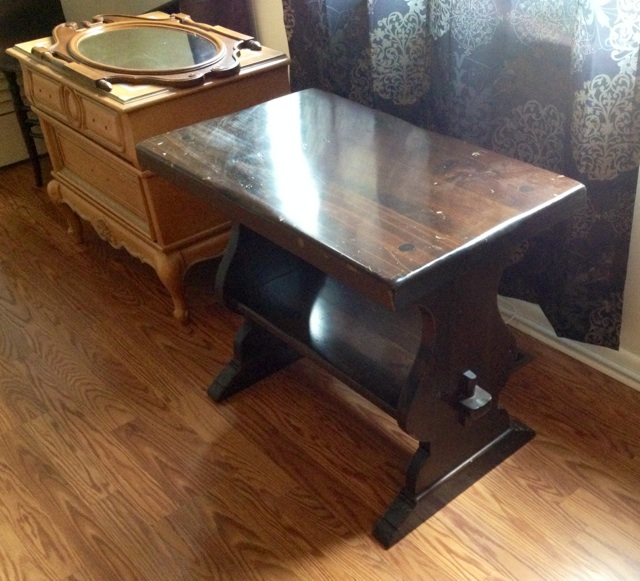
(ignore the mirror. That’s something I am making pretty and into a chalkboard for my classroom).

See? Great lines and tons of potential on both.

I was not feeling bright or loud colors for these two beauties. I did, however, know I wanted to play around with stencils. I decided on a driftwood/sand color for the trestle table and a deep metallic grey/brown for the nightstand.

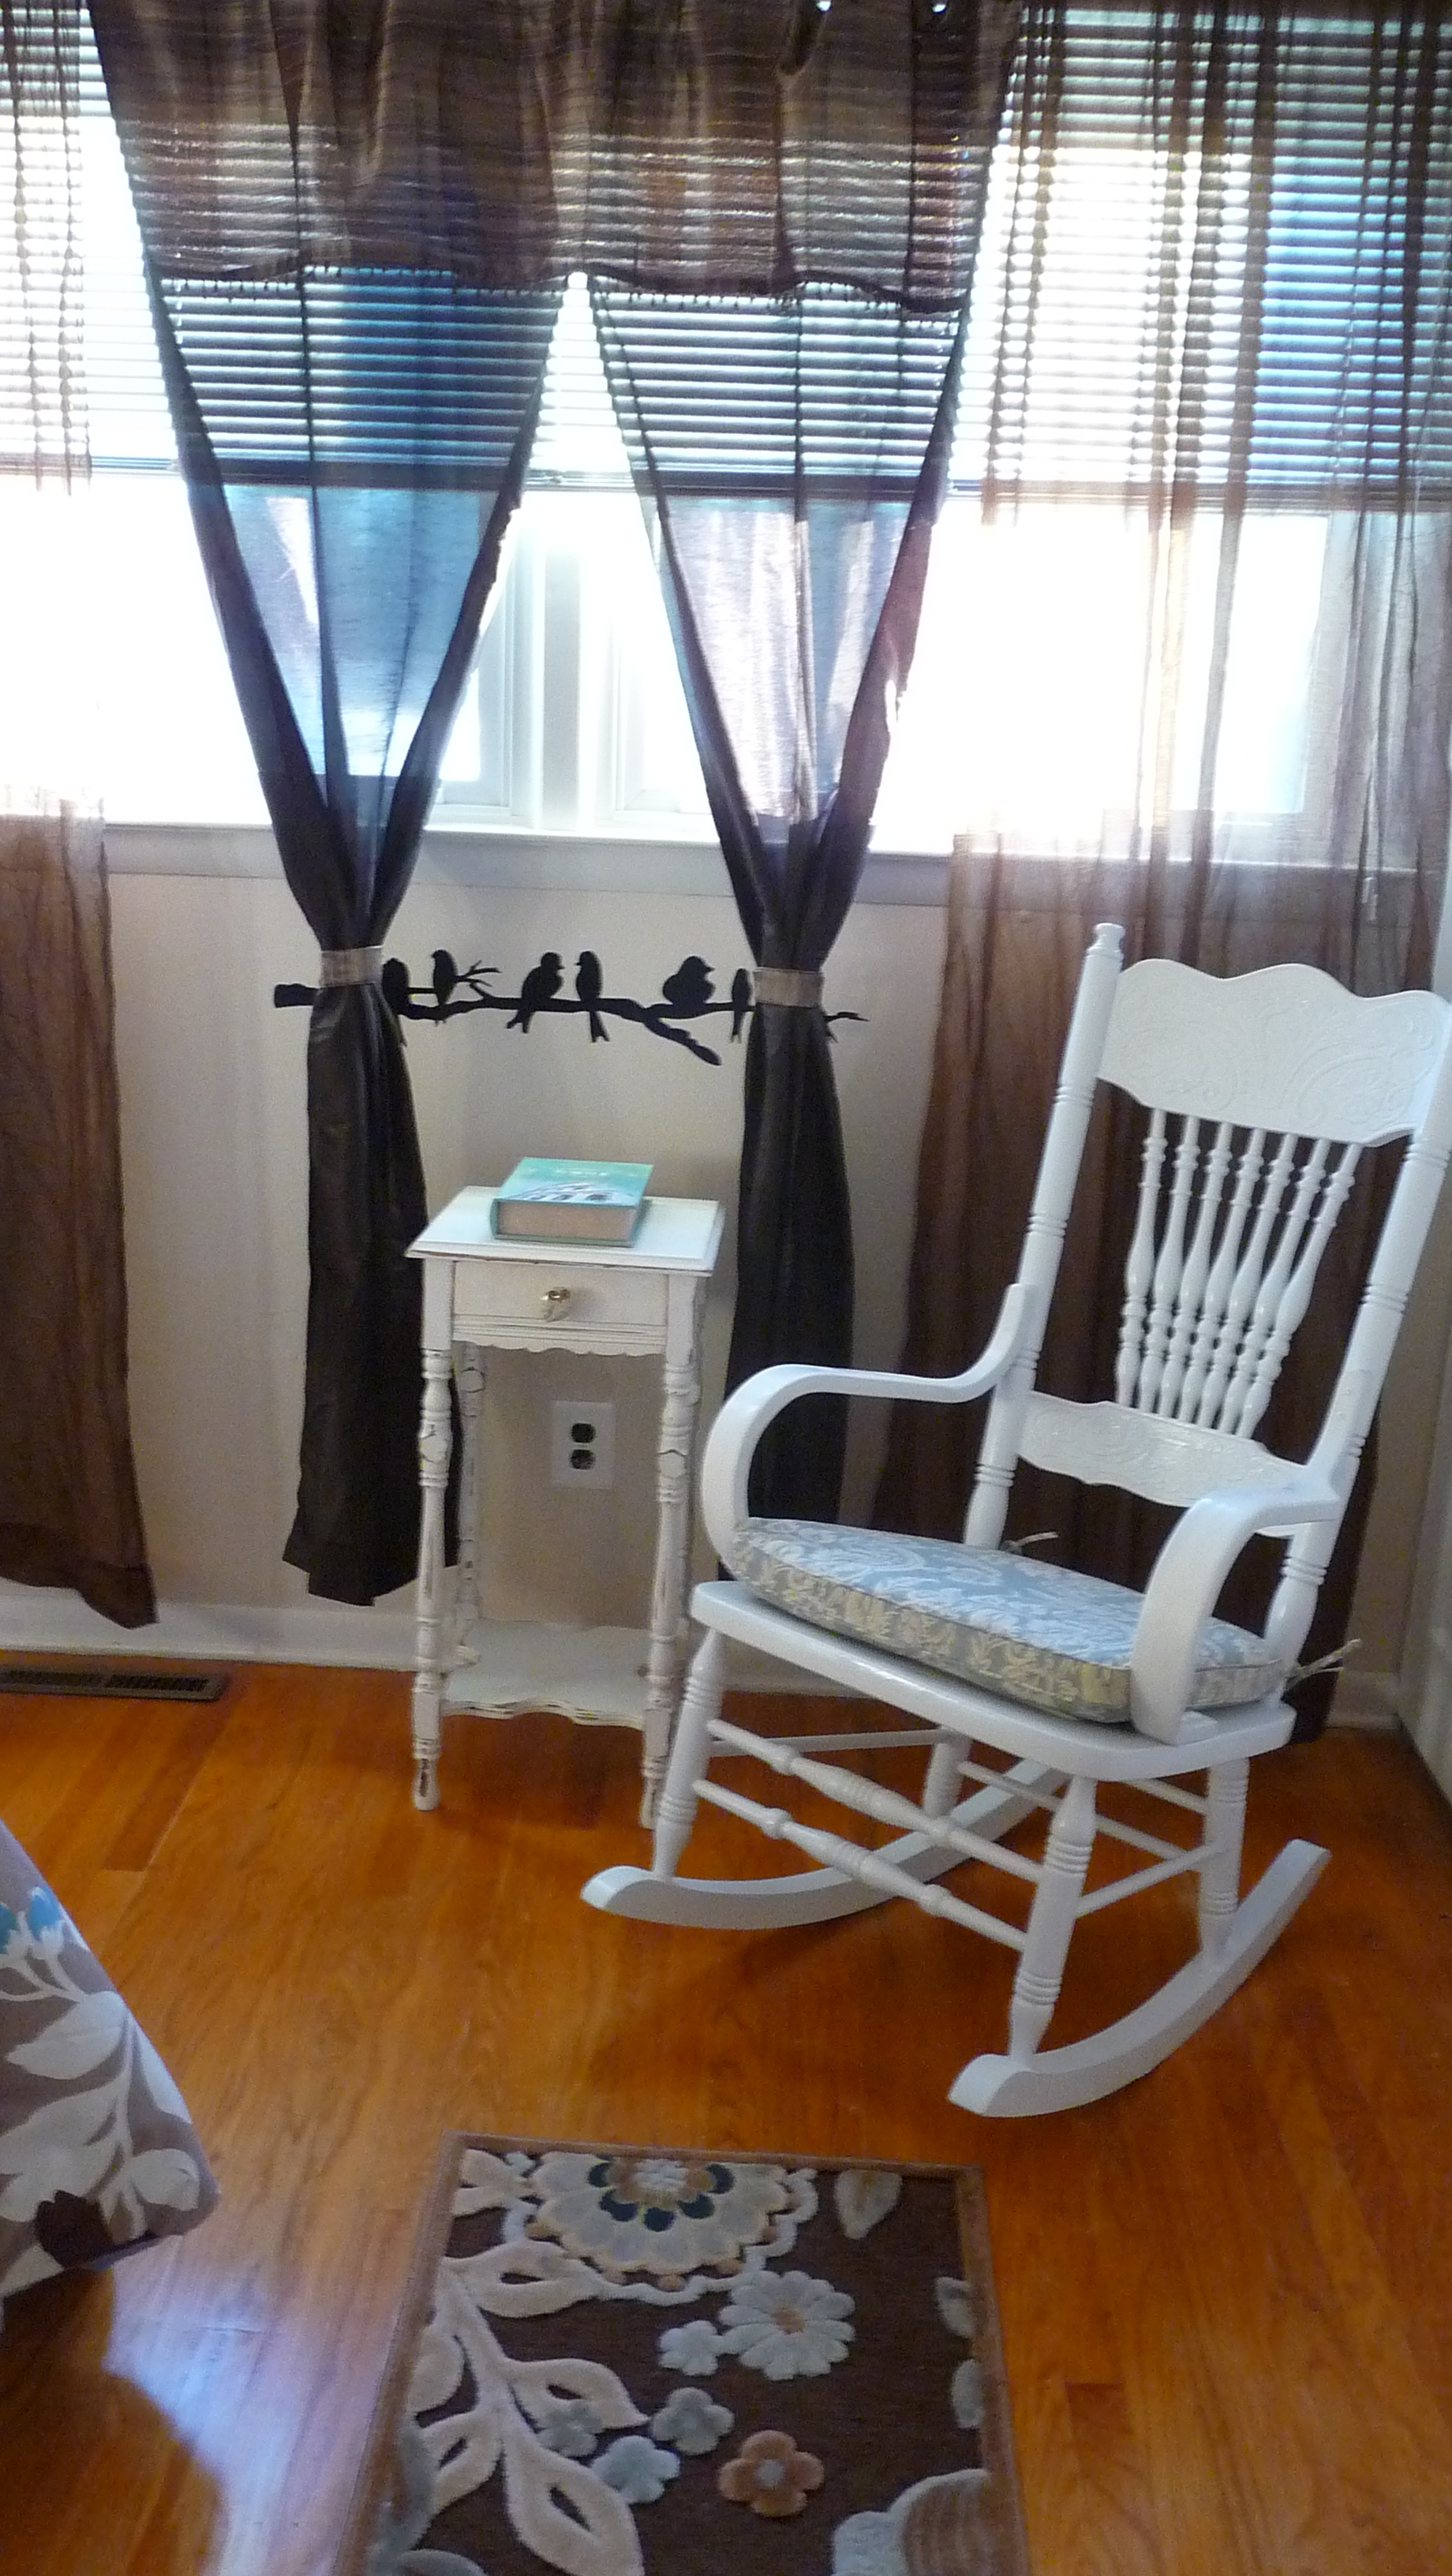
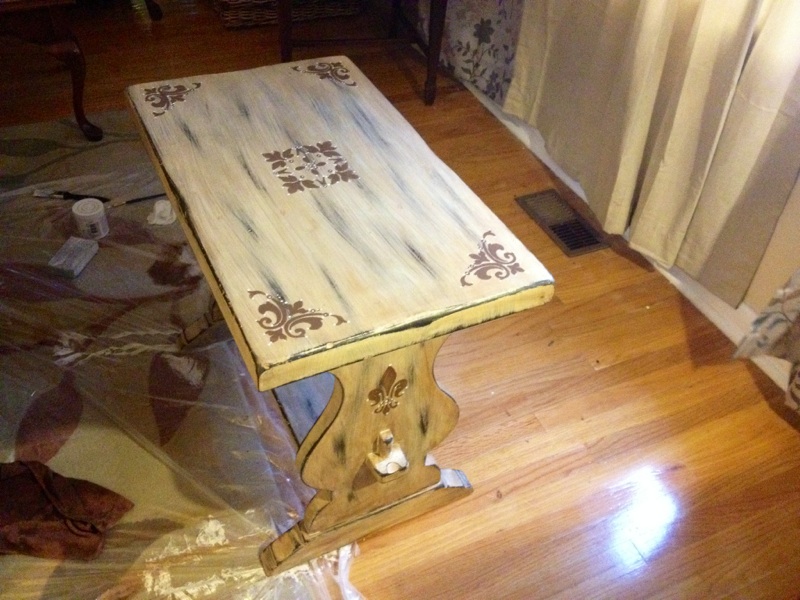
First up, the trestle table!

I painted the whole piece in white shabby paint, and then roughed it up heavily. In order to get the color I wanted, I used a dark antiquing wax, which gave me that pretty shade I wanted. I found stencils I really liked that gave the piece a French vibe and stenciled the designs on in darker brown. Here’s the first coat to paint:

Image

Here’s the “after” waxing and stenciling:

ImageImage


It was finished here, technically. After looking at it again the following day, I wanted to tweak it, because I thought it was too distressed and I found the pattern of sanding distracting. After redoing pieces of it and then using white revax (varnish and wax) on it, I finally got my desired result:

Image

Image

Image

Image

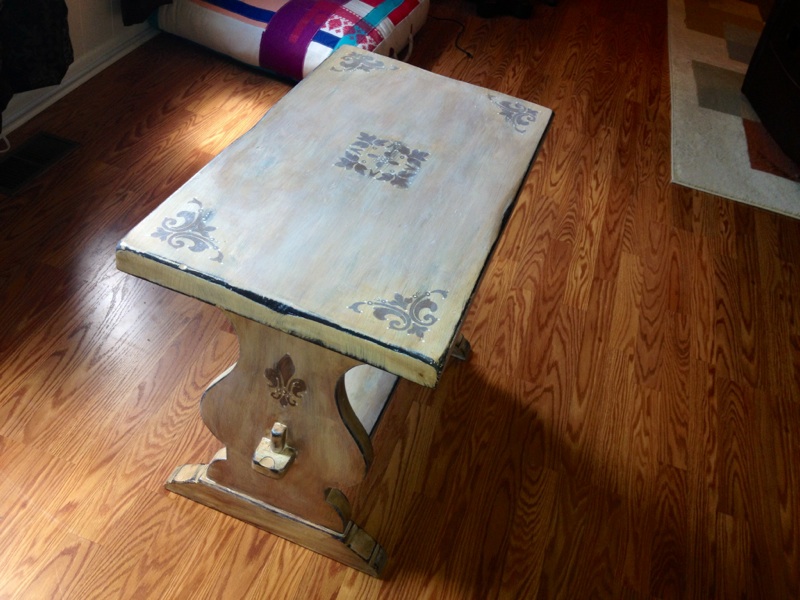
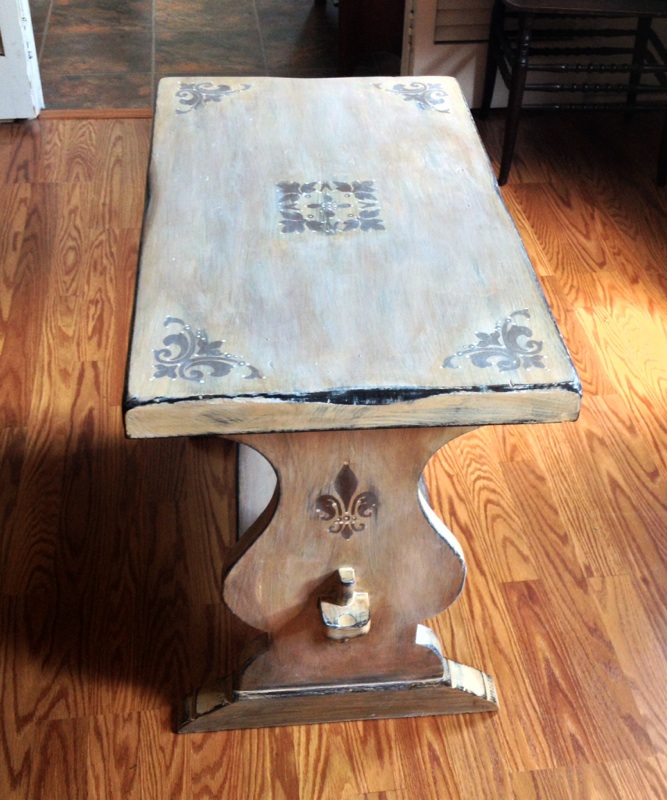
SO happy with it now. I love it. How people overlook things like this, I will NEVER comprehend!


Now for piece #2, the freebie nightstand:

After a few days inside my house in the AC and some sanding along the drawer edges, the drawers worked again. It had no pulls, so I needed to tackle that too.

I decided that in order to achieve the color I was going for, I’d need a deep brown base in a flat color and a white top glaze.

For white glaze, I recently tried a product called white revax and it’s AMAZING! Seriously, it seals, protects, and glazes all at once. A little goes a long way and it’s something to keep on hand for any future projects. It’s also non-toxic, VOC free, and made in the USA (does it get any better than that?) You can read about it and buy it here:

https://shabbypaints.com/vax-revax/

For my base color, I went to Home Depot and chose a color from Behr’s Marquee line called “Well-Bred Brown”:

Image


Let me tell you, this paint is un-freaking-believable. It goes on like butter! I definitely recommend this line, notable for its stain and dirt resistance. Here is the nightstand after its base coat:

Image

Looks just like melted Hershey’s milk chocolate bars. Exactly the shade I was going for!

After this stage, I played around with the stencils and got this result:

Image

I love the corner flourishes, and had to put a tiny fleur-de-lis on there on the front. The design at the bottom I painted by hand to bring it out. I accented the stenciled parts with a small hint of metallic gold acrylic paint.

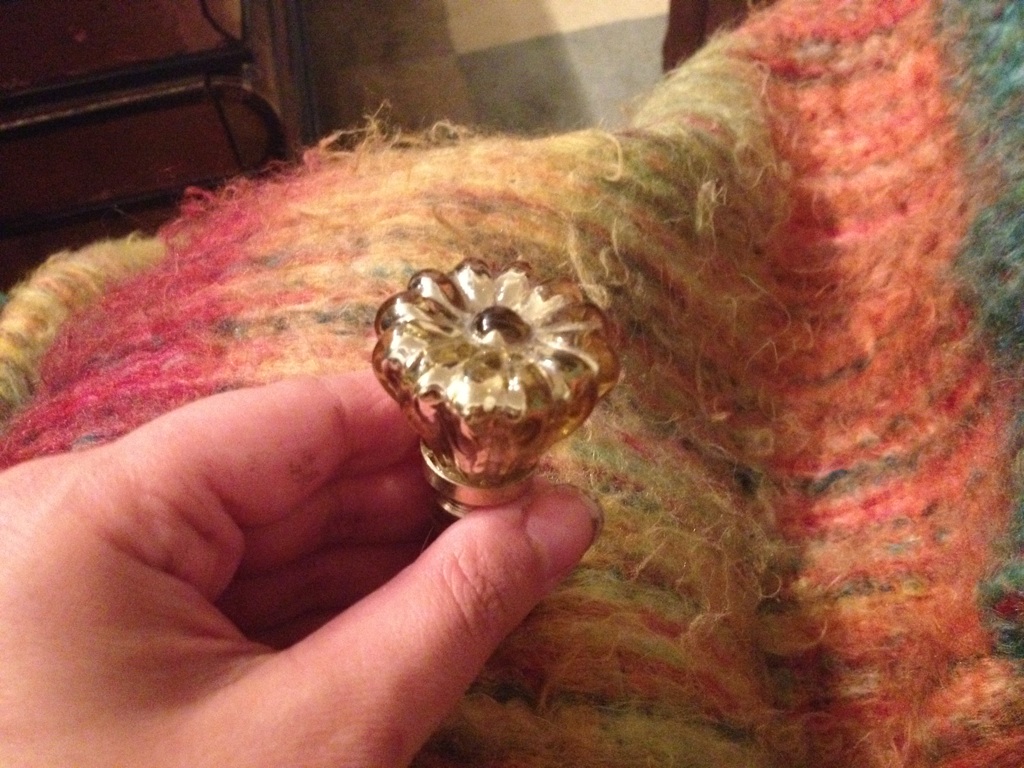
I actually nixed drawer pulls in favor of knobs, despite the fact that pulls likely “go” better for the piece. I found just what I wanted at Anthropologie…gold, vintage-looking mercury glass knobs on clearance for $2.95 each. Perfect!

Image

After sealing the brown paint with water-based poly, it was time to glaze it ๐Ÿ™‚ After using the revax and adding my knobs, the job was done. Prepare for the photo blitz and cue “Isn’t She Lovely”:

Image

Image

Image

Image

Image


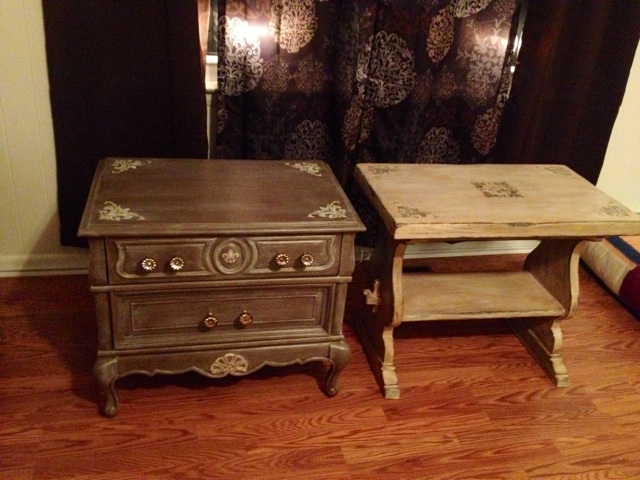
SO HAPPY WITH IT! The brown with the white revax gave me just the color I wanted. ย slightly metallic grey-meets-brown. Love, love, love. Times a million.


Now for costs!

Project #1:

Trestle table: $7

Stencils: $2.40

Paints/sanding block/materials: Already on hand.

Total cost: $9.40


Project #2:

Nightstand: Free (thanks, Kelley!)

Sample can of Behr Marquee “Well-Bred Brown”: $3.94

Stencils: $2.40

Knobs: $2.95 each x 6 for a total of $17.70

Other poly/materials/brushes/revax: Already on hand.

Total: $24.04


How’s THAT for bargains?! I love them both and am so digging the French-inspired style lately. My ottoman makeover (previously blogged) bit me with the Parisian bug. So, see? All you need is some vision, and everything old becomes new again!


Til next time…


Advertisement

“From that thrift shop down the road!”

Standard

I’ve had a very creative evening! I’ve been feeling extra inspired lately, and two oh-so-fabulous finds this week at my local thrift store were my muses ๐Ÿ™‚

Item #1…a 24-inch wood stool for $1.95? YES! I am just under 5 feet in height, so this is perfect for me.Image


No artsy chalk paint job for this one! I decided to celebrate the start of (unofficial) summer by going with a hand-painted, summery, and colorful design. I chalk-painted the legs a Tiffany blue, but am considering doing an ombre blue design down the legs to add some color variance…we shall see. Here’s the end result:

Image

Image

I’ve always thought of myself as having absolutely no artistic ability, but I may need to rethink that one.

My second thrift store find was an AWESOME end table with a beautiful marble insert. It’s by Mersman Furniture, mid-century or so, and was screaming out to me for a makeover! Best of all…I got it for just under $3. I mean, honestly…how do you say no?! Here she is:


ImageImage

Look at those details!!

I decided on chalk paint, layered in oatmeal and white, and then a dark brown antiquing wax/glaze. I wanted the end result to resemble old wood or driftwood, but go nicely with the marble. Here’s the midway point, with the layered paint job (I had no white chalk paint left, so some white acrylic paint did the trick) and before the distressing:Image


Fun, but incomplete. I wanted the details to jump out and the color to darken. I took a sanding block to the piece to distress all the edges and details, and then (for the first time), I gave antiquing wax a try. The color I had was dark brown, and this is the brand I use (I also love their chalk paints, and you can get them for about $4 each after a coupon at Joann Fabric):Image


After taking a sanding block to the painted table for heavy distressing, I used a lint-free cloth to give the entire table a thorough wax coating, rubdown, and buffing. I was hooked and obsessed with this product from the first swipe…seriously, it’s great! I will use it on some other pieces.

Here are photos of the lovely end result of the table, some with flash for details, some in natural light.

ImageImageImageImageImageImage

I’m happy with my decision to let this table rock the shabby look. The color pairs nicely with the beige marble insert and is neutral. It will serve as an end table next to the chaise on my sectional. The marble means no coasters are needed! For my best friend, the sectional is the equivalent of “Sheldon’s Spot”, so she will probably get the most use out of it!

I paid just under $3 for the table, and used supplies I already had on hand to redo it.

::shakes head:: $3. Disbelief.

Here are my other fun finds from that trip (where I spent a whopping $8):

Fun, cute vintage enamel colander for $1Image


And a great tabletop ironing board (that matches our kitchen) for just $2…we really needed one, as our other one that we’ve had forever broke and bent in half:

Image


Everything you see in this post cost me $8. Un-freaking-real. Thrifting/upcycling areย a way of life for me. It’s recycling at its finest ๐Ÿ˜‰


Until next time…

Somewhere Under the Rainbow (and over the bulkhead)

Standard

Ho-kay! So…

I won’t even mince words. I have done a LOT of cool things to my house since I bought it in 2013. I’m not sure why this little, silly, eccentric change is such a big deal to me, but it is! Like all great ideas, it began as a tiny ghost of a thought that snowballed and spiraled into something totally different…and far more wonderful.

The original plan was a pallet wall in the half bath, with rustic, unfinished wood. Then, I thought that maybe I should also put the pallet wood on the bulkhead where the main pipe is stored in the ceiling. Then I got to thinking I could salvage some of the pallet planks and paint them bright rainbow colors on the bulkhead. THEN, after taking the idea to my husband, he suggested scrapping the pallet wood and going for a more streamlined look with 1 x 2’s painted and placed together.

I’ve always been in love with (and truth be told, kind of obsessed with) rainbows. What’s not to love?! I am a colorful person, I love color in my house, I love all the things rainbows mean and stand for, and they simply make me happy. Once the idea of having my own, personal rainbow in my own home took hold in my mind, I couldn’t let it go.

I searched high and low, but could not find any photos of exactly what I wanted or planned on doing. Either it hasn’t been done or (more likely) simply hasn’t been posted. But this little bulkhead was the perfect place for a small but brilliant makeover. I decided early on to follow the ROYGBV color scheme, but after hubby had measured the bulkhead, he said that to sit the colors/lumber boards all up against one another, it was going to require 8 colors! After some thought (and a lot of mixing of paint), I decided to add a terra-cotta color after the red (that matched the half-bath perfectly) and a cross between robin’s egg blue and turquoise after green, for a total of 8 colors. Because the boards were pre-primed, my job was easy! I bought acrylic paints rather than latex for this project. The hardest part was spending the time to mix colors to make them exactly, perfectly “right”.

Here’s the top half of the rainbow being painted:

ImageImage

And the top half of the rainbow all finished:

Image

::warm fuzzies::

(Looks like a sunset!)

Then, it came time to begin the bottom half:

Image

(that was after coat 1)

After a few other coats, here is the whole rainbow assembled together:

Image

Now, let’s play “spot the problem”.

SEE THAT GREEN?! EEK. Way too dark! After several tries mixing to get the color I was going for:

Image

That’s more like it!

Once more, here it is with all of the finalized colors:

Image


And ::drumroll, please:: Here is the completed accent wall, up on the bulkhead in the half-bath.

Image

Image


I realize that to a lot of people, I am the layman’s term for “crazy”. However, I love my rainbow accent wall and I love that I have my own rainbow at home.

One of the best parts? Between materials and paint, the whole cost of the accent wall was a mere $15! If this isn’t $15 of fun, I don’t know what is ๐Ÿ™‚

Trash to Treasure: Rocking Chair

Standard

It’s been about a week since I’ve updated the blog. Please excuse my lack of attention! Life has been extremely busy, and I’ve been celebrating a fantastic (and long-awaited) new job offer!

A week and a half ago, my husband was on his way home from work and took a shortcut through a nearby neighborhood. Someone had put this out to the curb with the trash:

Image

An old but nicely detailed hickory rocking chair. It needed tightening and some new screws, which hubby so kindly did for me!

I loved it immediately and knew I wanted to make it over and put it in my guest room/future nursery. I have reading chairs all over the house and thought this room needed one as well.

I usually always choose to refinish wood and almost never paint it! I am a wood and furniture junkie and think the grain and quality of wood comprises much of the beauty of a piece. My exception to the rule is kitchen cabinets, because I love a light and bright kitchen!

As soon as I looked at the rocker, I thought “WHITE!”. It just needed to be white, period. I got started immediately. I painted on a coat of my trusty bonding primer after rubbing the chair down with mineral spirits on a clean rag. I then used up some white trim paint that we had left but was unhappy with the coverage, which was uneven around the fine details. I then switched to Rustoleum’s spray paint/primer:

Image

The rocker was old and worn in some spots, so it did not take the paint completely evenly (and I strive for perfection), but all in all, I was pleased with the results. It got two good coats with a 3rd and final spray in some spots.

Next up was choosing a chair cover. I searched first at Pier 1, one of my absolute favorite home stores. I didn’t see anything I loved for a price I wanted to pay (I’m cheap). I then switched my search to Pottery Barn, another favorite. I got lucky when looking for clearance chair cushions. This color, the blue and white “Maia” pattern, was what I had decided on originally:Image

However, I then came across the Tiffany-blue colored “Alessandra” pattern and fell in love. It was exactly what I was looking for, and even better…less than half-price with free shipping to boot! I bought the largest size cushion because the rocker is pretty large and I wanted the whole seat covered. Let me tell you…it just BARELY fits on. It does, but any bigger and it’d have been too large. Note that if you shop Pottery Barn and find something you love on clearance, you cannot return the item.

Here are the results. Not bad for a side of the road find, right?!

ImageImageImageImageImageImage

And, of course, here are some photos of the chair in its “home”…the guest room (click to enlarge them):

P1070979 P1070980

The total cost of this project was a mere $20!

Next time you see something with real potential on the side of the road, consider taking it home and turning someone’s trash into your treasure! It’s inexpensive, easy, and you end up with a beautiful item for your home!

Hello, hardwood!

Standard

Okay. So, you’ve just bought a house that is covered in carpet. Maybe it’s nice carpet, maybe it’s musty, old, stained carpet. Either way, it’s not what you want. You find out that there is hardwood underneath them.

That is really the luckiest scenario. If they’re in any kind of shape, it’s a whole, WHOLE lot easier to refinish them than to lay new wood throughout your home. Granted, you take the risk of them possibly being in bad condition when you tear out the carpet, but it’s the only way to do it. I will admit that, although not our style, we had very nice, plush, clearly pricey carpet throughout our home when we bought it. It didn’t matter, because once we knew there was “amber gold” under there (my nerdy husband’s phrase), we were itching to get started. We couldn’t wait to get rid of this:Image

And this:

Image

And THIS (YUCK…REALLY?!)

Image

THAT is what we were working with. The photos make me cringe. Now, we were prepared to outlay the expense of new flooring if we had to, if the wood couldn’t be saved or was in too bad of shape. Fortunately, we got lucky beyond our wildest dreams, because the floor was in a much better condition than we could have hoped for! The first step, is cutting the carpet with a razor into manageable “sections” to then rip out. We tag-teamed this job and pulled together. Teamwork makes it easier! Here is Jeff pulling up the first piece of carpet in the house:

Image

(Cute, isn’t he).

See the oddly-colored foam stuff under the actual carpet? That is the pad, the insulation. Sometimes it’s super easy to pull up, sometimes the installer goes adhesive-happy and you have to all but scrape it off. Either way, it has to go. Once you pull up the carpet and the foam, you will notice you are left with tac-strips around the perimeter (that hold the carpet in place), and what appears to be about 3 million staples. Brace yourself, this is the WORST part! There’s no short-cut to be learned here, you just have to get yourself a good pair of locking pliers and pick them ALL out. Some will fight you, too! You can always go back if you miss one, but it is so important that you do a thorough job of staple removal before you sand, because nothing tears up sandpaper and screens like stubborn, evil staples. Here is our tac-strip garden/collection (that very happy man is my new across-the-street ne.Image

A fair warning: The worst part area in the house for carpet removal WILL be the stairs. You will need to pull and rip with all your might because It will really be on there! Or, like us, you have a beast of a brother-in-law who yanks it out for you…thanks, Steve!

Once the carpet is gone, you have pulled out the staples, and you have removed the tac-strips, you’re ready to refinish. You’ve got several options. Our home is a 1965 center-hall colonial, and they nearly always had oak hardwood and (for whatever reason) pine stairs. I am a huge fan of oak hardwood because of its grain, beauty, and durability. You can choose to change the color of the floor with a stain, which only adds an extra step and more drying time…or, you can leave the wood its natural color and skip to the poly after you sand. Our floor was 50+ years old, and we decided to leave it its natural color.

Onto sanding: You can rent the sander at your local Home Depot. Usually, an orbital sander is used for deep sanding. We chose a drum sander, because we were able to get away with more of a good “scuff” than a deep sand. DON’T sand too much, you don’t want to wear away too much of the wood, which is especially true in an older home. Best practice is always to sand in long strokes, with the grain. This will bring out your floor’s natural beauty. For stairs, you can use a small hand-sander, which will make the job easy for you. We own one, but you can rent one. Here’s the drum sander:

Image

(I was SO happy to have hardwood floors).

Here is what sanding the stairs looks like with the hand-sander:

IMG_6236

Once you’ve sanded the whole area, and are down to bare wood, it’s time to vacuum up the dust. We found that a shop-vac was perfect for this job:Image

Your next choice to make is going to be what type of poly you want. Decide whether you want a gloss or semi-gloss finish. We chose semi in the bedrooms and gloss everywhere else but most people choose between the two. You can go with oil-based or water-based poly. I’ll break each option down for you:

Oil-Often more durable, a bit more scratch-resistant, much higher fumes, and slow drying time. Oil-based poly will “amber” over time, darkening your floor. For some, this is a great thing and a look they enjoy, because it will eventually accomplish what a coat of stain might have.

Water-based: fast-drying (a matter of hours per coat), low fumes, and will NOT darken over time or change the color of the floor. You can walk on it 24 hours after the last coat and it cures within a week. It’s 90% of the way there in a couple of days, so this is a GREAT option for a family who needs their home back quickly or in a pinch.

Here’s a good comparison, bearing in mind that the oil side will “amber” or darken more with time:

Image

To brush on the poly, you can buy a special sponge mop with changeable head for the job at any home-supply store. It will give you a great finish. You pour the poly on and then “brush” it around with the mop in long streaks so that it’s even. Just make sure you leave yourself a way out of the room!!

Image

Image

So pretty! Then you simply let dry and enjoy ๐Ÿ™‚

Looks like a lot of work, right? It is. But here’s the best part, and it’s the cost breakdown of doing it DIY vs hiring a pro.

DIY: With the cost of the poly, sander-rental and paper/screens, mop, brushes, and supplies, we spent about $350 total.

Pro: To have a professional remove your carpet, tac-strips, and staples, sand and then poly your floors in the whole house…you’re talking about $3,000 on the lower end and $5,000 on the higher. Staining adds extra cost because of the extra labor. The costs are ALL labor, because it’s such a labor-intensive job.

The difference is staggering! So roll up those sleeves, get your hands dirty, and get to work…and save a TON of money!