Monthly Archives: May 2014

“From that thrift shop down the road!”

Standard

I’ve had a very creative evening! I’ve been feeling extra inspired lately, and two oh-so-fabulous finds this week at my local thrift store were my muses πŸ™‚

Item #1…a 24-inch wood stool for $1.95? YES! I am just under 5 feet in height, so this is perfect for me.Image
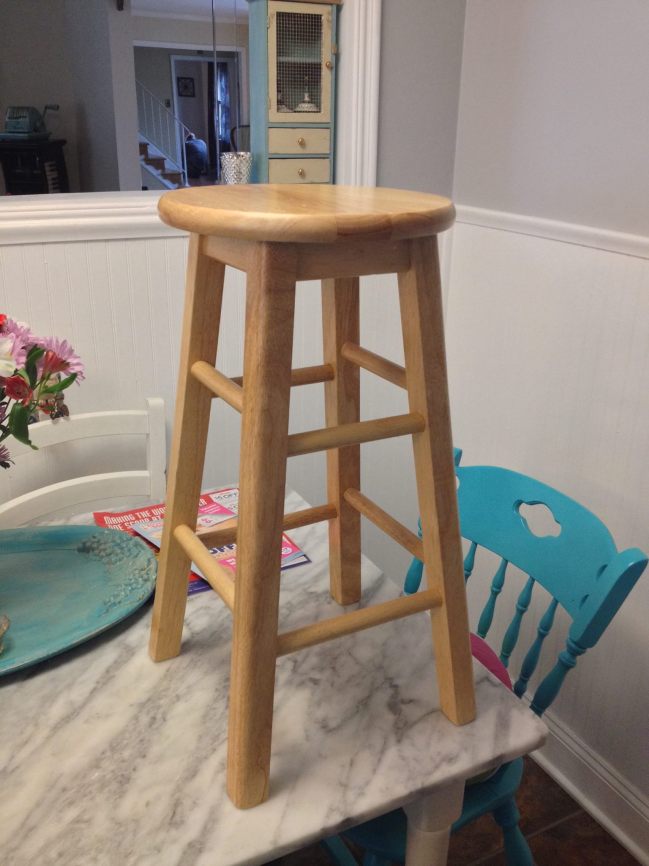
 

No artsy chalk paint job for this one! I decided to celebrate the start of (unofficial) summer by going with a hand-painted, summery, and colorful design. I chalk-painted the legs a Tiffany blue, but am considering doing an ombre blue design down the legs to add some color variance…we shall see. Here’s the end result:

Image

Image

I’ve always thought of myself as having absolutely no artistic ability, but I may need to rethink that one.

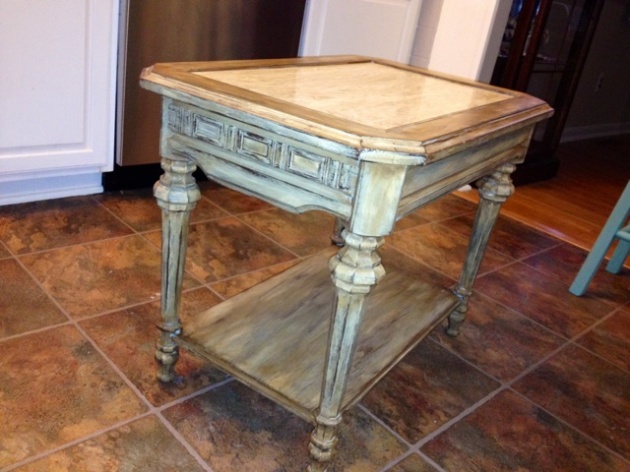
My second thrift store find was an AWESOME end table with a beautiful marble insert. It’s by Mersman Furniture, mid-century or so, and was screaming out to me for a makeover! Best of all…I got it for just under $3. I mean, honestly…how do you say no?! Here she is:


ImageImage

Look at those details!!

I decided on chalk paint, layered in oatmeal and white, and then a dark brown antiquing wax/glaze. I wanted the end result to resemble old wood or driftwood, but go nicely with the marble. Here’s the midway point, with the layered paint job (I had no white chalk paint left, so some white acrylic paint did the trick) and before the distressing:Image


Fun, but incomplete. I wanted the details to jump out and the color to darken. I took a sanding block to the piece to distress all the edges and details, and then (for the first time), I gave antiquing wax a try. The color I had was dark brown, and this is the brand I use (I also love their chalk paints, and you can get them for about $4 each after a coupon at Joann Fabric):Image


After taking a sanding block to the painted table for heavy distressing, I used a lint-free cloth to give the entire table a thorough wax coating, rubdown, and buffing. I was hooked and obsessed with this product from the first swipe…seriously, it’s great! I will use it on some other pieces.

Here are photos of the lovely end result of the table, some with flash for details, some in natural light.

ImageImageImageImageImageImage

I’m happy with my decision to let this table rock the shabby look. The color pairs nicely with the beige marble insert and is neutral. It will serve as an end table next to the chaise on my sectional. The marble means no coasters are needed! For my best friend, the sectional is the equivalent of “Sheldon’s Spot”, so she will probably get the most use out of it!

I paid just under $3 for the table, and used supplies I already had on hand to redo it.

::shakes head:: $3. Disbelief.

Here are my other fun finds from that trip (where I spent a whopping $8):

Fun, cute vintage enamel colander for $1Image


And a great tabletop ironing board (that matches our kitchen) for just $2…we really needed one, as our other one that we’ve had forever broke and bent in half:

Image


Everything you see in this post cost me $8. Un-freaking-real. Thrifting/upcycling areΒ a way of life for me. It’s recycling at its finest πŸ˜‰


Until next time…

Bonjour, Paris! (A fast, easy, cheap little makeover)

Standard

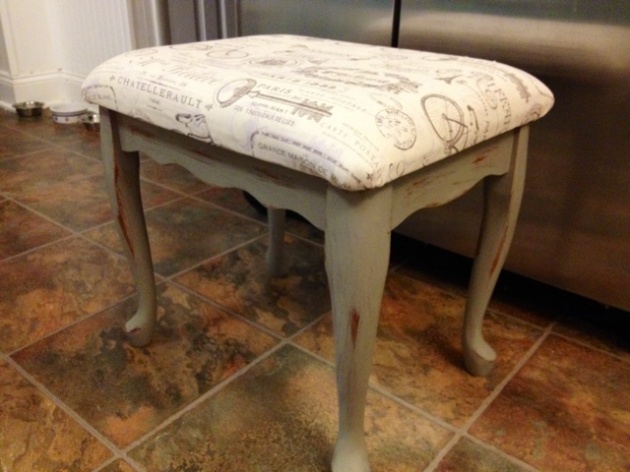
When I saw a small ottoman/upholstered footstool for sale for $5, all wood with padding and plywood intact…I pounced! There’s no limit to what could be done with it. It’s funny to me that the makeover ended up being neutral, demure, and sophisticated rather than vibrant, bright, and fun.


I’m fairly certain the culprit is “The Other Boleyn Girl”, which I am currently re-reading for the fourth time. Maybe it’s the sense of artistocracy, Anne’s French sense of fashion, or the courtly revels, but I’ve had Paris on the brain today.


I decided I wanted to budget between $8-$10 total for the project, including the ottoman and supplies.


Well, $3 in fabric later (I had also bought a burlap fabric, but it didn’t “fit” as well as this cotton twill), leftover chalk paint and paint supplies later, and I had my final result!

I used a bit of semi-gloss water-based floor poly to seal the chalk paint, which I distressed using an old sanding block. When keeping project costs down, GO SHOPPING IN YOUR OWN HOUSE.


Seriously…it’s the best way to do it! And chalk paint is environmentally friendly, non-toxic, and safe, so it’s a good choice for virtually anyone. Roughing it up is a lot of fun, and you can play around with it to achieve your desired result.

I did one good coat of oatmeal colored chalk paint and then roughed it up.


Here is what I started with:

Image

Bad fabric, bad color (it did not know whether to be maple or mahogany). However, good bones!

Here’s the frame after paint and before distressing:

Image


And the final results:ImageImageImageImageImageImage

(That last photo, with the flash on, highlights the distressing).

I fell in love with that fabric straight away…old bikes, skeleton keys, French script, the Eiffel Tower? AND cheap? Sign me up! It is a cotton twill, as previously mentioned, not heavy tapestry or thick fabric, but it works perfectly on this piece. I’ll use my $2 piece of Parisian burlap for another project in the future.


So to recap costs:

Footstool/ottoman: $5

Parisian fabric: $3

Leftover paint, brushes, poly, sanding block: FREE πŸ™‚

Project total: $8


Here it is in its new home, next to a fabulous $15 overstuffed chair that I got on Craigslist last summer. The butterfly pillow is from Pier 1 and features French script that pairs nicely with the ottoman.

IMG_1568

Can’t beat that, can you?

Image

Image


Until next time πŸ˜‰

Somewhere Under the Rainbow (and over the bulkhead)

Standard

Ho-kay! So…

I won’t even mince words. I have done a LOT of cool things to my house since I bought it in 2013. I’m not sure why this little, silly, eccentric change is such a big deal to me, but it is! Like all great ideas, it began as a tiny ghost of a thought that snowballed and spiraled into something totally different…and far more wonderful.

The original plan was a pallet wall in the half bath, with rustic, unfinished wood. Then, I thought that maybe I should also put the pallet wood on the bulkhead where the main pipe is stored in the ceiling. Then I got to thinking I could salvage some of the pallet planks and paint them bright rainbow colors on the bulkhead. THEN, after taking the idea to my husband, he suggested scrapping the pallet wood and going for a more streamlined look with 1 x 2’s painted and placed together.

I’ve always been in love with (and truth be told, kind of obsessed with) rainbows. What’s not to love?! I am a colorful person, I love color in my house, I love all the things rainbows mean and stand for, and they simply make me happy. Once the idea of having my own, personal rainbow in my own home took hold in my mind, I couldn’t let it go.

I searched high and low, but could not find any photos of exactly what I wanted or planned on doing. Either it hasn’t been done or (more likely) simply hasn’t been posted. But this little bulkhead was the perfect place for a small but brilliant makeover. I decided early on to follow the ROYGBV color scheme, but after hubby had measured the bulkhead, he said that to sit the colors/lumber boards all up against one another, it was going to require 8 colors! After some thought (and a lot of mixing of paint), I decided to add a terra-cotta color after the red (that matched the half-bath perfectly) and a cross between robin’s egg blue and turquoise after green, for a total of 8 colors. Because the boards were pre-primed, my job was easy! I bought acrylic paints rather than latex for this project. The hardest part was spending the time to mix colors to make them exactly, perfectly “right”.

Here’s the top half of the rainbow being painted:

ImageImage

And the top half of the rainbow all finished:

Image

::warm fuzzies::

(Looks like a sunset!)

Then, it came time to begin the bottom half:

Image

(that was after coat 1)

After a few other coats, here is the whole rainbow assembled together:

Image

Now, let’s play “spot the problem”.

SEE THAT GREEN?! EEK. Way too dark! After several tries mixing to get the color I was going for:

Image

That’s more like it!

Once more, here it is with all of the finalized colors:

Image


And ::drumroll, please:: Here is the completed accent wall, up on the bulkhead in the half-bath.

Image

Image


I realize that to a lot of people, I am the layman’s term for “crazy”. However, I love my rainbow accent wall and I love that I have my own rainbow at home.

One of the best parts? Between materials and paint, the whole cost of the accent wall was a mere $15! If this isn’t $15 of fun, I don’t know what is πŸ™‚