Tag Archives: whimsical

An Accidental Re-do

Standard

On Wednesday, we had an electrician come over to do some work for us upstairs. My newly-redone hall table was right outside the main bathroom. I always try to provide water, coffee, or beer to anyone working on the house. Hubby set the glass of ice water on the table. Despite layers of poly and wax, the water bubbled the top layer and it peeled RIGHT off the table.


-_- Do you know how long those paint jobs take? They’re not something you can patch up! I allowed myself my momentary freakout and went back to the drawing board. The best idea I had for the top was to decoupage it. Emily Dickinson is one of my favorite poets, so I put her poetry on the top, using lots of regular glue, reinforcing the seams, and 3-4 heavy coats of poly. I added the side stencils and then hand painted the undertones of white and gold, sealing it when done. No need to worry about this finish coming off!


Not a bad save, I (actually) like something I did πŸ™‚

Cost: Free (doesn’t get better than that).

ImageImageImageImage


If you’re a lover of the unrivaled, devastating beauty of words (as I am), familiarize yourself with Emily Dickinson. No one will ever surpass Robert Frost for me, but she’s way up there. Some of my favorites:


I had no time to hate, because
The grave would hinder me,
And life was not so ample I
Could finish enmity.

Nor had I time to love, but since
Some industry must be,
The little toil of love, I thought,
Was large enough for me.

~~~~~~~~~~~~~~~~~~~~~~~~~~~~~~~~~
Hope is the thing with feathers
That perches in the soul,
And sings the tune without the words,
And never stops at all,

And sweetest in the gale is heard;
And sore must be the storm
That could abash the little bird
That kept so many warm.

I've heard it in the chillest land,
And on the strangest sea;
Yet, never, in extremity,
It asked a crumb of me.
~~~~~~~~~~~~~~~~~~~~~~~~~~~~~~~~~

Behind Me β€” dips Eternity –

Before Me β€” Immortality –

Myself β€” the Term between –

~~~~~~~~~~~~~~~~~~~~~~~~~~~~~

And of course, my all-time favorite of hers:


If I can stop one heart from breaking,

I shall not live in vain;

If I can ease one life the aching,

Or cool one pain,

Or help one fainting robin

Unto his nest again,

I shall not live in vain.

– Emily Dickinson


em Oh: I "met" my new classroom 2 days ago, and we like each other very much :-) I look at it as my next blank canvas. From now on, I want my room to reflect me and I have to put my stamp on it. I'm already dreaming of projects for it, some are already in the works. I'm feeling so much more inspired and happy lately. I love this photo only because it radiates that. Here I am in my new future "second home"! class Lastly, this is unrelated and I know "Throwback Thursday" is a Facebook thing... But I came across this photo of my 6th grade class trip. Seeing the Twin Towers is always eerie, moving, and incredibly sad. I remembered being so awed by their massive size. trip
Advertisement

“From that thrift shop down the road!”

Standard

I’ve had a very creative evening! I’ve been feeling extra inspired lately, and two oh-so-fabulous finds this week at my local thrift store were my muses πŸ™‚

Item #1…a 24-inch wood stool for $1.95? YES! I am just under 5 feet in height, so this is perfect for me.Image


No artsy chalk paint job for this one! I decided to celebrate the start of (unofficial) summer by going with a hand-painted, summery, and colorful design. I chalk-painted the legs a Tiffany blue, but am considering doing an ombre blue design down the legs to add some color variance…we shall see. Here’s the end result:

Image

Image

I’ve always thought of myself as having absolutely no artistic ability, but I may need to rethink that one.

My second thrift store find was an AWESOME end table with a beautiful marble insert. It’s by Mersman Furniture, mid-century or so, and was screaming out to me for a makeover! Best of all…I got it for just under $3. I mean, honestly…how do you say no?! Here she is:


ImageImage

Look at those details!!

I decided on chalk paint, layered in oatmeal and white, and then a dark brown antiquing wax/glaze. I wanted the end result to resemble old wood or driftwood, but go nicely with the marble. Here’s the midway point, with the layered paint job (I had no white chalk paint left, so some white acrylic paint did the trick) and before the distressing:Image


Fun, but incomplete. I wanted the details to jump out and the color to darken. I took a sanding block to the piece to distress all the edges and details, and then (for the first time), I gave antiquing wax a try. The color I had was dark brown, and this is the brand I use (I also love their chalk paints, and you can get them for about $4 each after a coupon at Joann Fabric):Image


After taking a sanding block to the painted table for heavy distressing, I used a lint-free cloth to give the entire table a thorough wax coating, rubdown, and buffing. I was hooked and obsessed with this product from the first swipe…seriously, it’s great! I will use it on some other pieces.

Here are photos of the lovely end result of the table, some with flash for details, some in natural light.

ImageImageImageImageImageImage

I’m happy with my decision to let this table rock the shabby look. The color pairs nicely with the beige marble insert and is neutral. It will serve as an end table next to the chaise on my sectional. The marble means no coasters are needed! For my best friend, the sectional is the equivalent of “Sheldon’s Spot”, so she will probably get the most use out of it!

I paid just under $3 for the table, and used supplies I already had on hand to redo it.

::shakes head:: $3. Disbelief.

Here are my other fun finds from that trip (where I spent a whopping $8):

Fun, cute vintage enamel colander for $1Image


And a great tabletop ironing board (that matches our kitchen) for just $2…we really needed one, as our other one that we’ve had forever broke and bent in half:

Image


Everything you see in this post cost me $8. Un-freaking-real. Thrifting/upcycling areΒ a way of life for me. It’s recycling at its finest πŸ˜‰


Until next time…

Somewhere Under the Rainbow (and over the bulkhead)

Standard

Ho-kay! So…

I won’t even mince words. I have done a LOT of cool things to my house since I bought it in 2013. I’m not sure why this little, silly, eccentric change is such a big deal to me, but it is! Like all great ideas, it began as a tiny ghost of a thought that snowballed and spiraled into something totally different…and far more wonderful.

The original plan was a pallet wall in the half bath, with rustic, unfinished wood. Then, I thought that maybe I should also put the pallet wood on the bulkhead where the main pipe is stored in the ceiling. Then I got to thinking I could salvage some of the pallet planks and paint them bright rainbow colors on the bulkhead. THEN, after taking the idea to my husband, he suggested scrapping the pallet wood and going for a more streamlined look with 1 x 2’s painted and placed together.

I’ve always been in love with (and truth be told, kind of obsessed with) rainbows. What’s not to love?! I am a colorful person, I love color in my house, I love all the things rainbows mean and stand for, and they simply make me happy. Once the idea of having my own, personal rainbow in my own home took hold in my mind, I couldn’t let it go.

I searched high and low, but could not find any photos of exactly what I wanted or planned on doing. Either it hasn’t been done or (more likely) simply hasn’t been posted. But this little bulkhead was the perfect place for a small but brilliant makeover. I decided early on to follow the ROYGBV color scheme, but after hubby had measured the bulkhead, he said that to sit the colors/lumber boards all up against one another, it was going to require 8 colors! After some thought (and a lot of mixing of paint), I decided to add a terra-cotta color after the red (that matched the half-bath perfectly) and a cross between robin’s egg blue and turquoise after green, for a total of 8 colors. Because the boards were pre-primed, my job was easy! I bought acrylic paints rather than latex for this project. The hardest part was spending the time to mix colors to make them exactly, perfectly “right”.

Here’s the top half of the rainbow being painted:

ImageImage

And the top half of the rainbow all finished:

Image

::warm fuzzies::

(Looks like a sunset!)

Then, it came time to begin the bottom half:

Image

(that was after coat 1)

After a few other coats, here is the whole rainbow assembled together:

Image

Now, let’s play “spot the problem”.

SEE THAT GREEN?! EEK. Way too dark! After several tries mixing to get the color I was going for:

Image

That’s more like it!

Once more, here it is with all of the finalized colors:

Image


And ::drumroll, please:: Here is the completed accent wall, up on the bulkhead in the half-bath.

Image

Image


I realize that to a lot of people, I am the layman’s term for “crazy”. However, I love my rainbow accent wall and I love that I have my own rainbow at home.

One of the best parts? Between materials and paint, the whole cost of the accent wall was a mere $15! If this isn’t $15 of fun, I don’t know what is πŸ™‚

Dining Room Decor

Standard

Today I want to switch gears a little, from renovations to decor. I want to focus in on the dining room! Maybe you’ve got a formal dining room, perhaps you’ve got just an eat-in-kitchen. Either way, I hope you glean some ideas from this entry that will help you set it up with style.

Let me first say that I didn’t really want the “typical” dining room that is used once or twice a year. I wanted the room to be a showpiece, but one that could be used at any time, one that felt inviting and did not put out the “Do not touch anything in this fancy room” vibe. I certainly enjoy using my china for tea services and even for just my morning coffee. I’m continually saying “Life is short, use the china!” to the amusement of family and friends.

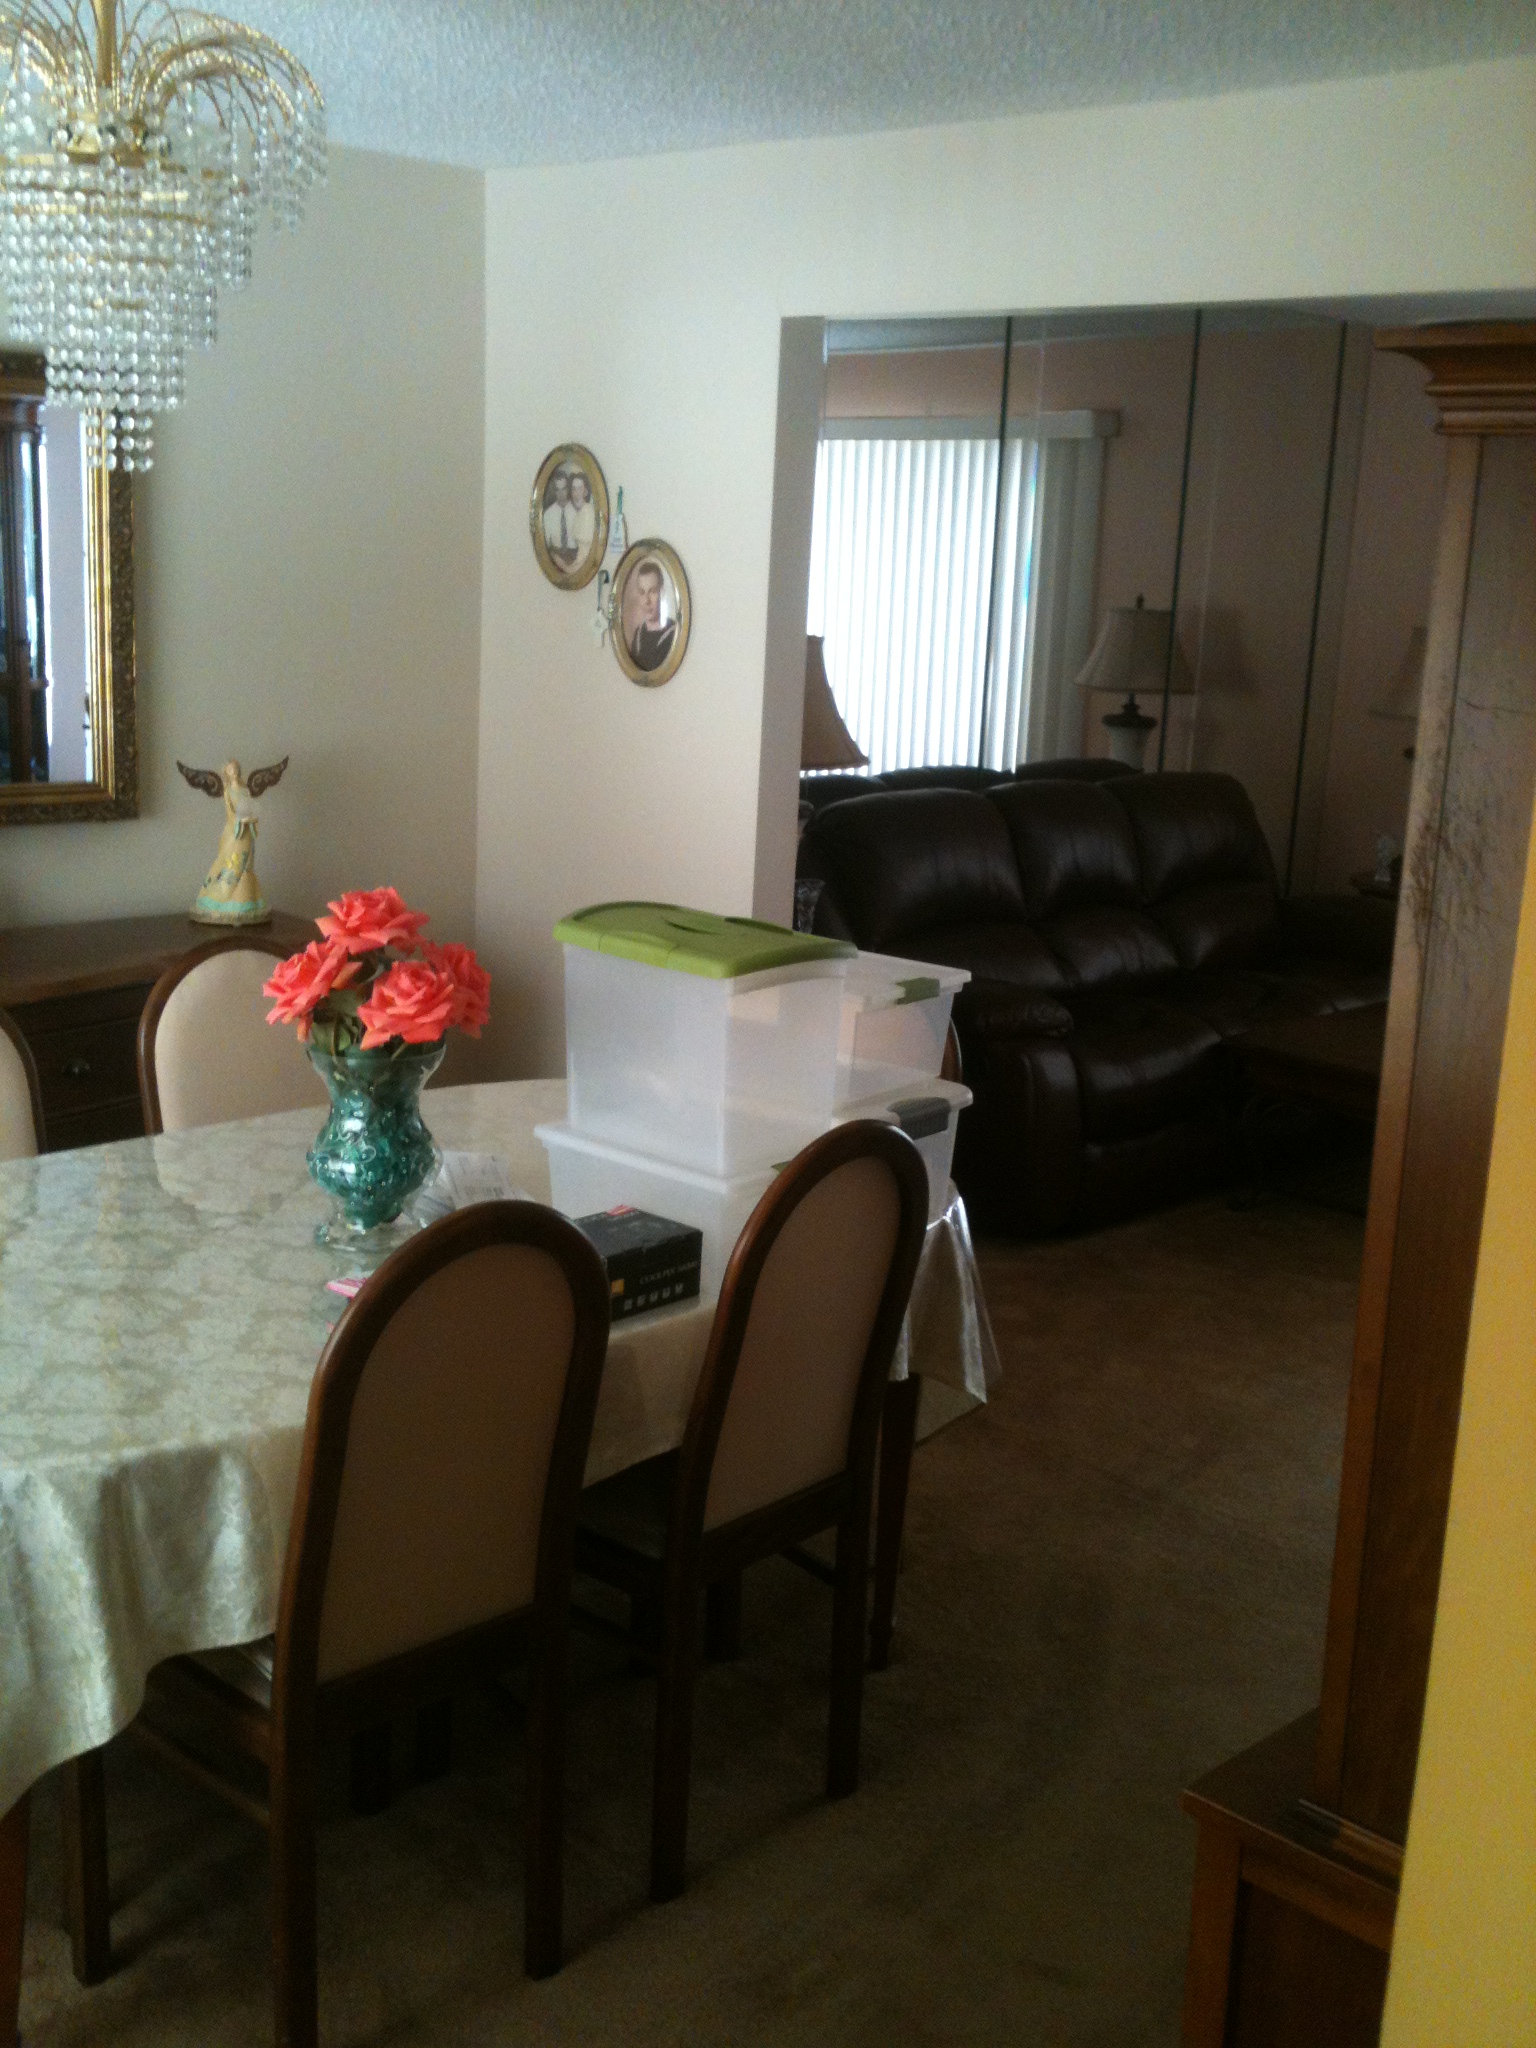
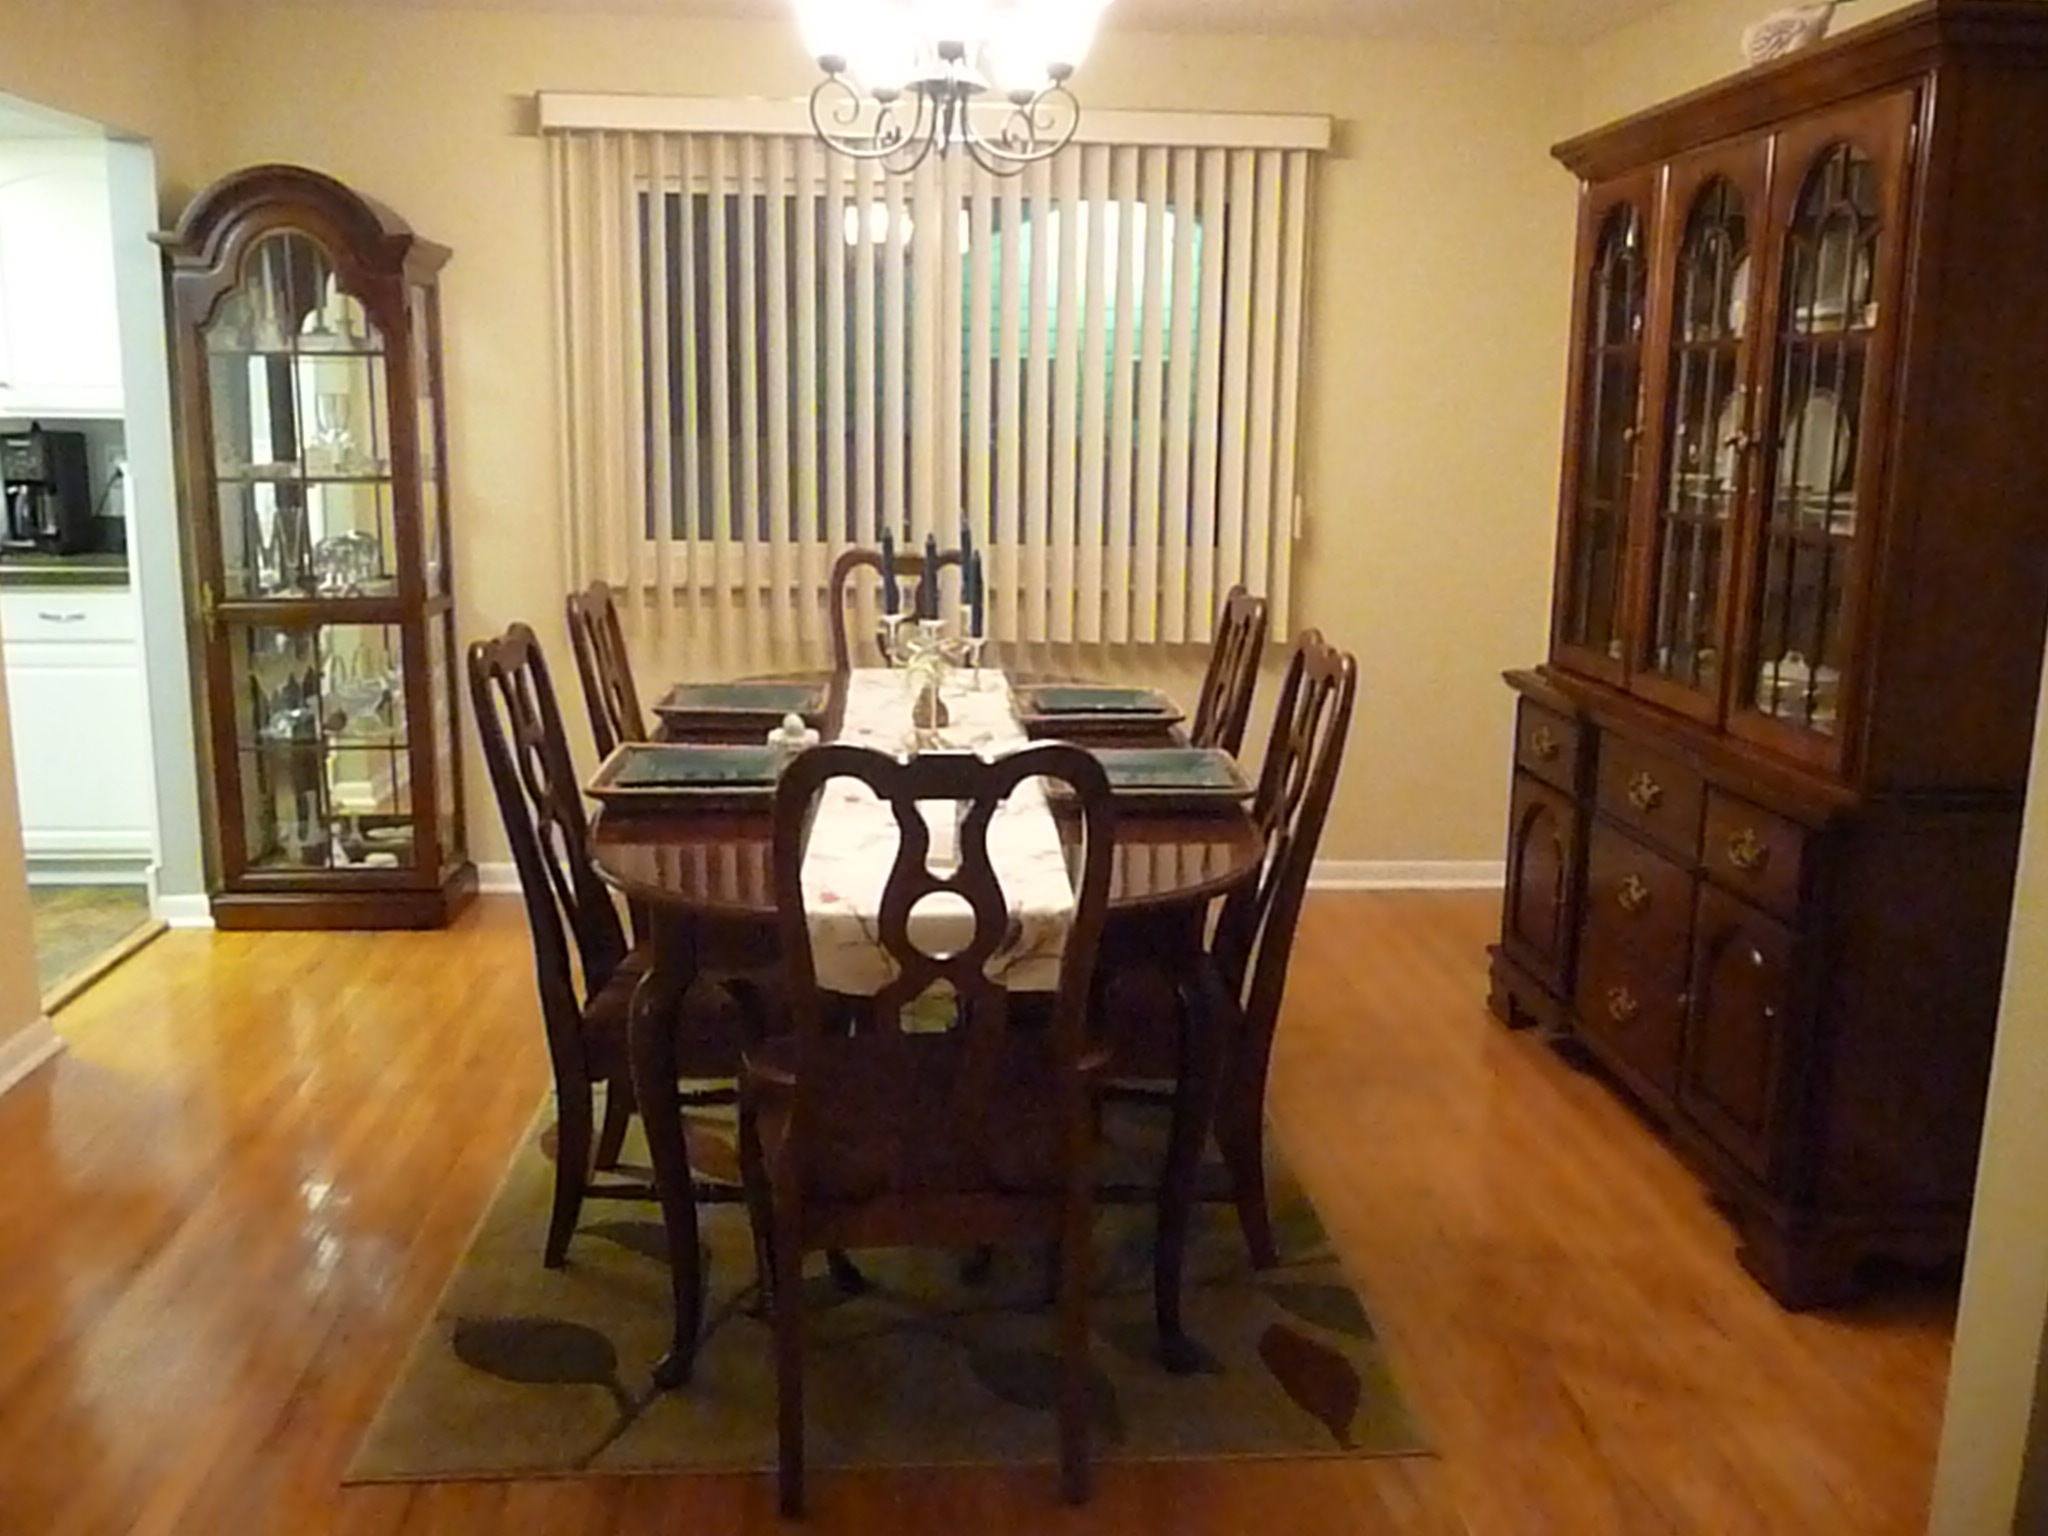
It would be easier to begin by showing you the dining room as it was when we toured our house so you know what we were working with:

Image

So…yeah…

A 90’s-fab chandelier, decor not to our taste, carpet. AGAIN, though, great “bones”!

If you look back a few entries, you will see that we refinished our home’s original hardwood floors, so I had that to work with when decorating.

The most important thing when setting up a formal dining room is absolutely selecting the furniture, which comes in just about every color, every wood type, every style, every budget. If you do not have a family set, your options are to buy new or buy used. You can go for any kind of look you want…modern, traditional, antique, whimsical. I’m a girl who knows what she wants, so I have always wanted a mahogany set in the formal Queen Anne style. My parents have a stunning cherry Thomasville dining room suite that is Queen Anne style, and I have admired it since the day they got it.

As you can guess, my choice does not come cheap…in fact, it’s one of the most expensive types on the market. I don’t do particleboard and every wood surface in my home is solid. I did not want to plunk $5,000-$10,000 down for a brand new set. My favorite solution? Buy used!

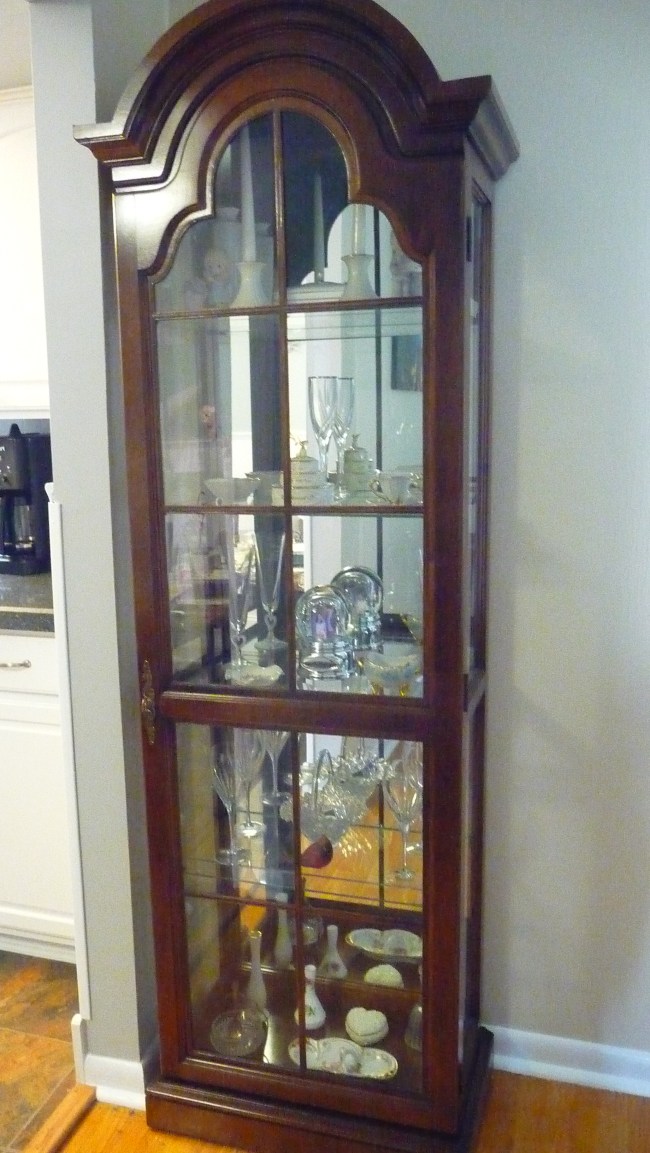
I scoured Craigslist (more on that at a later date), and a family in a wealthy neighborhood was moving. I found my dream set there, for the bargain price of $1,000, which included the table with 2 leaves, 6 chairs (2 captain’s chairs, 4 armchairs), a hutch, and a curio. The maker is Bassett, which is quality. Definitely see if you can find a maker’s mark if you are buying used.

Next step? Getting rid of that awful chandelier! We found exactly what we were looking for at Lowe’s. For fixtures, we gravitate to oil-rubbed bronze, but the bottom line is to buy what you love. $100 bought us our nice, new one.

If you’ve got a hardwood floor, you should absolutely buy an area rug for under your table. It adds style and protects the flooring. I do not like room-size rugs, but that is a personal preference. I like to see my hardwood. I chose just a 5 x 7 area rug to go under the table. My dining room is open to my formal living room, so I used the same rug in that room to, to create the flow and feel of a unified space. The rugs were a reasonable $75 each.

Once you have a light fixture, rug (if needed) and furniture picked out, it’s time to accessorize (the most fun part).

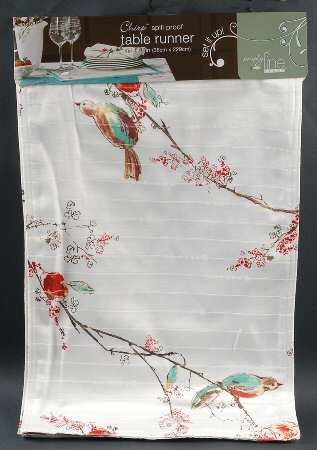
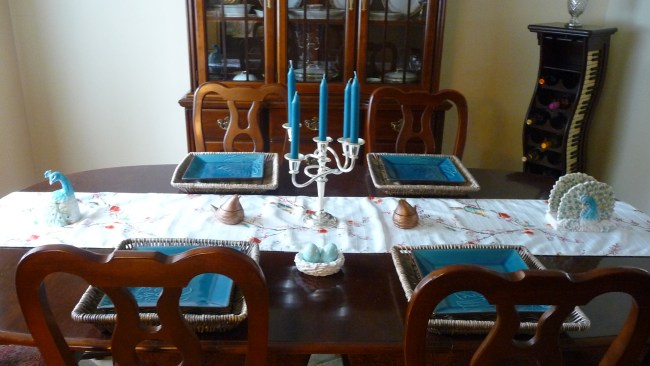
I like formal, but I do not like stuffy!!! I wanted to add some whimsical elements to the room. I am a big fan of the tablescape. Settting up a great table gives your room polish and personality. You can change them with the seasons, which I often enjoy doing. I prefer a runner to a tablecloth, and found exactly what I was looking for in Lenox’s “chirp” pattern:

Image

It had the perfect amount of whimsy, the russet colors to tie in my seat cushions with the rug, birds (which I wanted), and the fun element of nature. I planned the rest of the table decor around it. I got it on sale for $25.

I knew I wanted to set 4 plates out, so I found great bronze wicker chargers and blue plates with a leaf design at Macy’s. They look great together, the blue “pops” and ties into the blue accents on the rug and in the runner. I paid $40 for all 4 chargers and all 4 plates, which was a great deal.

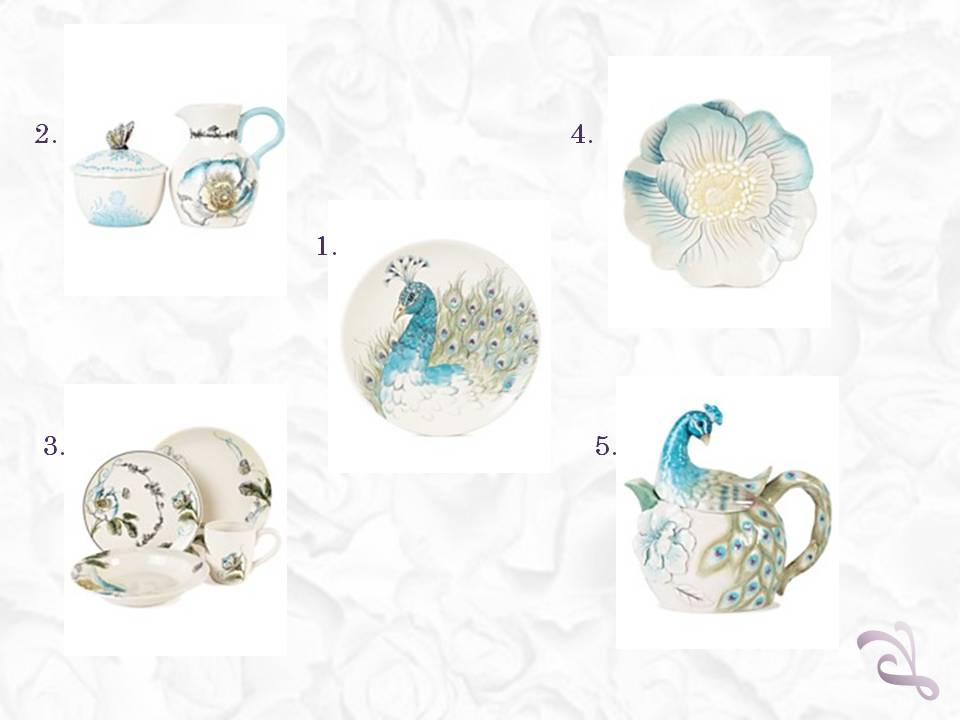
As for accents, I found a GREAT collection that Rachel Bilson (an adorable actress that I love) designed for Macy’s that is peacock-themed. The name of her awesome line is Edie Rose. I bought her peacock box, napkin holder, potholders, and kitchen towels. She also has a salt-and-pepper shaker set that looks like 2 robin’s eggs in a white nest. Each piece was on sale at Macy’s when I bought them. Here are some photos of this collection:ImageImageImage

Pretty!

I already owned a bronze set of bird tealight holders from a store called Ten Thousand Villages, which went perfectly with everything else.

Now, it was time to select a centerpiece. Giving your dining table a great centerpiece is going to top off the room. It serves as an accent and pulls everything together. I found a fabulous bright silver candelabra at my local thrift store for $4. It was love at first sight! I knew I wanted to put in taper candles that were a unique color. I lucked out at Homegoods when I found a pack of 6 blue tapers that perfectly matched my plates! The candles cost me just $5.99. The combination of the silver with the blue is stunning, interesting, and different. I get so many compliments on my table setup.

No Italian girl’s dining room is complete without a wine-rack! I like my wine, and I wanted something really special. My favorite thrift store had a tall solid wood wine rack carved like a piano down the sides. It holds 16 bottles and has a top rack for goblets. It was so special that I had to have it! It was priced at $65, but I used up $25 of credit that I had there and used a $20 discount card. So I paid just $32 for it. It’s a fun touch of whimsy in the room!

Image

That corner of the room needed a tie-in with my table, so I found a mercury glass lidded tumbler from Pottery Barn that looks great on top (which you will see in the full photos of the room). The mercury glass matched up with my silver candelabra perfectly.

I kept wall decor kind of simple, with a beautiful, colorful Leonid Afremov painting on the big wall with a set of mosaic leaf sconces framing the hutch. The sconces are from Bed, Bath, and Beyond, and I love them so much that I bought 3 sets for my house. $8 per set after a coupon!

For china, I have a set of gorgeous Limoges china from France. The pattern is lovely, with a blue and gold design. My aunt gave it to my mother, who gave it to me. I still need to have it insured. My mother has our family china made in the 1890’s in Czechoslovakia. I put my many little mementos in my curio cabinet, and I love how complete having china and treasures makes a dining room feel. Shoutout to my sister’s china too…she’s got 2 Lenox collections. She has the holly motif holiday set that I adore, and a classy, modern white set for everyday.

One exceptionally fun element I found are the trellis brackets I got from Anthropologie to frame where the dining room is open to the formal living room. They are normally $50 a pair, but I got these on clearance for $15. I love the bronze color and the twig motif. They’re perfect!

Image

Oh, and that quote decal was $1 at my local Dollar Tree!

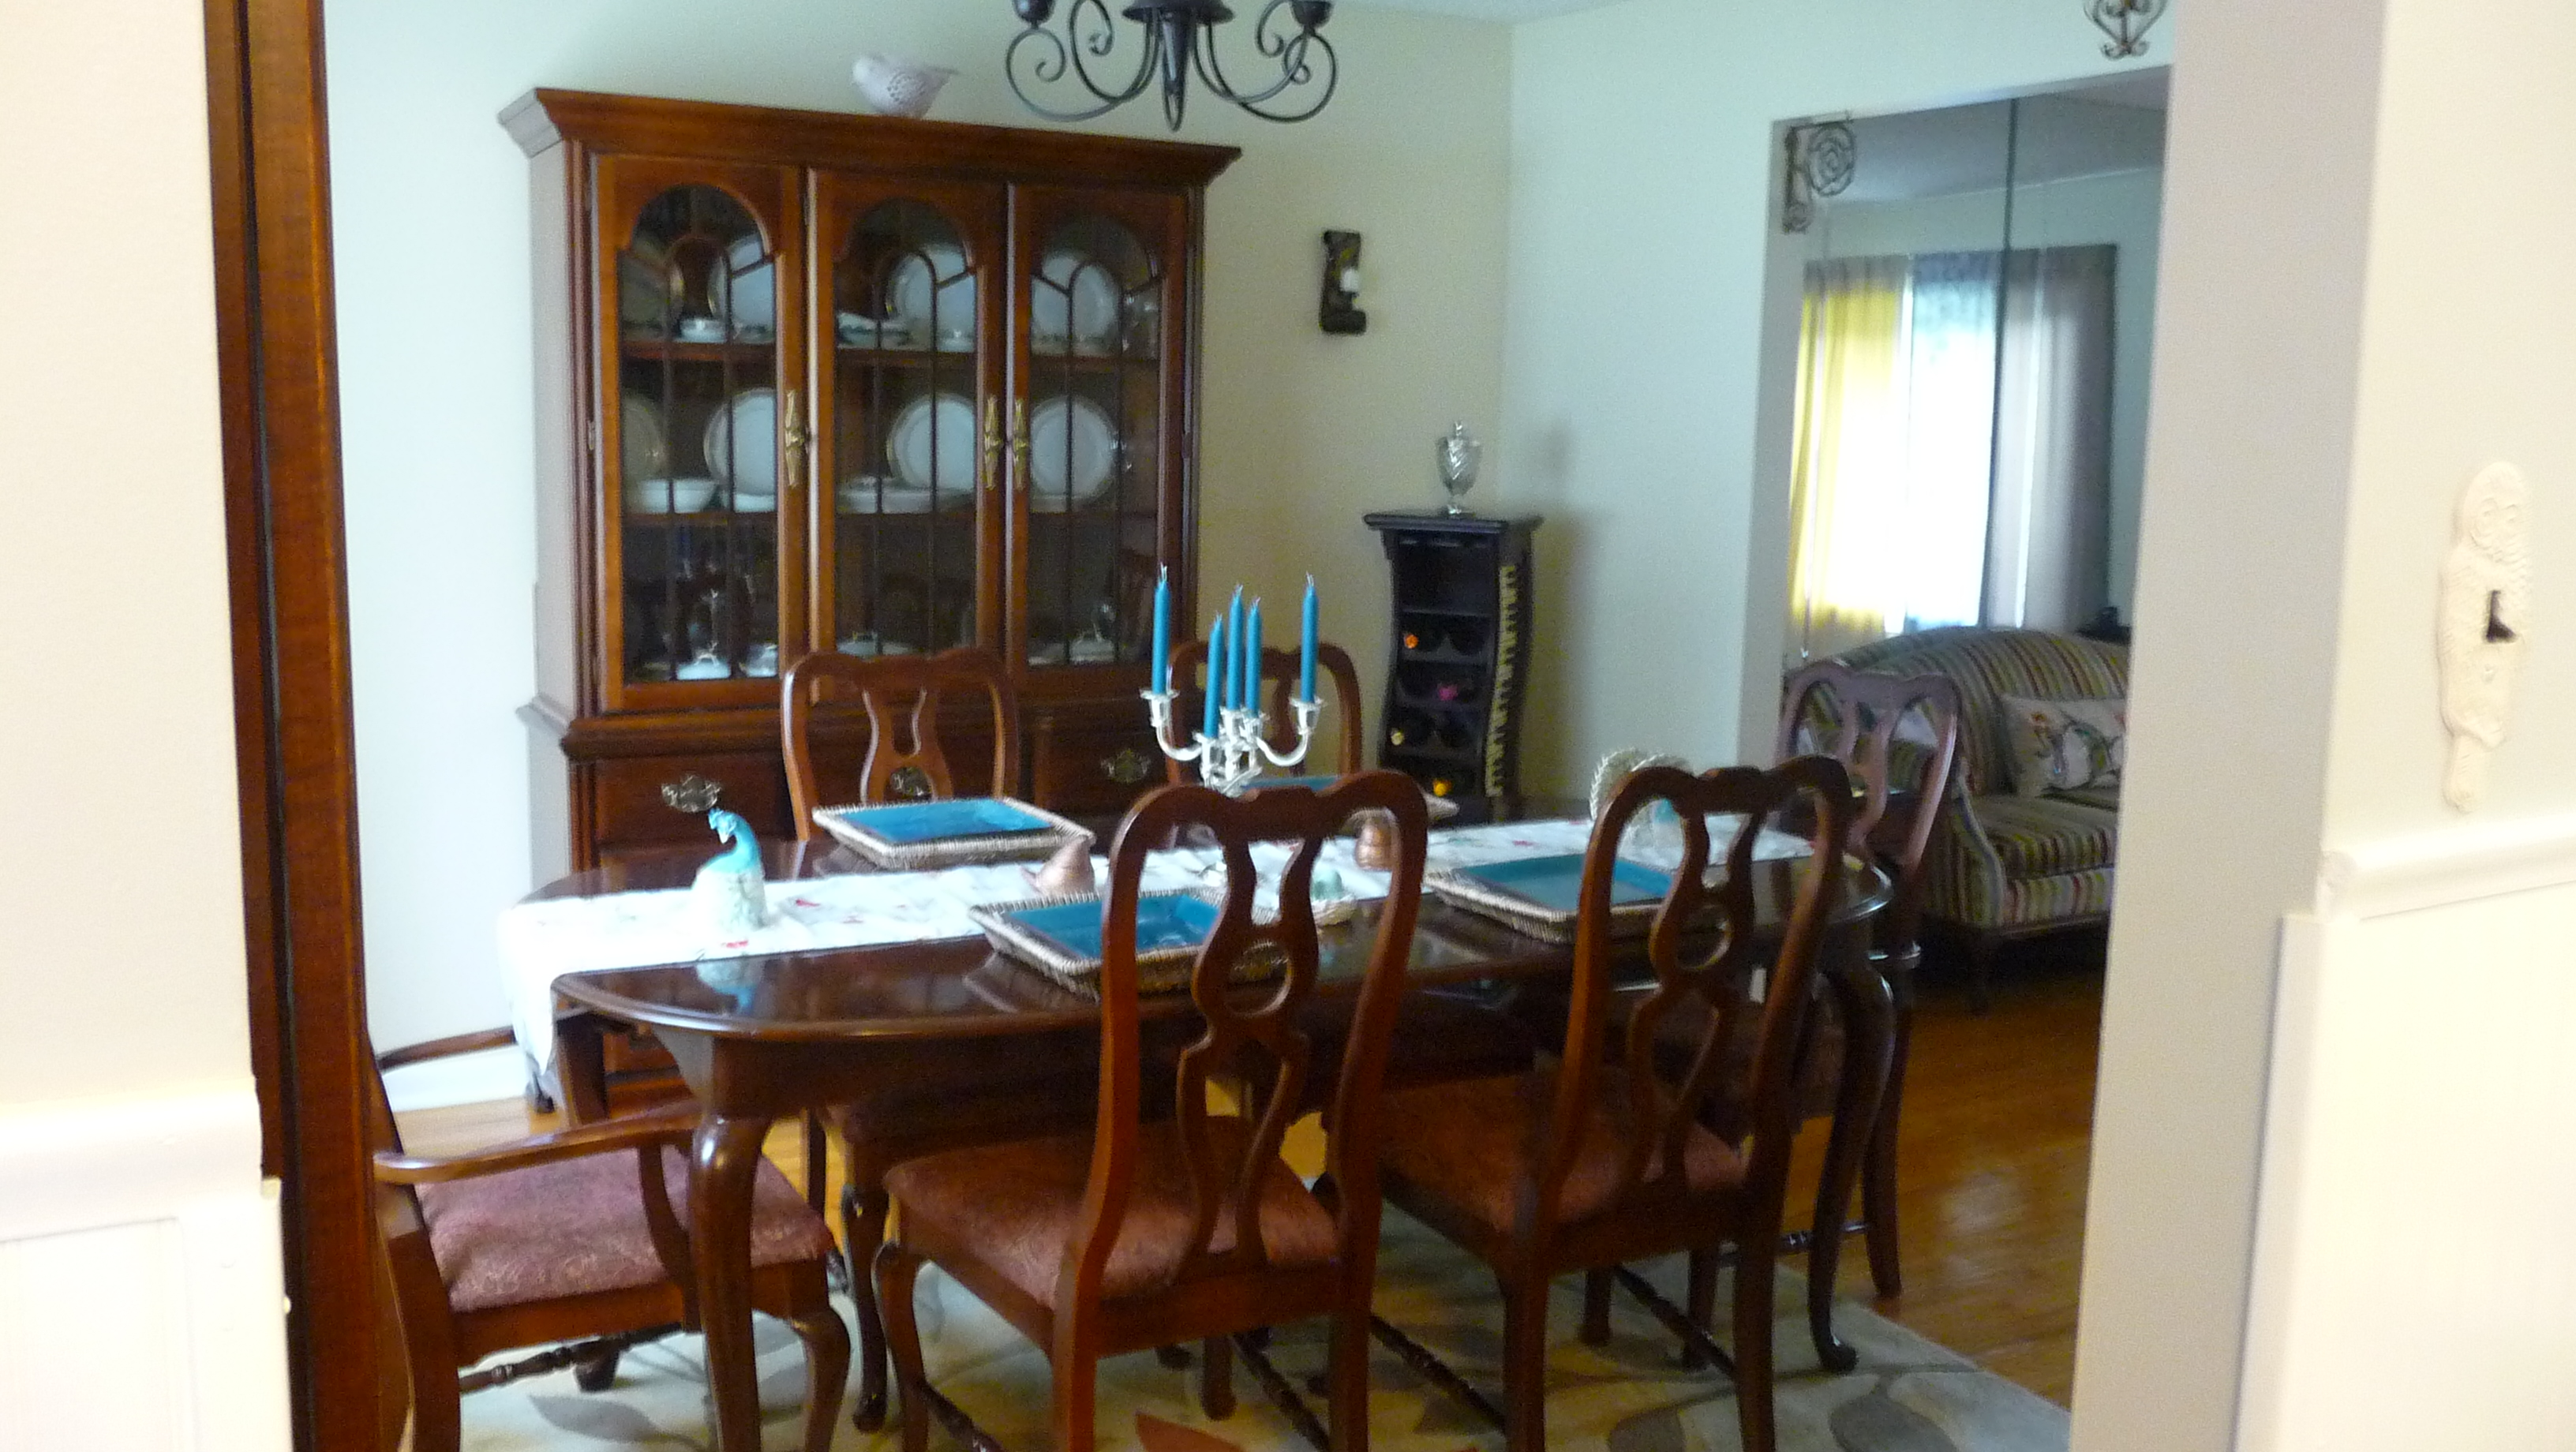
Now for some photos of my finished dining room:

ImageImageImageImageImageImage

It all came together nicely, and all on a budget!