Category Archives: Trash to Treasure

* Snow Day Project: Footstool Makeover *

Standard

A TON has changed in my life since my last update and I am busier than I have ever been before…

The long and short of it: I am 7 months pregnant with my first child, a baby girl, due May 18th 🙂 If you count back from my last entry, it’s kind of self-explanatory.

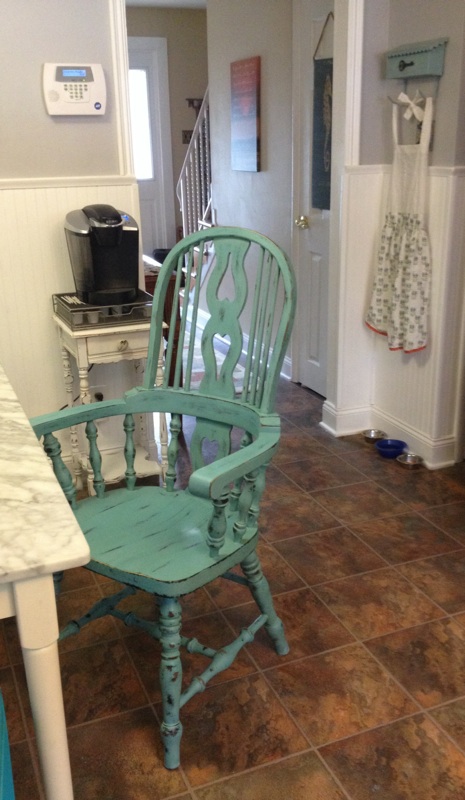
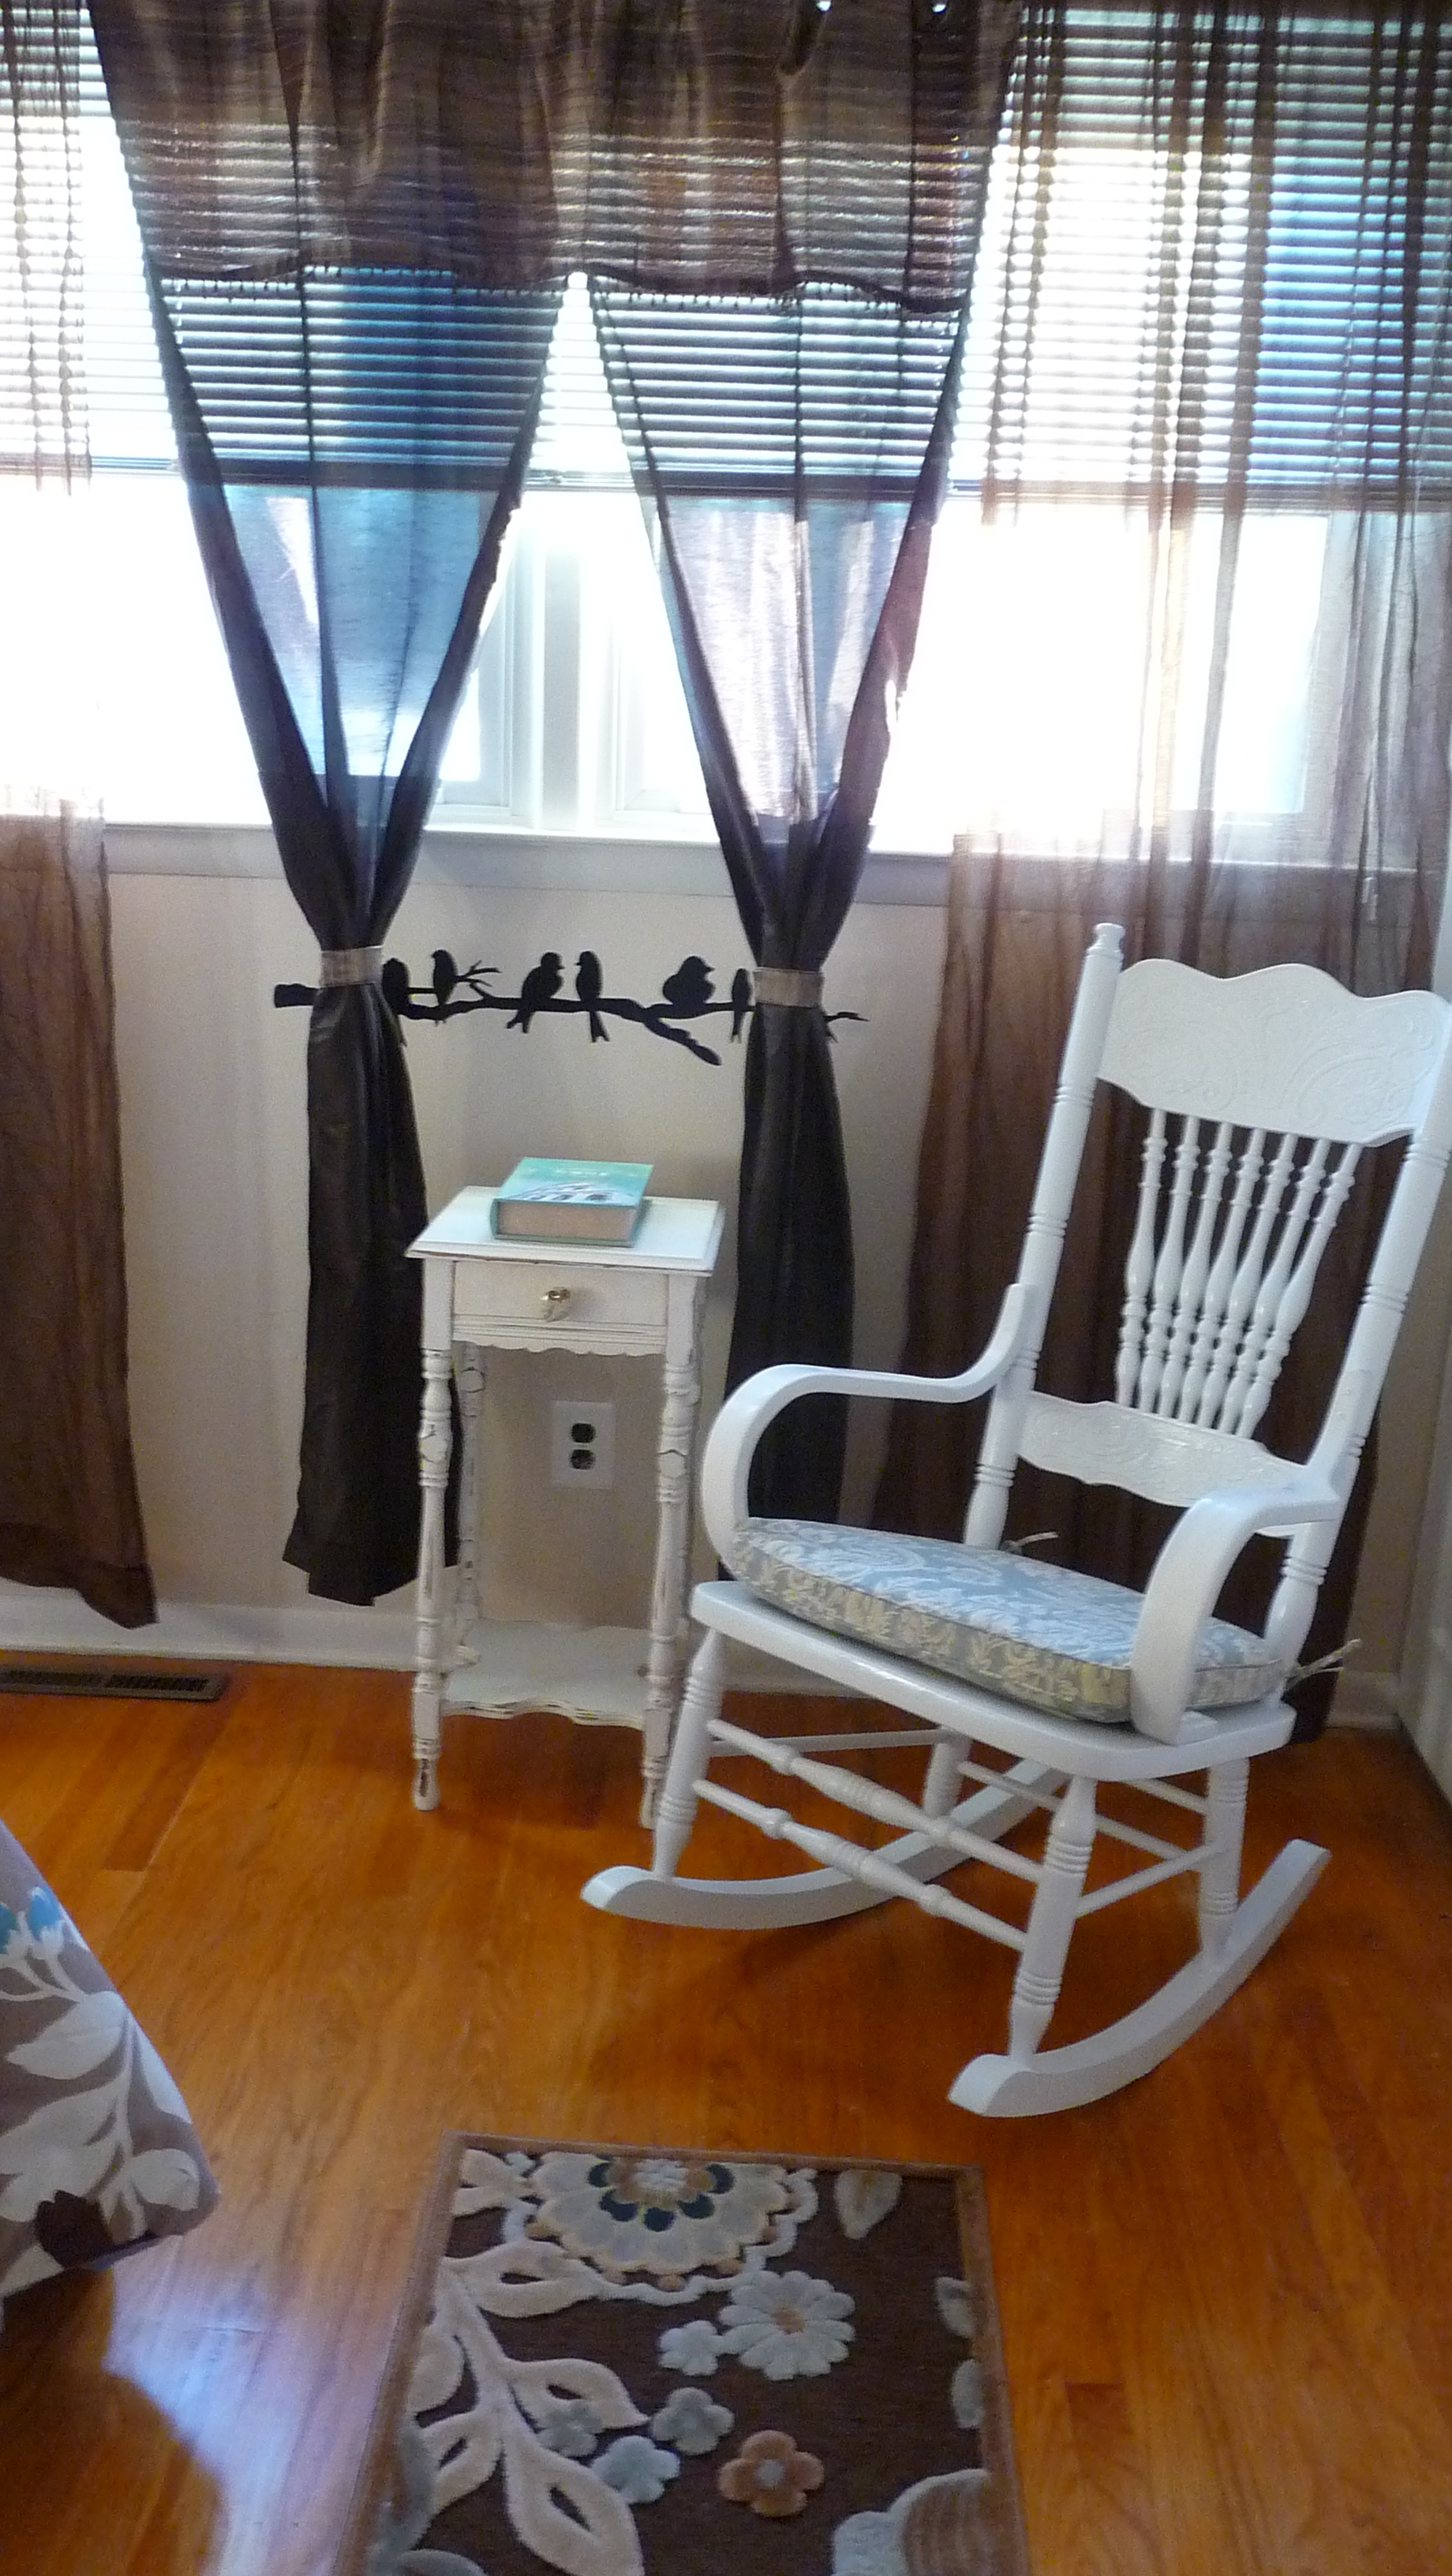
My pregnancy has been rough, and naturally, I cannot use most products I used to when doing projects, nor have I had any energy to do them anyway. I’ve avoided traditional paint, dust, chemicals, fumes, all the toxic nonsense. But I had a nice snow day off from work today, and decided to tackle a tiny, fun little project. The shabby rocker from my last entry? This cute little footstool goes with it…it’s down in our den and ready for downstairs feedings and rocking the baby! We ended up getting a comfy secondhand glider/ottoman for the nursery.

Before I get down to it, I DO finally have a huge project in the works, and it’s slowly getting there…my 50-year-old family bedroom set is now my daughter’s nursery furniture and it is being rehabbed. All drawer tracks were repaired by my hubby, tracks are being greased, new hardware is being added, and the dark pine frames are being painted with a beachy look to go with the “shabby beach cottage” nursery. I kept the drawer fronts their original dark pine. It is a unique, high-contrast, almost odd look. I’ll take photos of the completed nursery soon. I knew this was what I wanted in a nursery, whether the baby was a boy or girl.

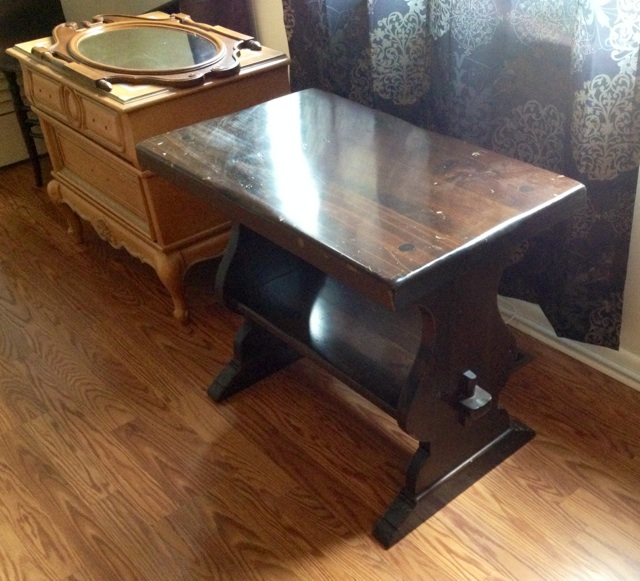
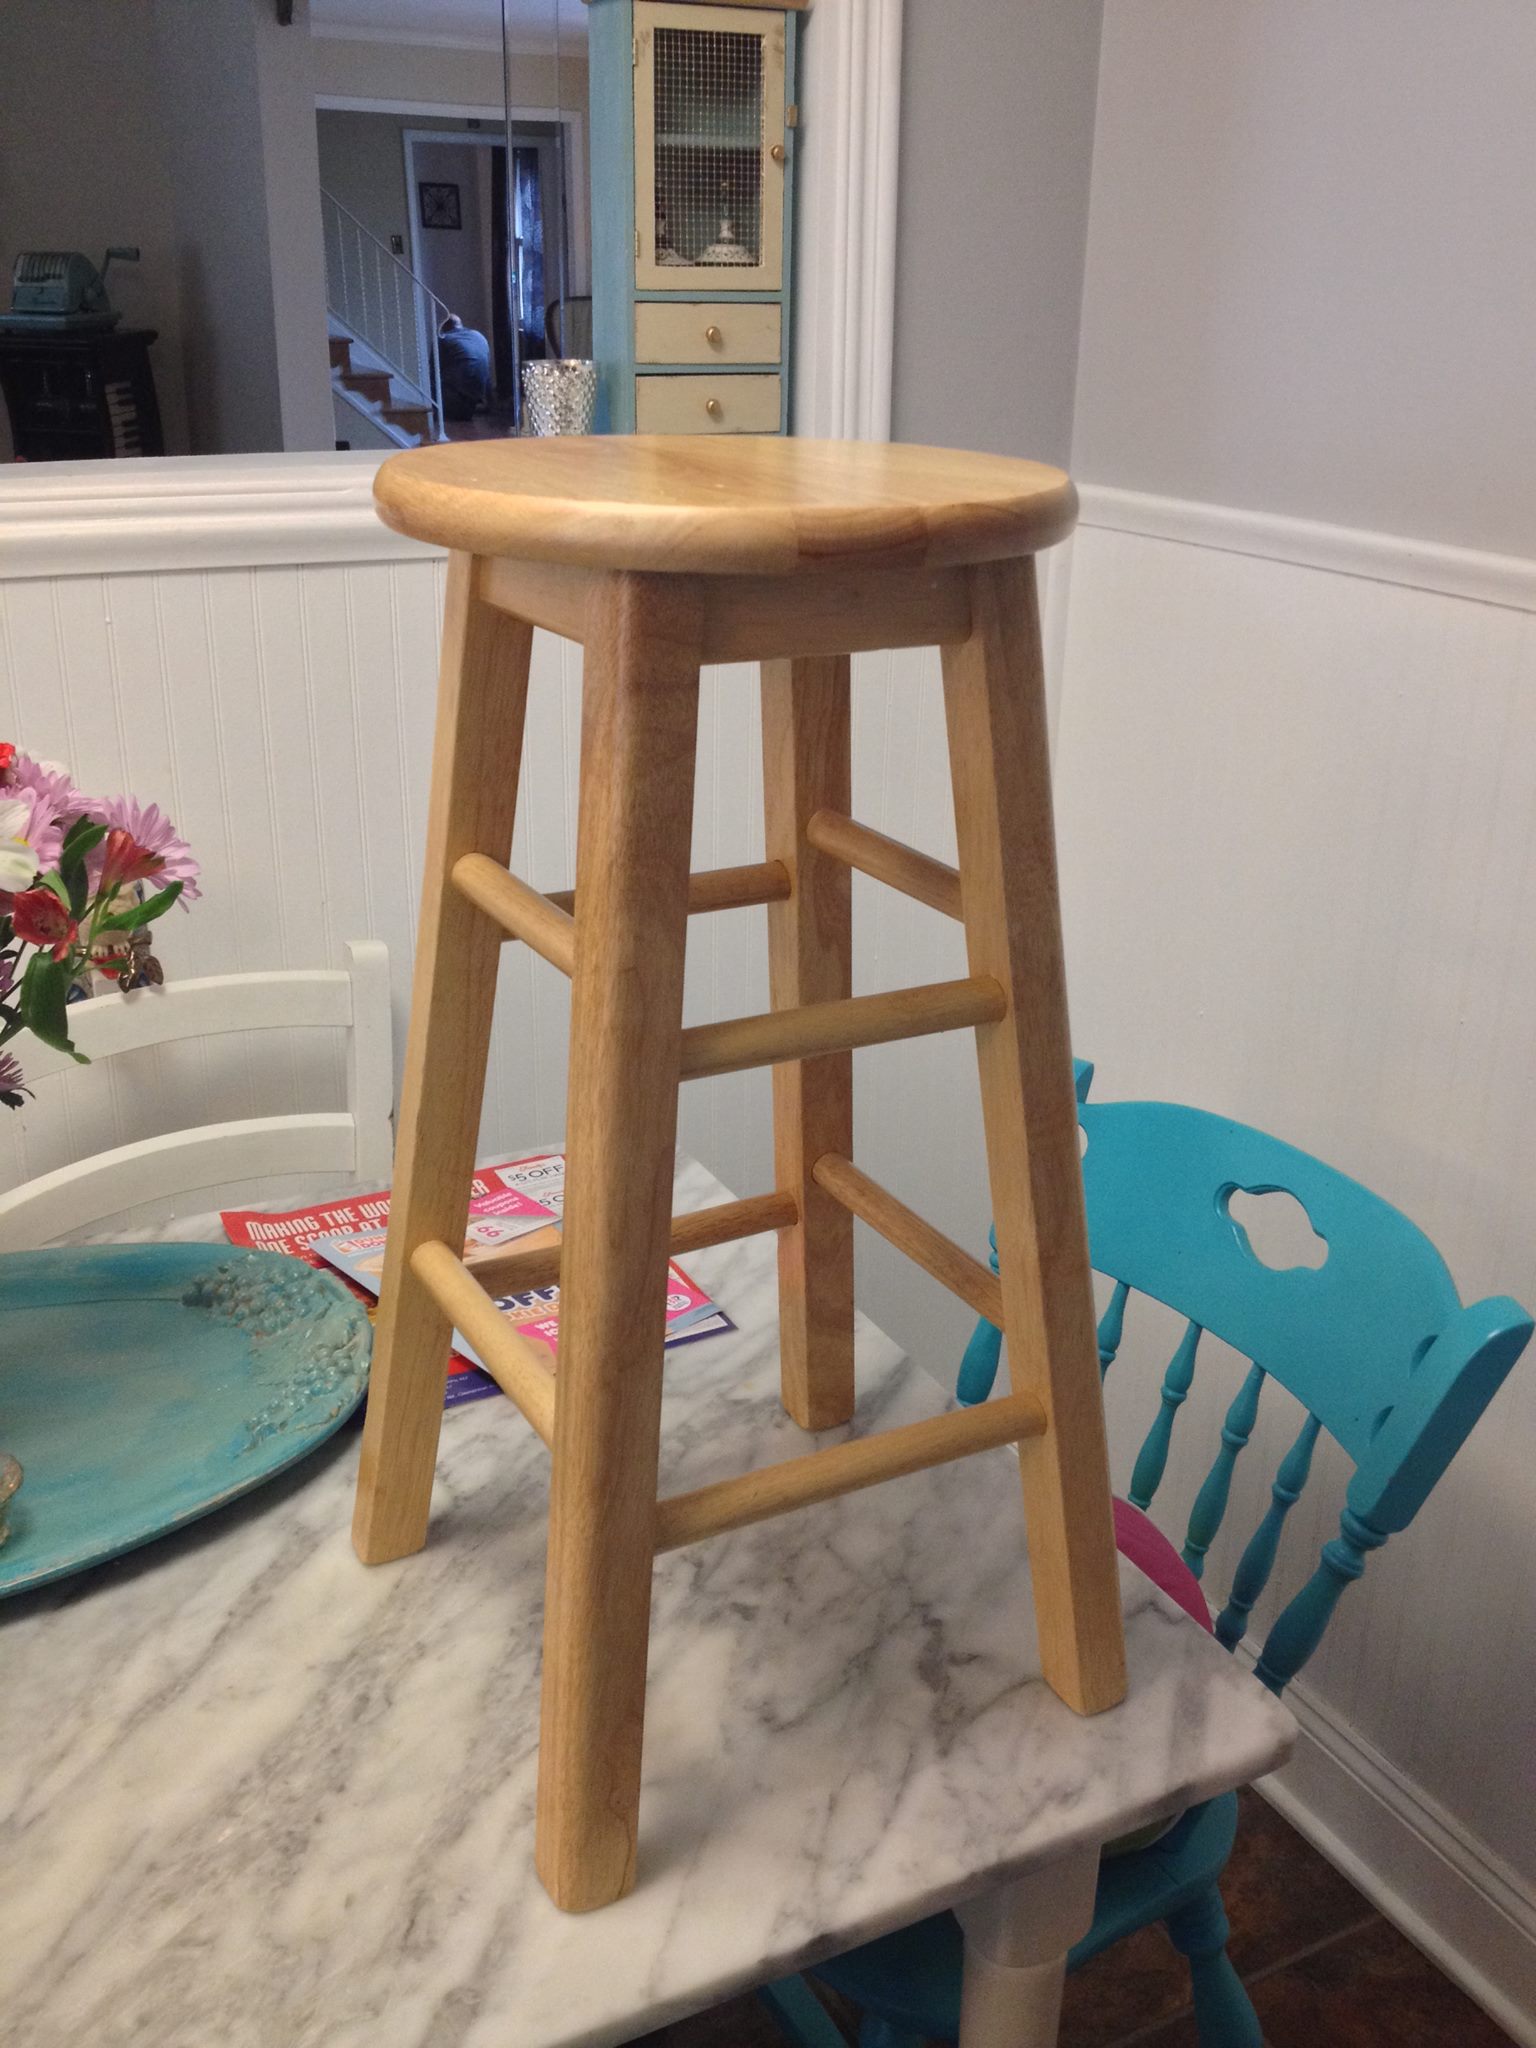
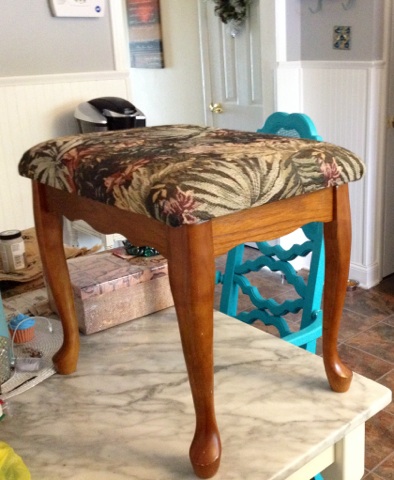
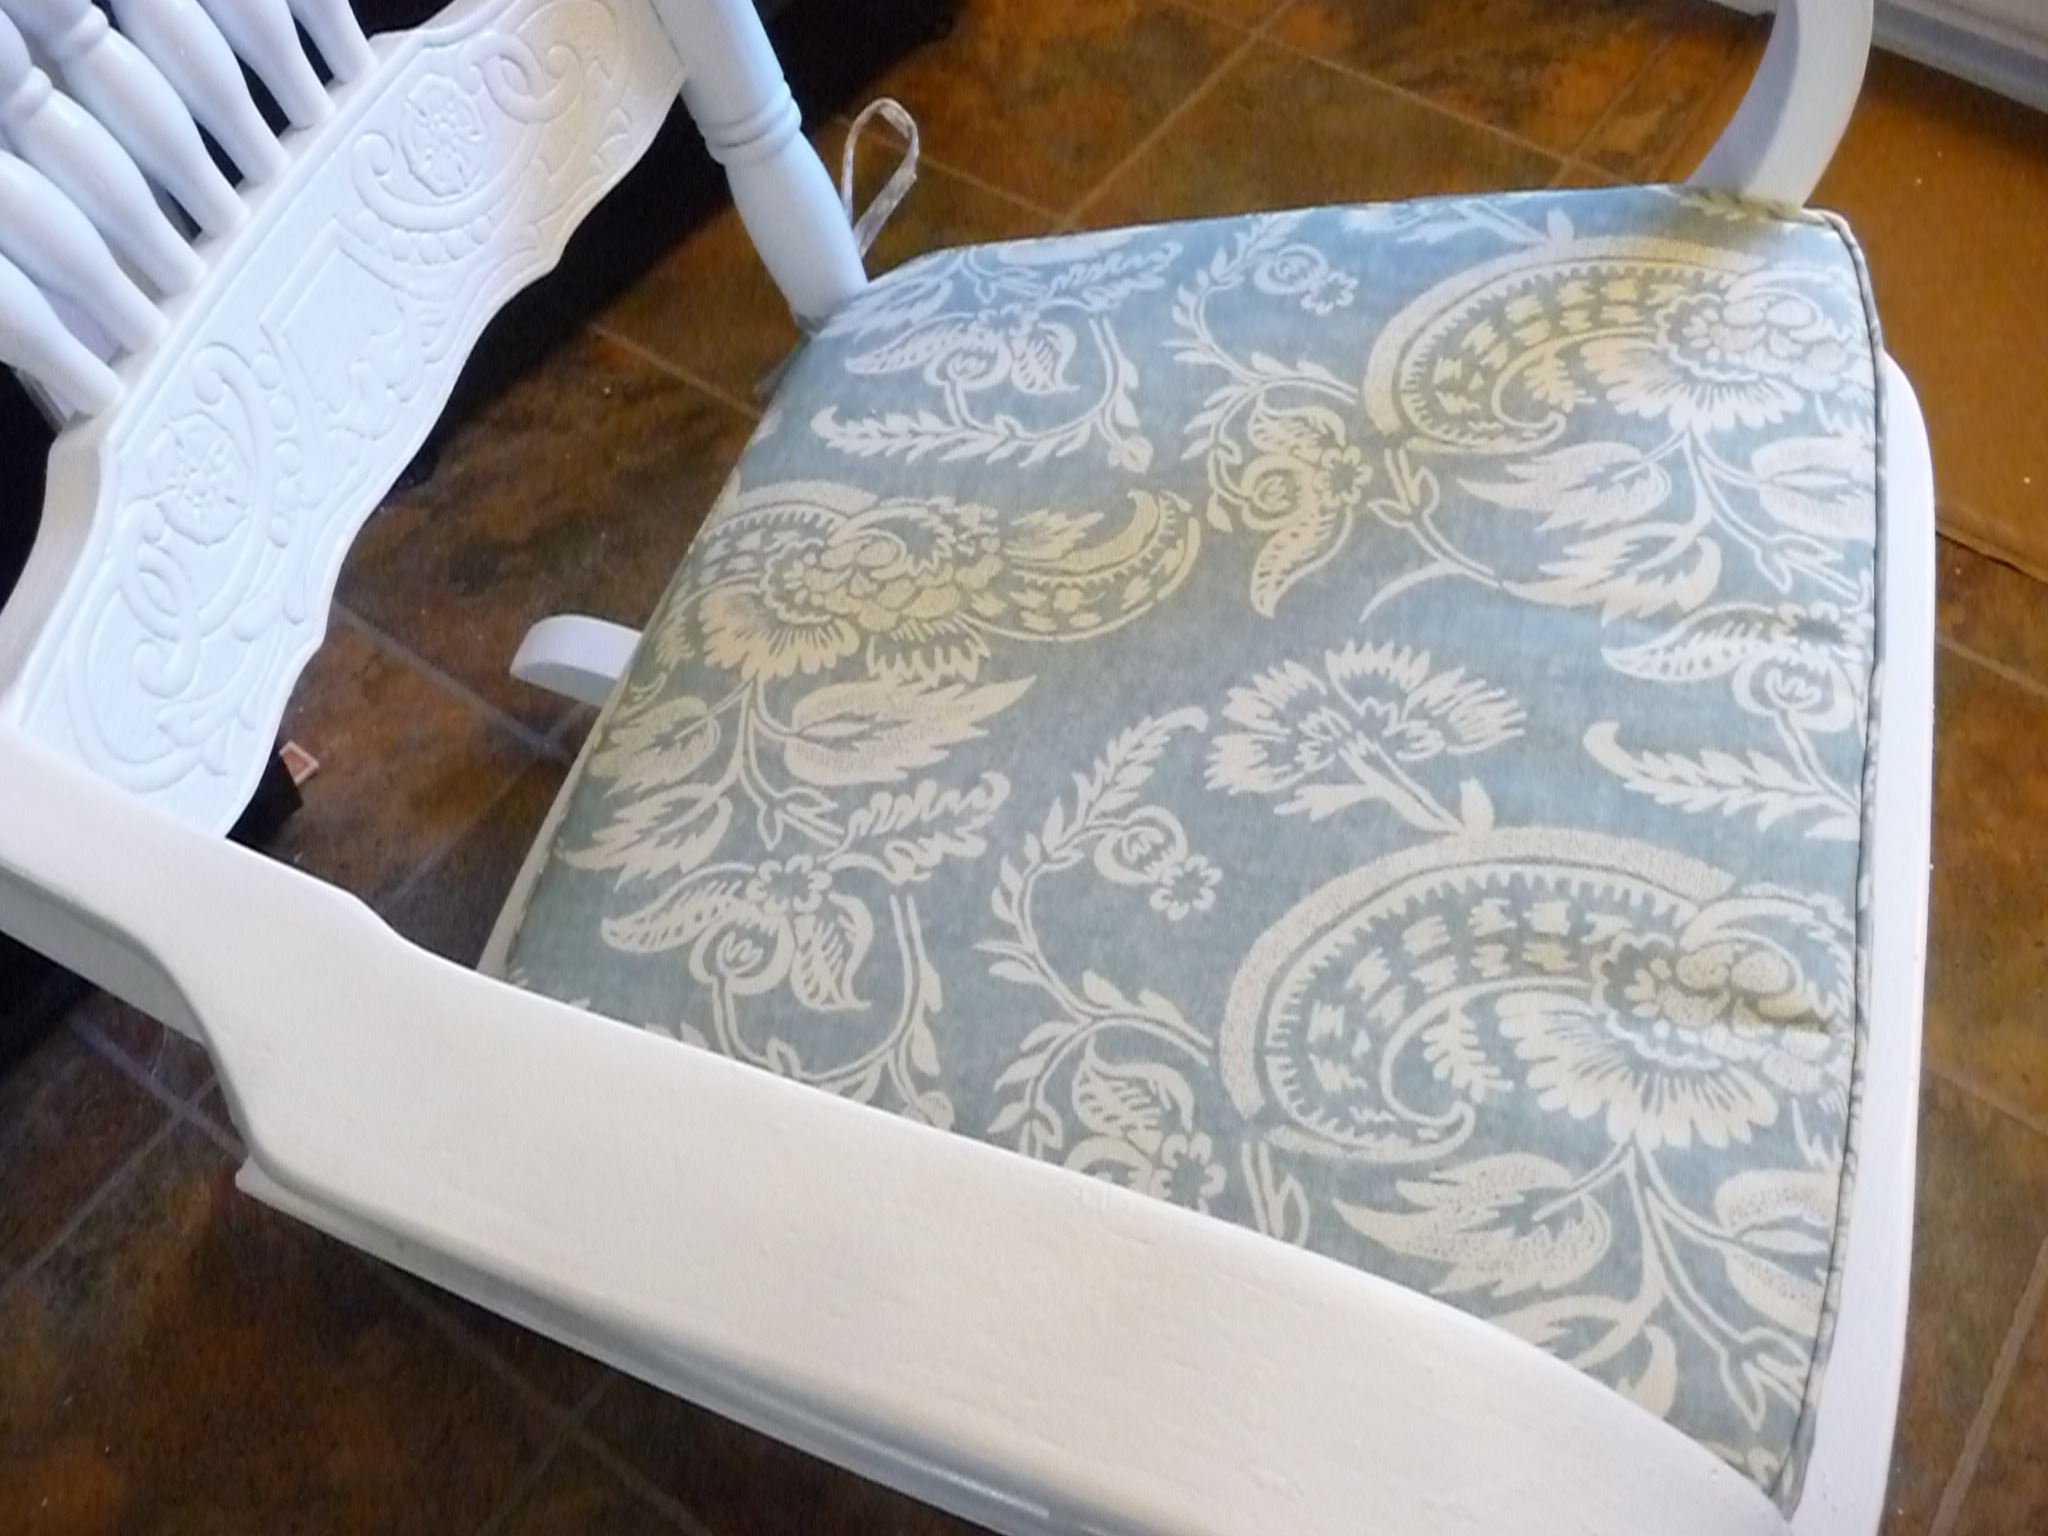
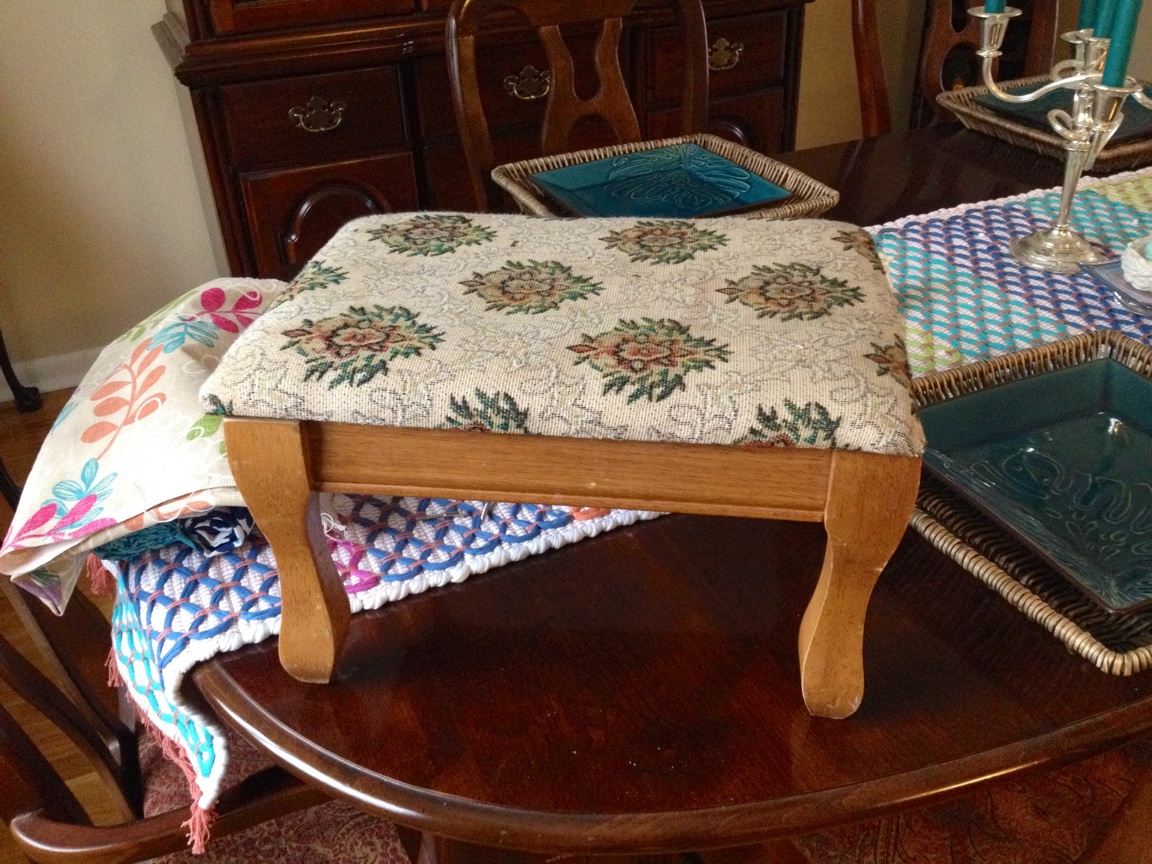
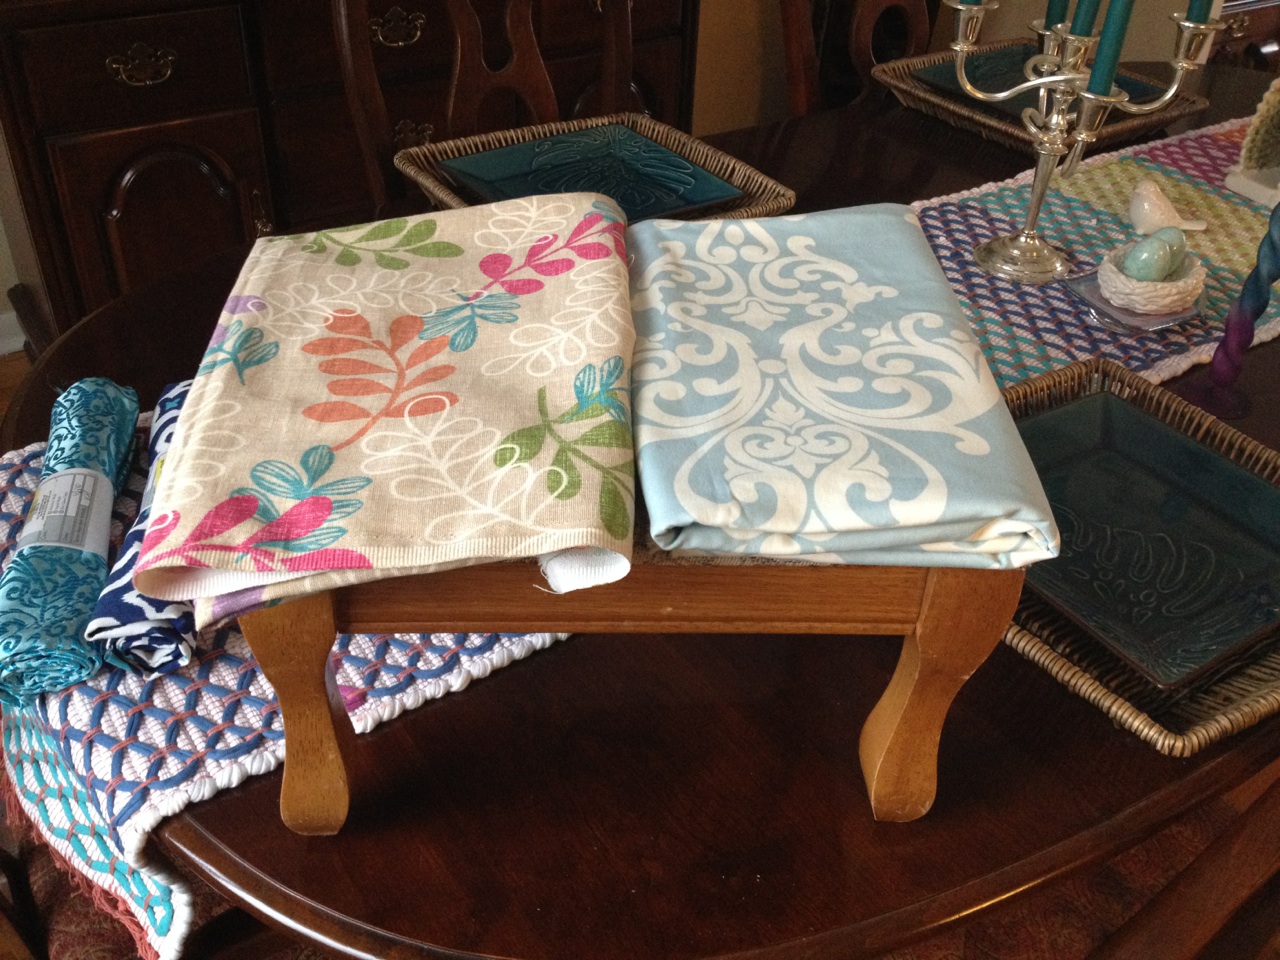
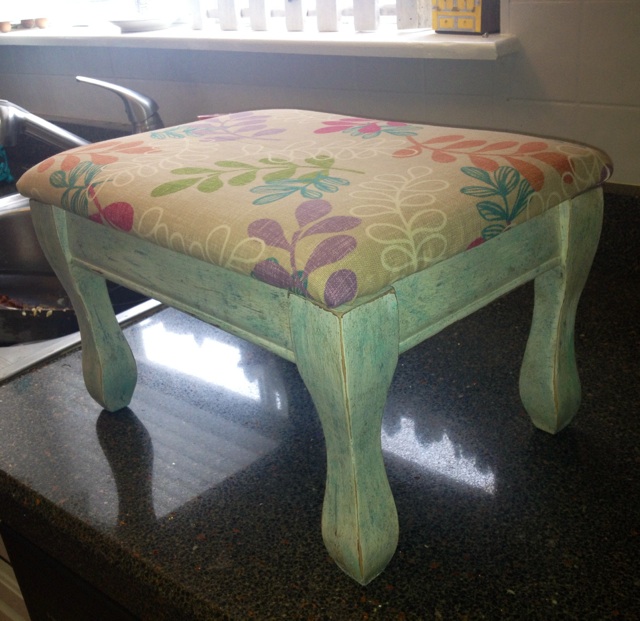
So back to the task at hand…here was my raw material for the footstool. The second photo was me deciding between two fabric choices. I opted for more color and saved the blue and cream etoile for another day/project.

IMG_3711 IMG_3712

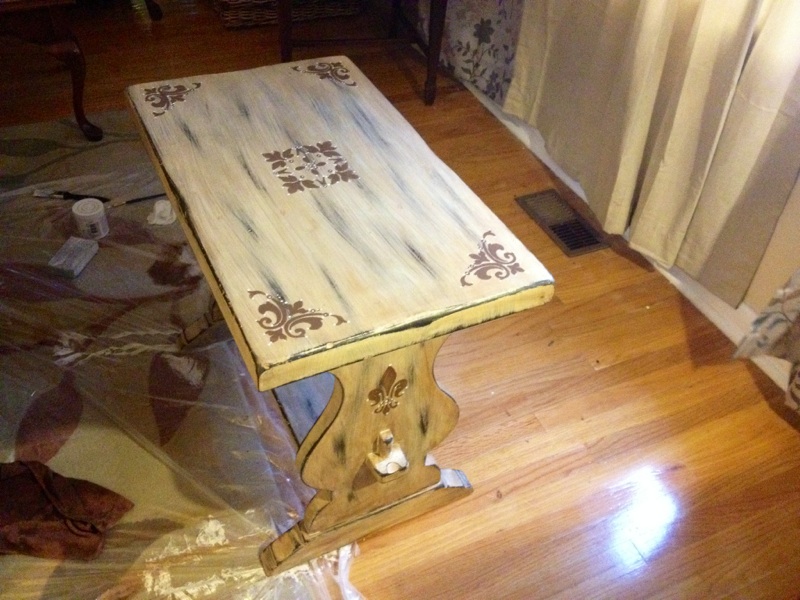
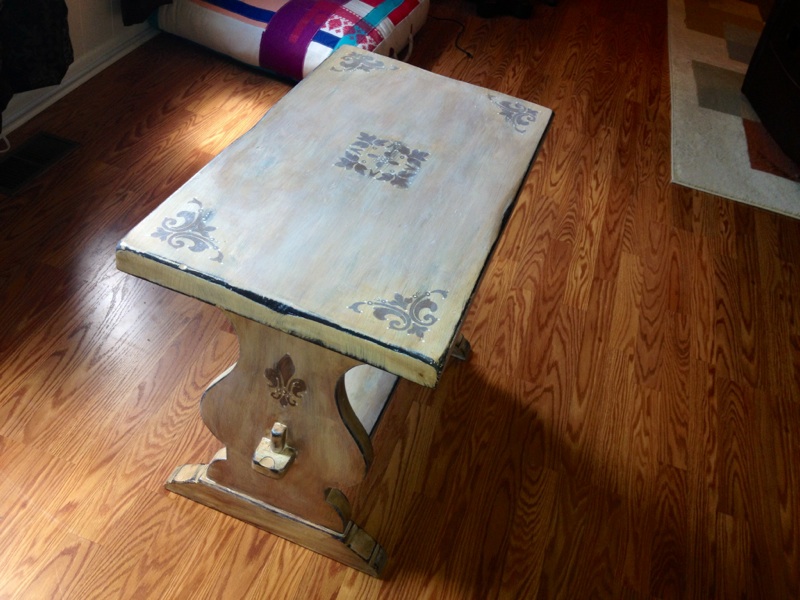
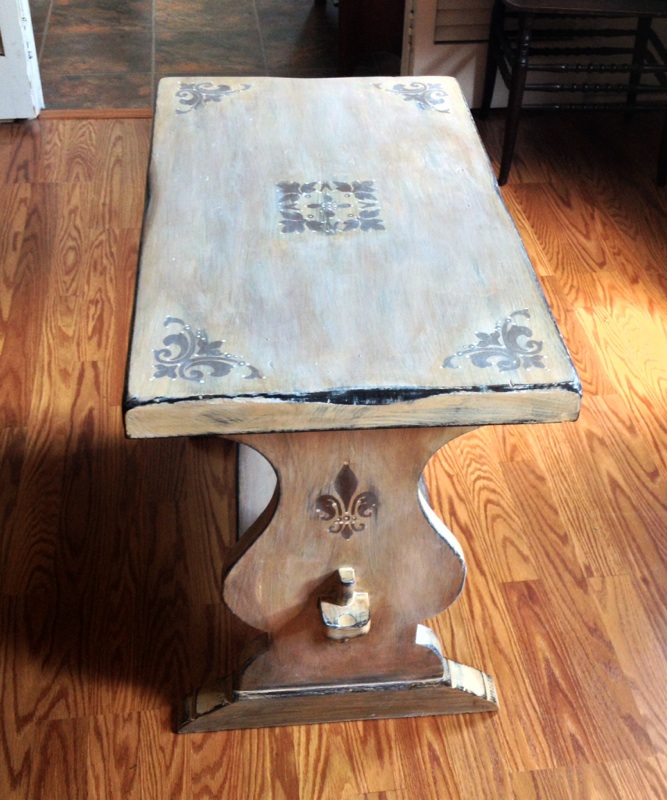
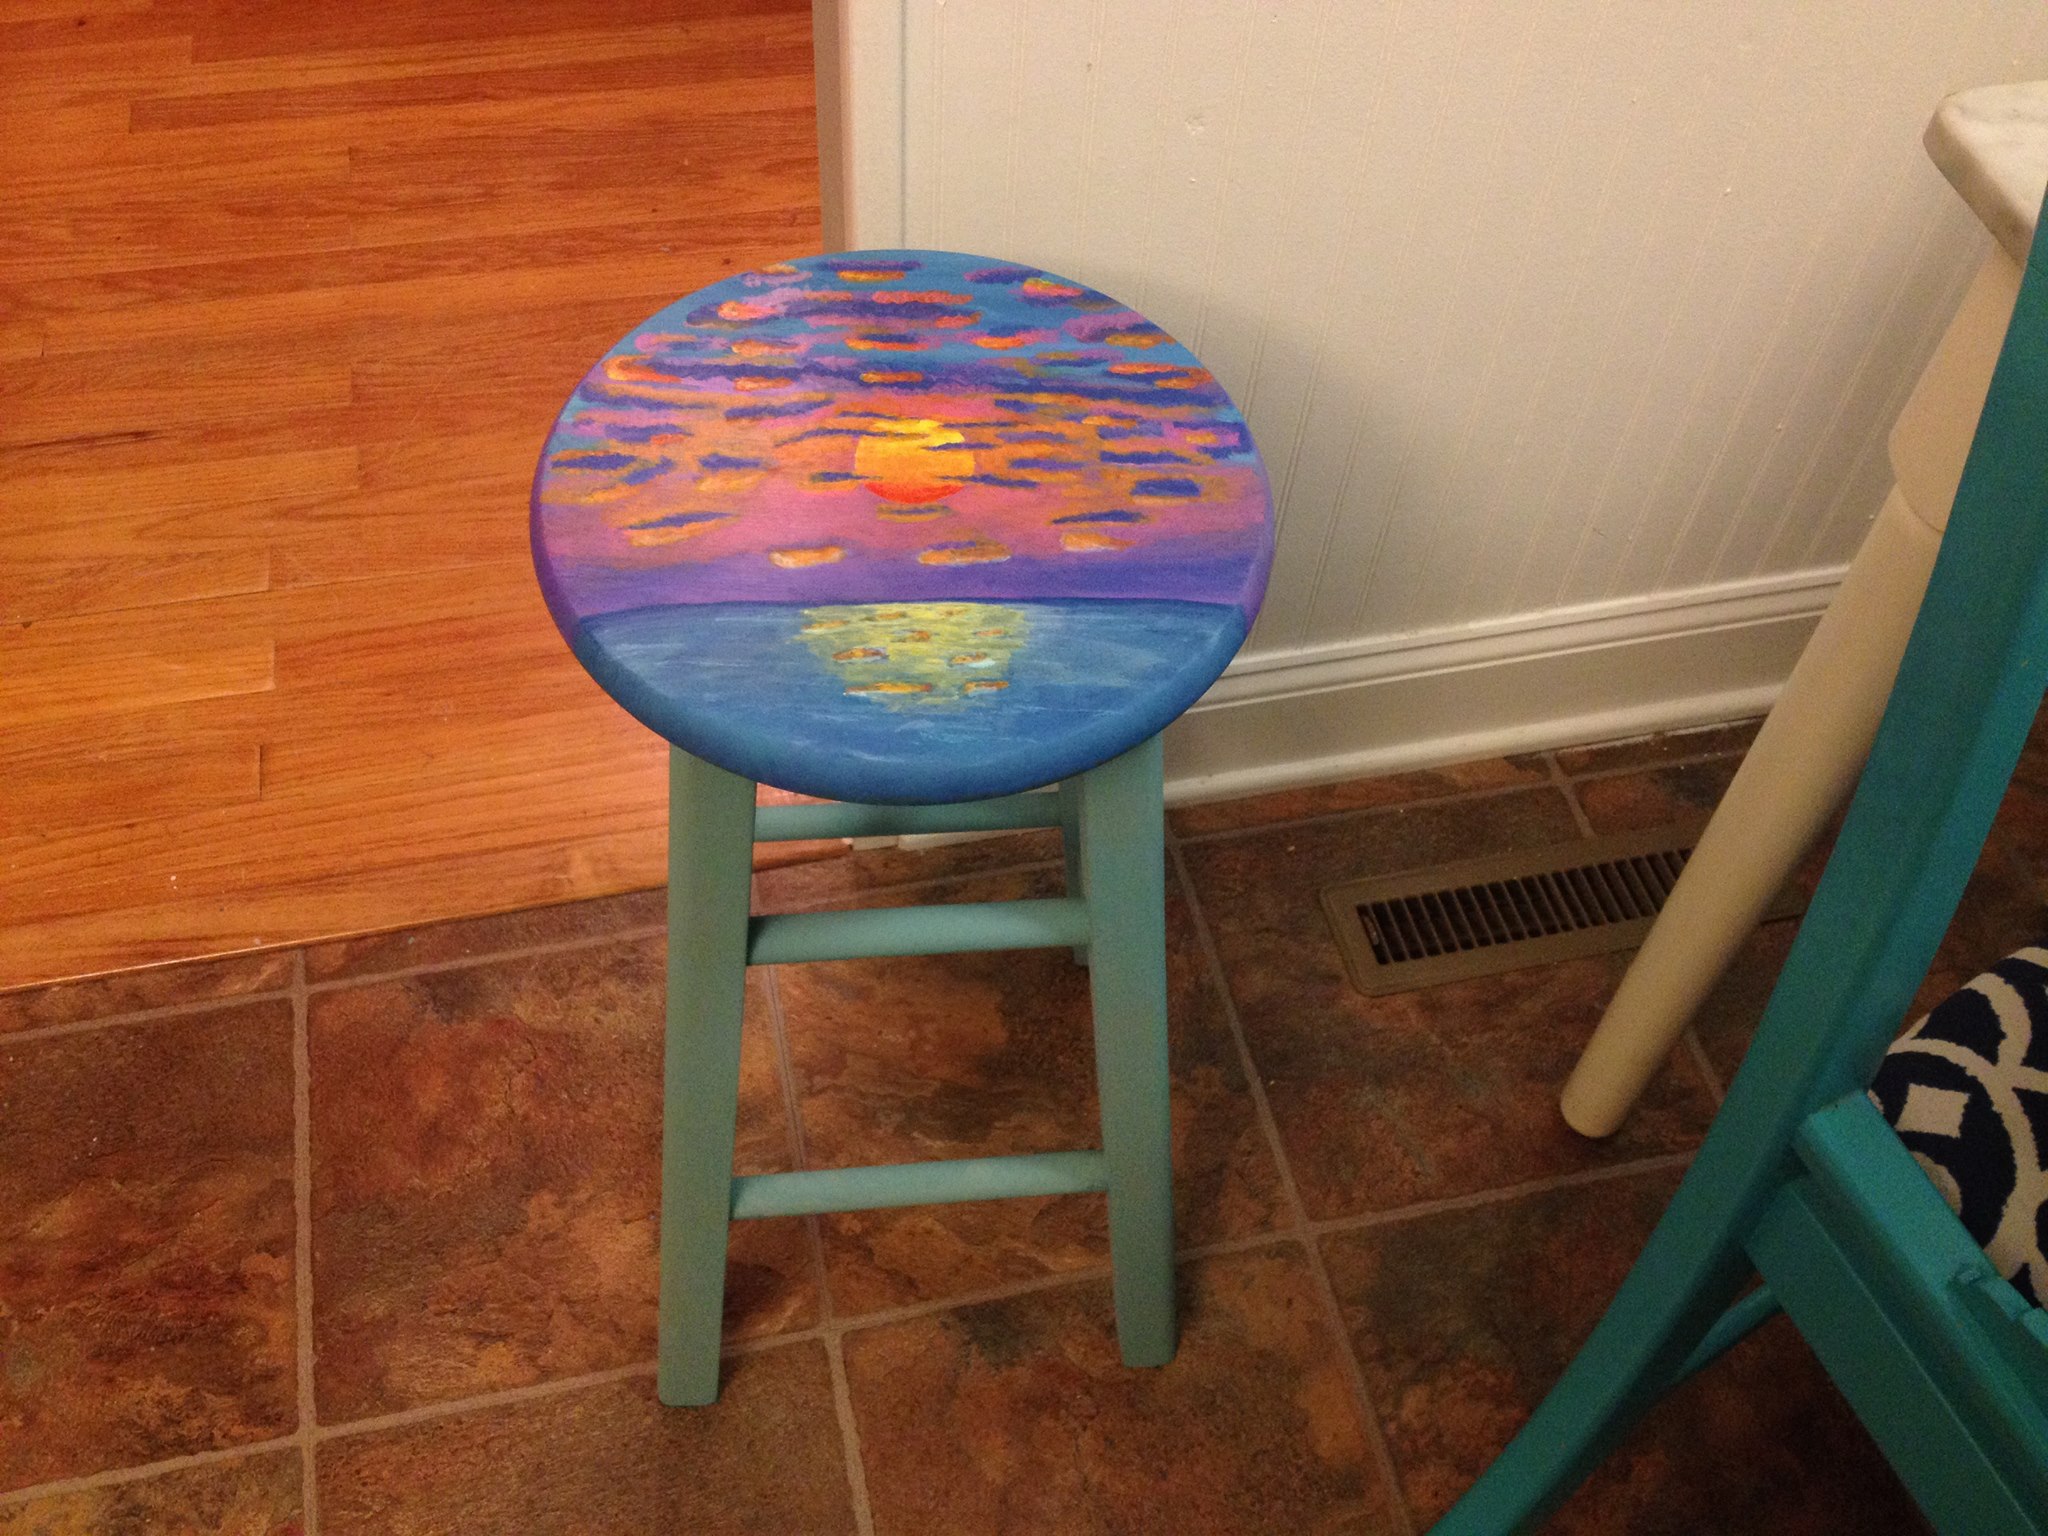
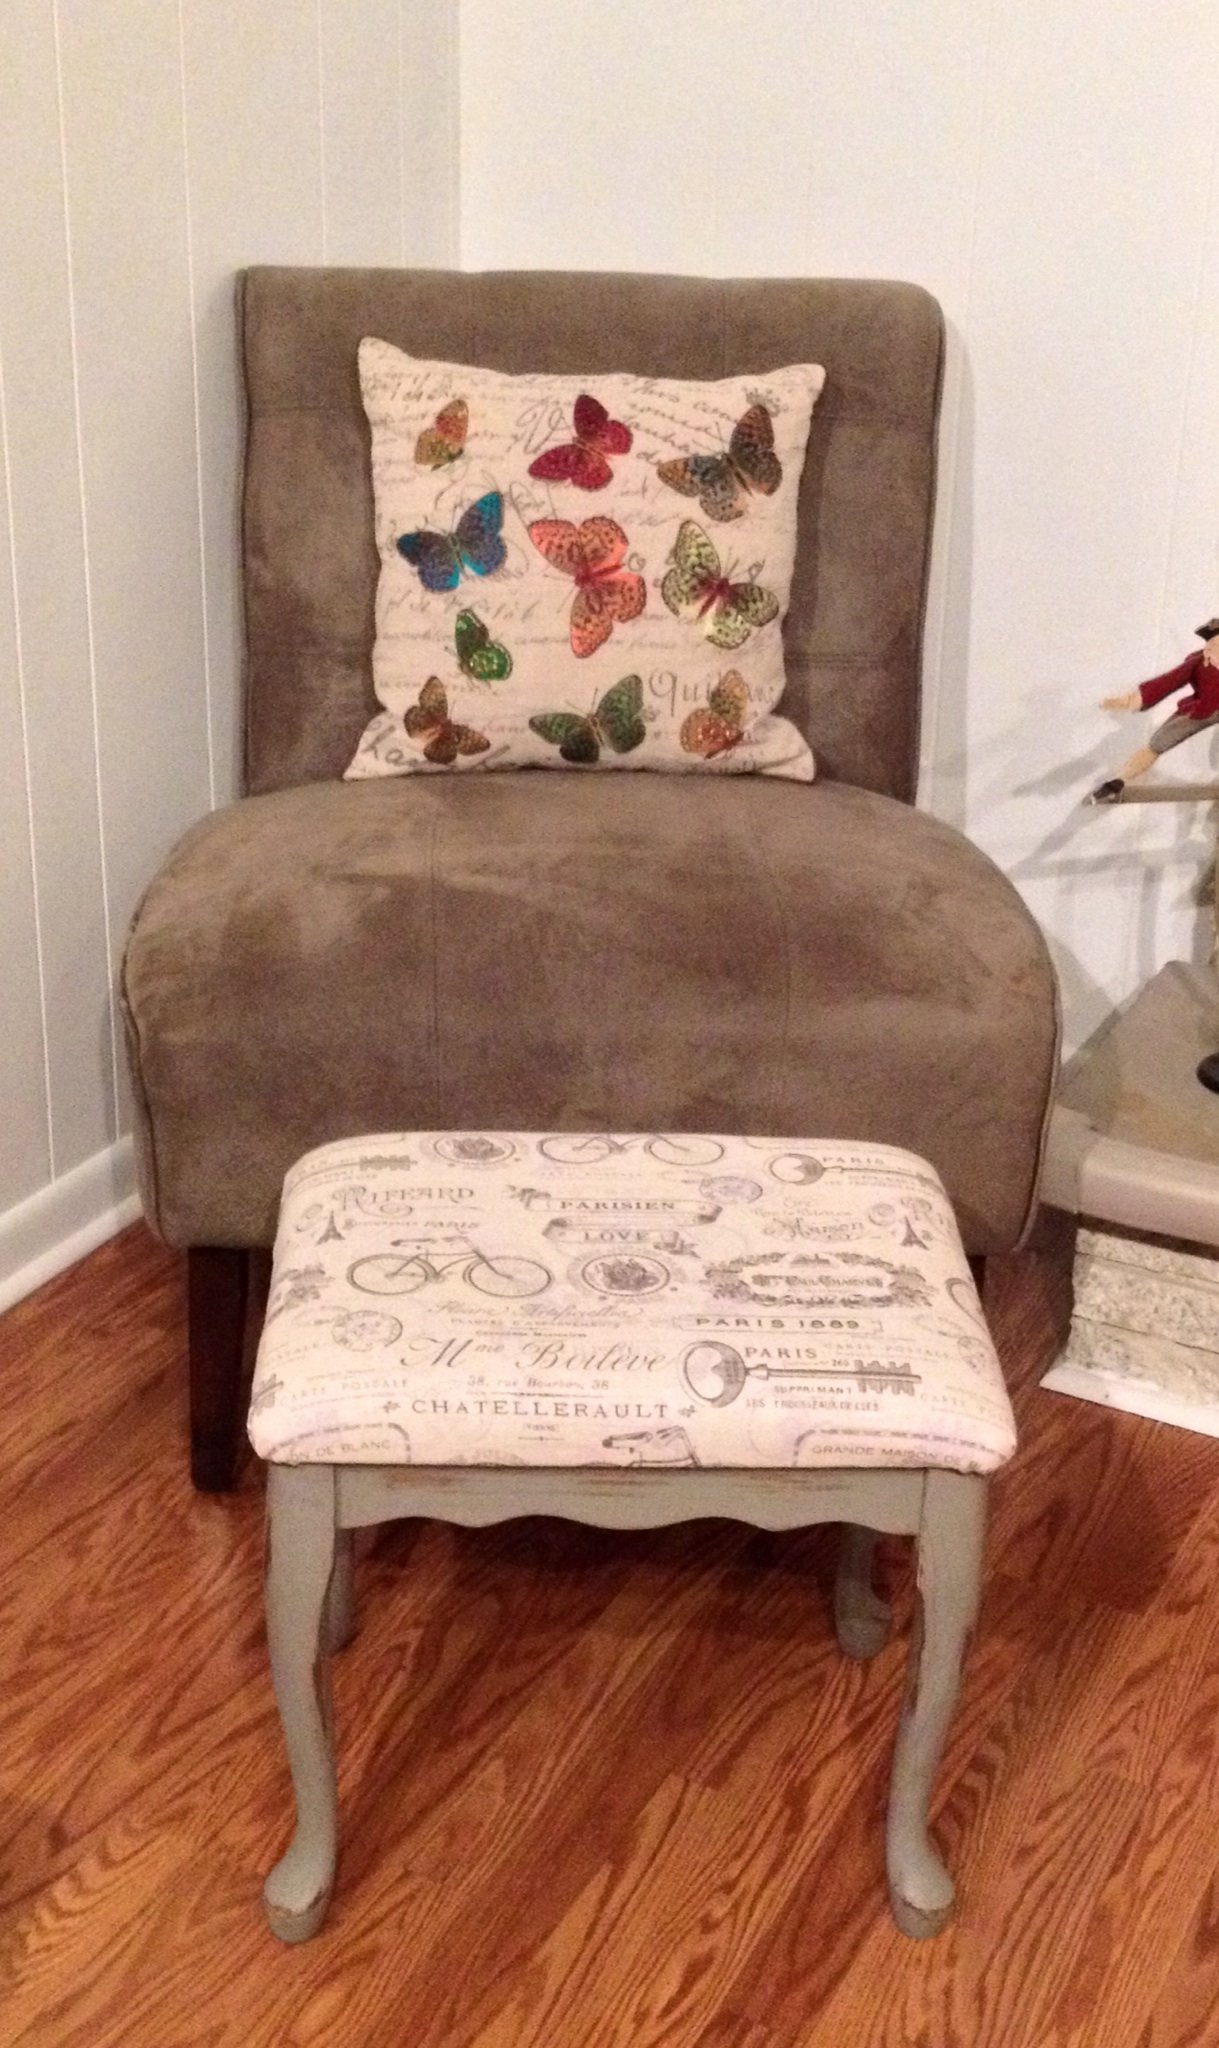
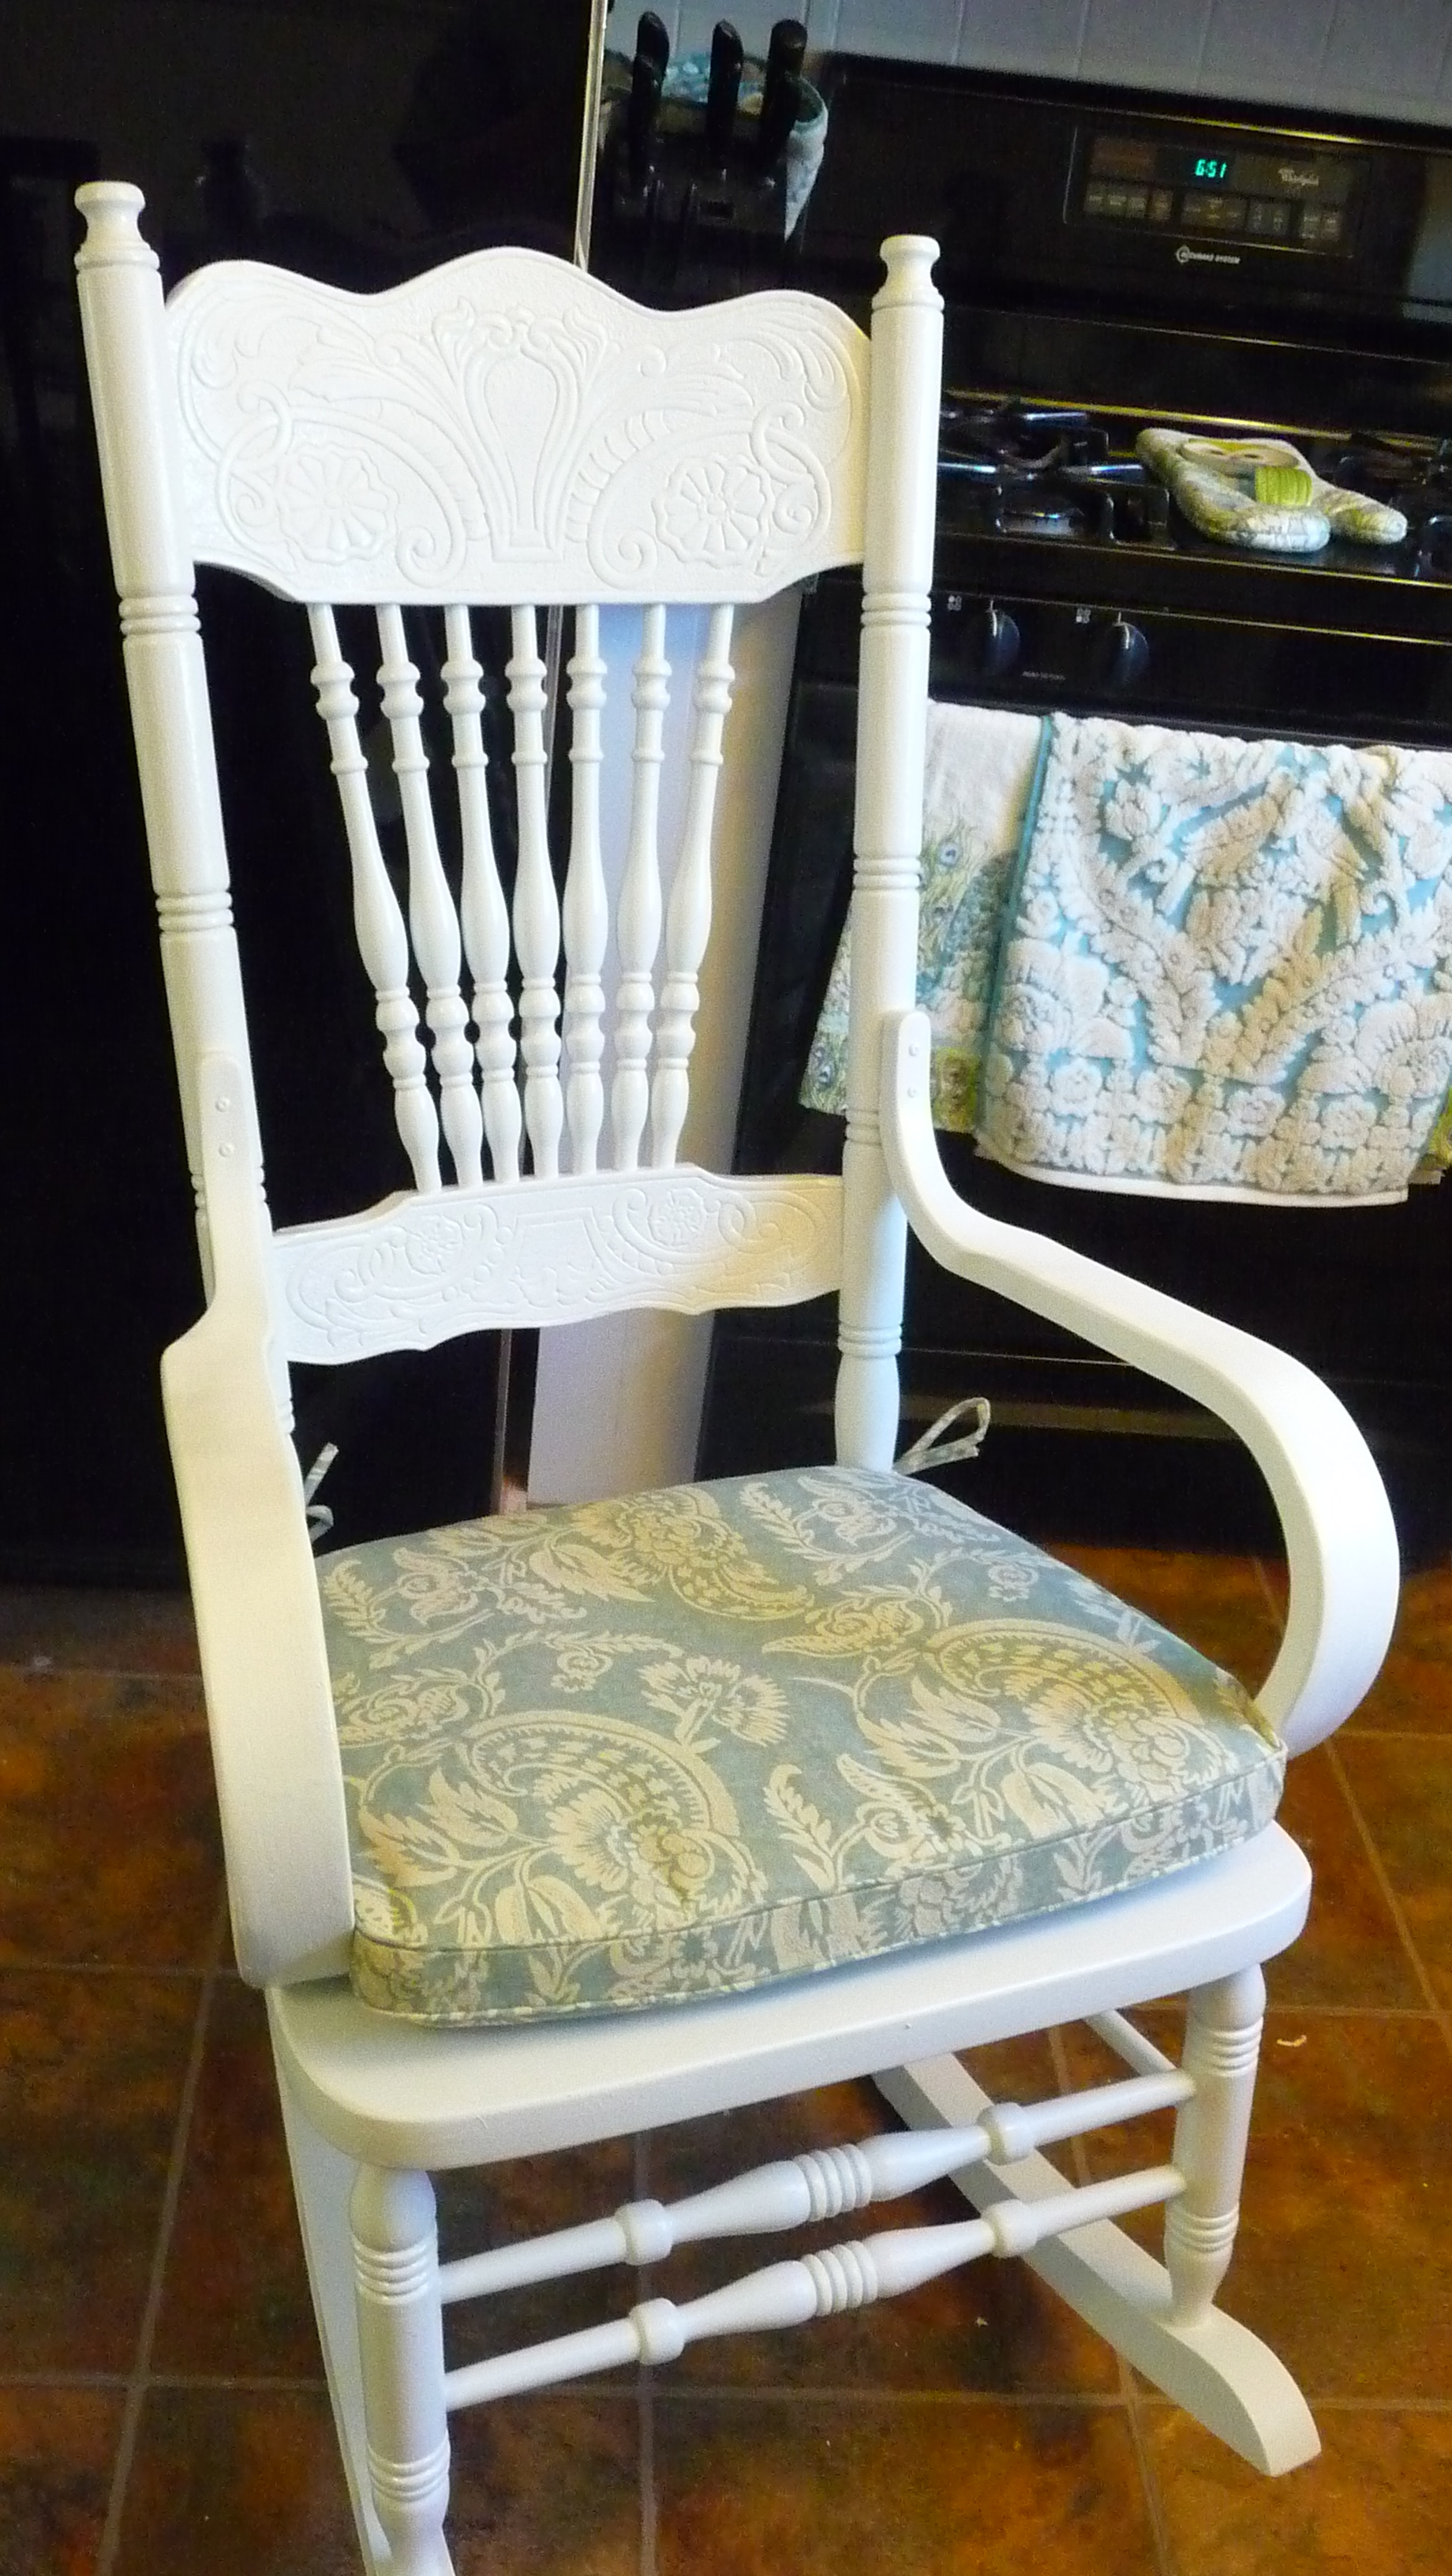
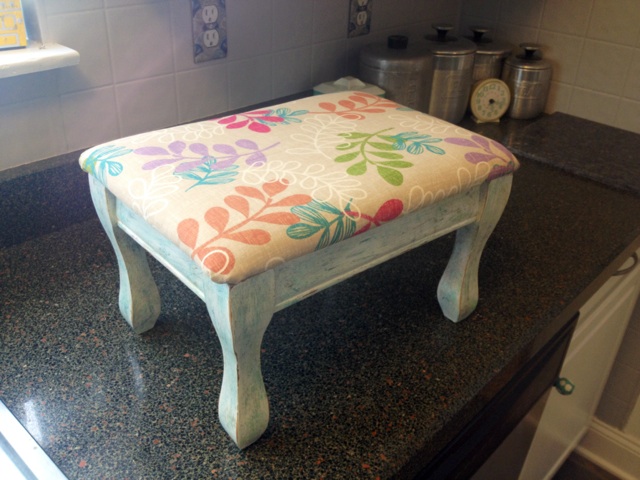
The colors used for it were Shabby Paints’ “Alamo White”, and 3 custom-mixed accent colors…a beachy slate blue, an oatmeal beige, and a mint green…I did the base coat of the white and then highlighted with the others. After re-upholstering the top, here is the end-result (and hubby and I both love it).

IMG_3717 IMG_3720 IMG_3722 IMG_3723 IMG_3727

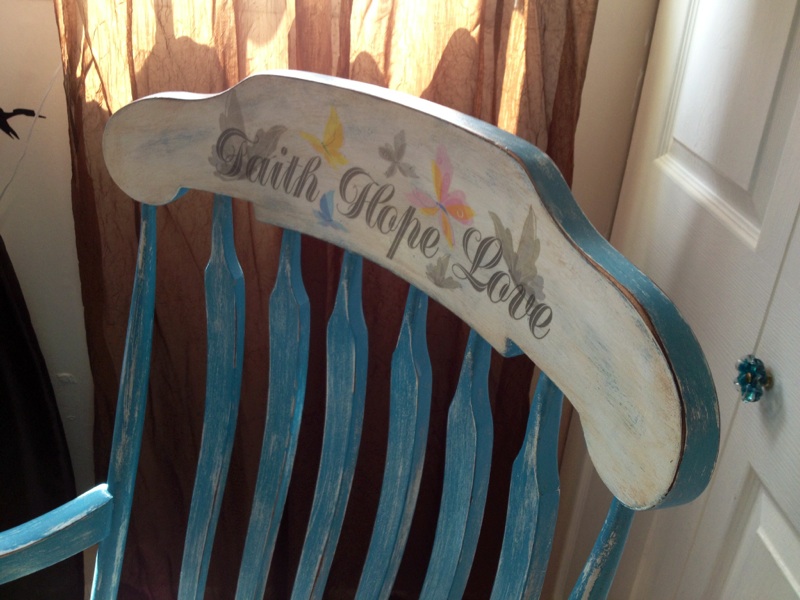
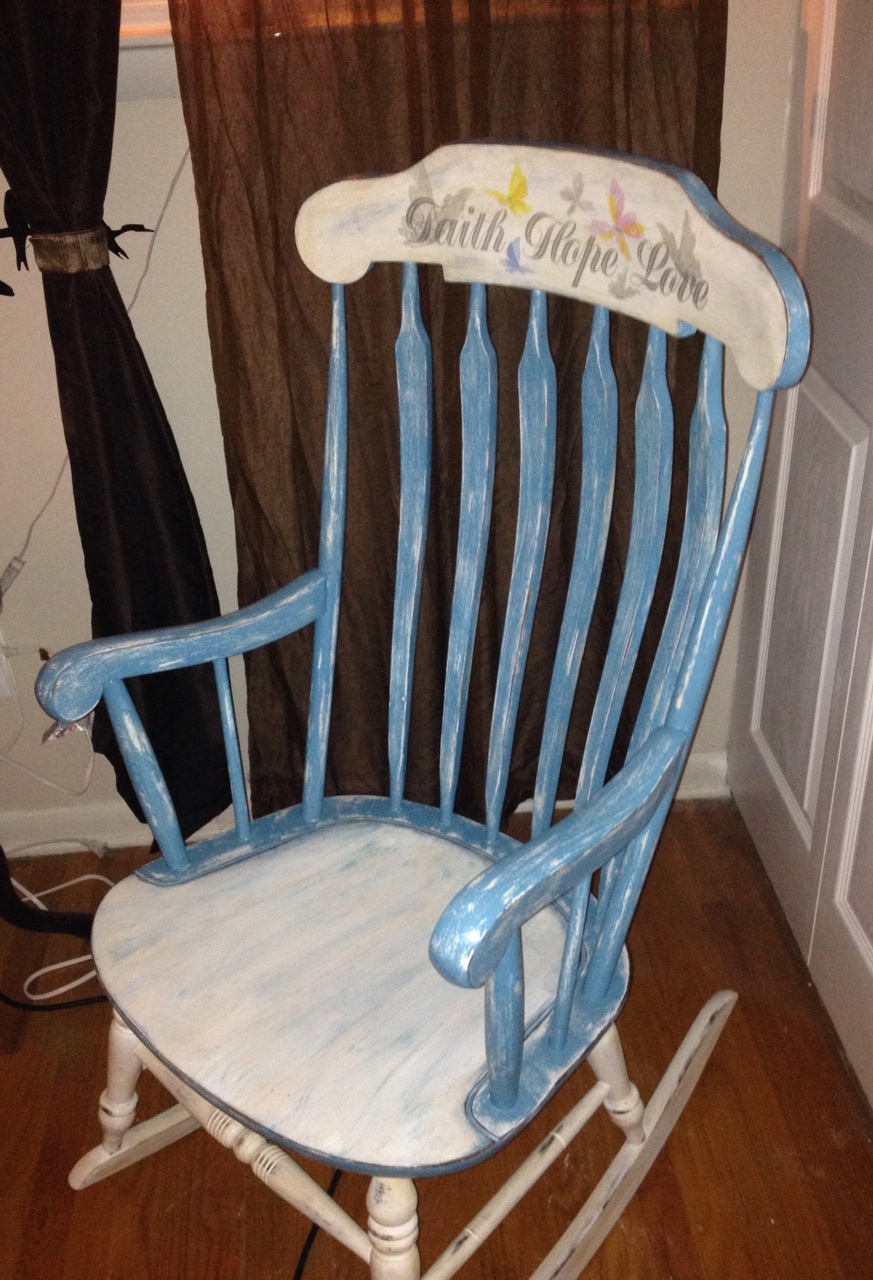
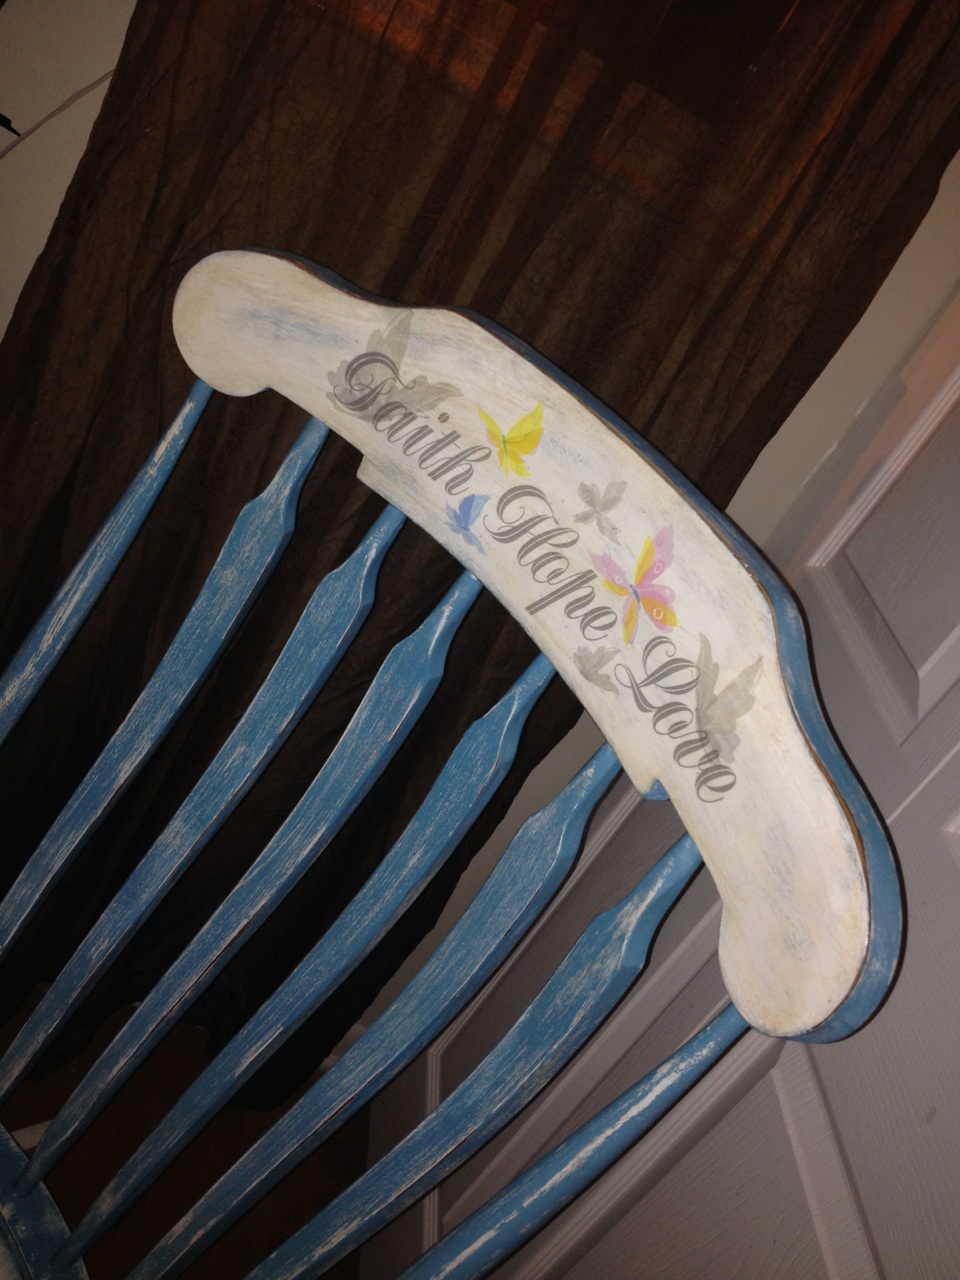
MUCH more fun! Not only will it work with the rocker (especially because her name is going on the top of the rocker in little-girl-themed letters when the time gets closer since the name is a secret), but it’ll make a great little seat for her before long. Here it is with the rocker before an accent pillow and name decal on the back:

IMG_3731 IMG_3734

Cost breakdown:

Footstool: Free 🙂 We sold off some items (like our game table set) from the second half of the den to make room for a playroom and space for the baby, and this was purchased with some of the money we got for it…it gave us a very nice Valentine’s Day out together at the Jersey Shore.

Fabric: $1’s worth of fabric purchased from a Walmart remnant. I still have half left for a small pillow or a seat-pad if I decide to make one. All tolled, this project would have cost about $8 if I were actually paying for it. Doesn’t get any better, does it?

Within a month, there will be an update showcasing the final product that is Babygirl’s fabulous nursery!

A Random Revamp

Standard

A while back, I found a vintage, mahogany Nichols & Stone rocking chair at my local thrift store for just $2.95. It was solid, sturdy, comfortable, and worth so much than I paid for it! Originally, I gave it a white, distressed chalk paint makeover with a rubbing of brown antiquing wax over top. I stenciled a design onto the top…it was pretty. But after a month or so, I kept getting the nagging sensation that the rocker, while beautiful, was not made over to its full potential. I wanted to try something a little more “out of the box” and unique, while still being something that wasn’t too “loud” (if that makes any sense).

Here is the rocker after its first makeover:
IMG_1787

In remaking it…I first decided to leave the base alone. I wanted to try a cool distressing technique where you seal the current finish well, paint one thick coat of color over top of the old finish (in this case, I used “dynasty blue” by Shabby Paints), and then distress/sand just enough to get down to the old finish, but not to bare wood like is typically done. The result would be an awesome shade of blue distressed to show the white/cream finish underneath for a unique effect. It came out better than expected! I then decided to leave the seat the same color as the base, but to add some subtle tones of blue in it for interest. The top of the rocker also got the same finish as the base to pull it all together, and rather than paint or stencil a design onto the top permanently, I opted to use a cute, $1 decal I had that can easily be removed for another or some other type of design in the future. The butterflies sold me! I enjoy this revamp far better than the original makeover I gave it!

People often think I am nuts as an artist to constantly change things out or move something to make room for a new piece, but that’s my process and it’s fun for me!

The result is something I am thrilled with:
IMG_2659

IMG_2661

IMG_2660

IMG_2664

IMG_2666 IMG_2668


Less elegant? Definitely?

More colorful and interesting? I think so. Thoughts?

French & Sensibility

Standard

(See what I did there, bibliophiles and Jane Austen fans?!)

For the record, I came up here to the office to blog, and was greeted with this:

Image

After coaxing him off with treats, I’m ready to go 🙂

I’ve got TWO projects to blog today 🙂 I’ll start with showing you the raw materials and starting costs. I found an awesome, thick pine trestle bench/end table at a thrift store. It was $7 and I had to have it! It was rustic and yet reminded me vaguely of a church pew.

The second piece is a nightstand that I got for free from one of my upcycle friends. I threw my back out getting it to my car, as it apparently is the heaviest nightstand on earth. The drawers were very swollen from the humidity and it needed a little work, but my goodness…those lines and details! I knew it would really be something when completed.

Here are my two “before” items:

Image

(ignore the mirror. That’s something I am making pretty and into a chalkboard for my classroom).

See? Great lines and tons of potential on both.

I was not feeling bright or loud colors for these two beauties. I did, however, know I wanted to play around with stencils. I decided on a driftwood/sand color for the trestle table and a deep metallic grey/brown for the nightstand.

First up, the trestle table!

I painted the whole piece in white shabby paint, and then roughed it up heavily. In order to get the color I wanted, I used a dark antiquing wax, which gave me that pretty shade I wanted. I found stencils I really liked that gave the piece a French vibe and stenciled the designs on in darker brown. Here’s the first coat to paint:

Image

Here’s the “after” waxing and stenciling:

ImageImage


It was finished here, technically. After looking at it again the following day, I wanted to tweak it, because I thought it was too distressed and I found the pattern of sanding distracting. After redoing pieces of it and then using white revax (varnish and wax) on it, I finally got my desired result:

Image

Image

Image

Image

SO happy with it now. I love it. How people overlook things like this, I will NEVER comprehend!


Now for piece #2, the freebie nightstand:

After a few days inside my house in the AC and some sanding along the drawer edges, the drawers worked again. It had no pulls, so I needed to tackle that too.

I decided that in order to achieve the color I was going for, I’d need a deep brown base in a flat color and a white top glaze.

For white glaze, I recently tried a product called white revax and it’s AMAZING! Seriously, it seals, protects, and glazes all at once. A little goes a long way and it’s something to keep on hand for any future projects. It’s also non-toxic, VOC free, and made in the USA (does it get any better than that?) You can read about it and buy it here:

https://shabbypaints.com/vax-revax/

For my base color, I went to Home Depot and chose a color from Behr’s Marquee line called “Well-Bred Brown”:

Image


Let me tell you, this paint is un-freaking-believable. It goes on like butter! I definitely recommend this line, notable for its stain and dirt resistance. Here is the nightstand after its base coat:

Image

Looks just like melted Hershey’s milk chocolate bars. Exactly the shade I was going for!

After this stage, I played around with the stencils and got this result:

Image

I love the corner flourishes, and had to put a tiny fleur-de-lis on there on the front. The design at the bottom I painted by hand to bring it out. I accented the stenciled parts with a small hint of metallic gold acrylic paint.

I actually nixed drawer pulls in favor of knobs, despite the fact that pulls likely “go” better for the piece. I found just what I wanted at Anthropologie…gold, vintage-looking mercury glass knobs on clearance for $2.95 each. Perfect!

Image

After sealing the brown paint with water-based poly, it was time to glaze it 🙂 After using the revax and adding my knobs, the job was done. Prepare for the photo blitz and cue “Isn’t She Lovely”:

Image

Image

Image

Image

Image


SO HAPPY WITH IT! The brown with the white revax gave me just the color I wanted.  slightly metallic grey-meets-brown. Love, love, love. Times a million.


Now for costs!

Project #1:

Trestle table: $7

Stencils: $2.40

Paints/sanding block/materials: Already on hand.

Total cost: $9.40


Project #2:

Nightstand: Free (thanks, Kelley!)

Sample can of Behr Marquee “Well-Bred Brown”: $3.94

Stencils: $2.40

Knobs: $2.95 each x 6 for a total of $17.70

Other poly/materials/brushes/revax: Already on hand.

Total: $24.04


How’s THAT for bargains?! I love them both and am so digging the French-inspired style lately. My ottoman makeover (previously blogged) bit me with the Parisian bug. So, see? All you need is some vision, and everything old becomes new again!


Til next time…


Salvage Server (in with the old)

Standard

By now, anyone who knows me at all knows that my tiger oak “problem” is legendary. It’s one of my favorite things on earth. Painting it should be illegal and punishable by water torture. I’m not all that sure that I’m kidding when I say that…


ANYWAY!


I noticed that someone on my “upcycle/DIY” FB group listed a tiger oak dining table (round) that opens for a leaf. It was huge, something like ’56 round! Furthermore, it damn near weighed a ton (seriously). It was way too large to be used in its current state, and I would never part with my Carrara marble kitchen table. It was too beautiful to pass up for $20. I knew I had to find a way to re-purpose it before Jeff got home from work and threatened serving me with divorce papers (again)!

After walking my house and brainstorming with my best friend, I remembered that I’ve always wanted a server/buffet in the dining room, but I don’t have one. A server too big and chunky would take up too much room, as I already have a mahogany Queen Anne set that includes a table with 2 leaves, 6 chairs, a curio, a hutch, and an antique side table.

How to turn this massive table into a server? Cut it in half at the bias, where it breaks apart for the leaf! The edge would sit along the wall under the partition, coming out in a demilune/half-moon shape.

Then came the issue of what the heck could serve as the base. Hubby and I then recalled that in the very back of our storage room was the mahogany, Queen-Anne end table that we used as a coffee table and ate off at for 4.5 years at the apartment. Not only would it match the dining room set, but it also has sentimental value. The fact that the top was all sorts of beat up didn’t matter, since we’d be securing the top to it anyway.

The issue was that the server would sit too low. A trip out to the shed turned up old pieces of pressure-treated 2 x 4. When we stacked them (piecemeal style), the height became perfect. After that came a lot of pre-drilling, broken drillbits, loud noises, very long screws, and the task of securing them to the base. The remaining movement and slight rattling was fixed with shims.

I refused to risk long screws going up into the tiger oak top, because I was unwilling to risk a screw coming through the table top. When something is 100 years old with a perfect patina, it’s never as easy as wood putty, filler, and new stain. Instead, we used liberal amounts of contact adhesive. We put the top into place on the base and weighed it down heavily overnight. It’s now nice and secure!

I love the character of old pieces and wanted to make the server look its best without messing with that. I applied a small bit of stain to chips along the edges, and then made a homemade polish with white vinegar and olive oil, massaging it into the wood. This is literally all that was needed. Here is the end-result. If you like it, we have an extra base and the other half of the table if you’d like to make one. I’ll unload the supplies cheap, just let me know!Image


Image

ImageImage


Here are some photos of the dining room, so you can see the lay of the land:

Image

Image

Image


I LOVE this project. It was fast and easy with two people and it was a fun way to re-purpose an antique. I love it, and it will get plenty of us during dinners and parties. Not bad for $20!

Roadside Rescue Makeover: ANOTHER Chair!

Standard

En route home the other night, my husband noticed (mere nanoseconds before I did) 2 chairs and a dining table at the curb by our neighborhood. I can spot quality a mile away, and what caught my eye first was a beautiful table base, country-looking and trestle-style. I typically get eye-rolls, loud sighs, and joking divorce threats when bringing salvaged furniture into my life/home, so I was shocked when he willingly turned the car around to look! There was a BEAUTIFUL, thick, high-quality dark pine dining table with two chairs. The chairs were lovely, with a finely-detailed Windsor design that was rustic and yet elegant. I needed one (naturally).


Whoever went home with the dining table is a lucky person indeed!


Shocker #2 was when my husband said “I think we can fit both in the car”. I had to make sure I heard him right! Being practical, I said we should take the better of the two chairs. So we went home with this beauty:Image


Oh, the potential! I do not like to refinish dark pine, and prefer painting it (not my usual). Looking at the details, I decided on a shabby paint job, but was torn between an oatmeal shade with antiquing wax like this $3 thrift store table makeover (I did this last week):

Image

OR this robin’s egg blue shade that I used to make over my $0.50 salt and pepper mills:Image


The blue idea won out, mainly because it’s the final chair I could get away with squeezing into the hodgepodge/ quirky eat-in area! It’s softer than the screaming turquoise I used on the other chairs and I’ve been all about blue lately! That, and I had plenty of the paint left over, so I did not need to buy any supplies!

Here she is after being painted with the blue chalk paint:

ImageImage


See? Pretty even without being shabbied up!


After I took a sanding block to her, this was the result:


ImageImage


I had no clear furniture wax left, so in an effort to keep this project completely free, I used some semi-gloss water-based poly I had left over from the floors. I used this to seal it, since it would be expecting frequent use.


This was a TOTALLY free project! Free chair, leftover paint and poly, leftover paint brushes and sandpaper. It doesn’t get better than that!

Here it is in its “home”:

Image

“From that thrift shop down the road!”

Standard

I’ve had a very creative evening! I’ve been feeling extra inspired lately, and two oh-so-fabulous finds this week at my local thrift store were my muses 🙂

Item #1…a 24-inch wood stool for $1.95? YES! I am just under 5 feet in height, so this is perfect for me.Image


No artsy chalk paint job for this one! I decided to celebrate the start of (unofficial) summer by going with a hand-painted, summery, and colorful design. I chalk-painted the legs a Tiffany blue, but am considering doing an ombre blue design down the legs to add some color variance…we shall see. Here’s the end result:

Image

Image

I’ve always thought of myself as having absolutely no artistic ability, but I may need to rethink that one.

My second thrift store find was an AWESOME end table with a beautiful marble insert. It’s by Mersman Furniture, mid-century or so, and was screaming out to me for a makeover! Best of all…I got it for just under $3. I mean, honestly…how do you say no?! Here she is:


ImageImage

Look at those details!!

I decided on chalk paint, layered in oatmeal and white, and then a dark brown antiquing wax/glaze. I wanted the end result to resemble old wood or driftwood, but go nicely with the marble. Here’s the midway point, with the layered paint job (I had no white chalk paint left, so some white acrylic paint did the trick) and before the distressing:Image


Fun, but incomplete. I wanted the details to jump out and the color to darken. I took a sanding block to the piece to distress all the edges and details, and then (for the first time), I gave antiquing wax a try. The color I had was dark brown, and this is the brand I use (I also love their chalk paints, and you can get them for about $4 each after a coupon at Joann Fabric):Image


After taking a sanding block to the painted table for heavy distressing, I used a lint-free cloth to give the entire table a thorough wax coating, rubdown, and buffing. I was hooked and obsessed with this product from the first swipe…seriously, it’s great! I will use it on some other pieces.

Here are photos of the lovely end result of the table, some with flash for details, some in natural light.

ImageImageImageImageImageImage

I’m happy with my decision to let this table rock the shabby look. The color pairs nicely with the beige marble insert and is neutral. It will serve as an end table next to the chaise on my sectional. The marble means no coasters are needed! For my best friend, the sectional is the equivalent of “Sheldon’s Spot”, so she will probably get the most use out of it!

I paid just under $3 for the table, and used supplies I already had on hand to redo it.

::shakes head:: $3. Disbelief.

Here are my other fun finds from that trip (where I spent a whopping $8):

Fun, cute vintage enamel colander for $1Image


And a great tabletop ironing board (that matches our kitchen) for just $2…we really needed one, as our other one that we’ve had forever broke and bent in half:

Image


Everything you see in this post cost me $8. Un-freaking-real. Thrifting/upcycling are a way of life for me. It’s recycling at its finest 😉


Until next time…

Bonjour, Paris! (A fast, easy, cheap little makeover)

Standard

When I saw a small ottoman/upholstered footstool for sale for $5, all wood with padding and plywood intact…I pounced! There’s no limit to what could be done with it. It’s funny to me that the makeover ended up being neutral, demure, and sophisticated rather than vibrant, bright, and fun.


I’m fairly certain the culprit is “The Other Boleyn Girl”, which I am currently re-reading for the fourth time. Maybe it’s the sense of artistocracy, Anne’s French sense of fashion, or the courtly revels, but I’ve had Paris on the brain today.


I decided I wanted to budget between $8-$10 total for the project, including the ottoman and supplies.


Well, $3 in fabric later (I had also bought a burlap fabric, but it didn’t “fit” as well as this cotton twill), leftover chalk paint and paint supplies later, and I had my final result!

I used a bit of semi-gloss water-based floor poly to seal the chalk paint, which I distressed using an old sanding block. When keeping project costs down, GO SHOPPING IN YOUR OWN HOUSE.


Seriously…it’s the best way to do it! And chalk paint is environmentally friendly, non-toxic, and safe, so it’s a good choice for virtually anyone. Roughing it up is a lot of fun, and you can play around with it to achieve your desired result.

I did one good coat of oatmeal colored chalk paint and then roughed it up.


Here is what I started with:

Image

Bad fabric, bad color (it did not know whether to be maple or mahogany). However, good bones!

Here’s the frame after paint and before distressing:

Image


And the final results:ImageImageImageImageImageImage

(That last photo, with the flash on, highlights the distressing).

I fell in love with that fabric straight away…old bikes, skeleton keys, French script, the Eiffel Tower? AND cheap? Sign me up! It is a cotton twill, as previously mentioned, not heavy tapestry or thick fabric, but it works perfectly on this piece. I’ll use my $2 piece of Parisian burlap for another project in the future.


So to recap costs:

Footstool/ottoman: $5

Parisian fabric: $3

Leftover paint, brushes, poly, sanding block: FREE 🙂

Project total: $8


Here it is in its new home, next to a fabulous $15 overstuffed chair that I got on Craigslist last summer. The butterfly pillow is from Pier 1 and features French script that pairs nicely with the ottoman.

IMG_1568

Can’t beat that, can you?

Image

Image


Until next time 😉

Kitchen Phase 2: Mission Accomplished!

Standard

Our kitchen has come such a long way since we bought our house 6 months ago! It went from looking very 1970’s to sleek, beautiful, and fun. We got our appliances yesterday, so I wanted to show you the way everything looks, because this is the look that will stay for a very long time (until we tackle phase 3, which is knocking down a wall, having an island built, and having a mosaic backsplash put in).

As it stands, even without phase 3, the kitchen is officially fully updated!

Phase 1 involved a large amount of paint and a gargantuan amount of elbow grease, but it was also cheap! Yesterday, appliances went in…and though I can’t call that a “cheap” update, the price we paid for them was outstanding! When you see our kitchen photos from move-in day and from yesterday, you’ll be amazed at the transformation.

I talk often about “good bones” with a house, and I’ve said it numerous times about our kitchen. The layout was workable. There was an eat-in area. The 1995 oak cabinets were solid wood and in good enough shape to keep. They had Granite Transformations put in the counters, and the color was close enough to what we wanted that we decided to keep it. The beadboard on the walls was a plus, just ugly and unpainted. We had a good amount to “work with” and make better. Could we have ripped out the bulkhead, counters, backsplash, floor, beadboard, cabinets, etc? Sure! But I didn’t want to literally sink money into a major renovation. It works wonders for some, but the reality is that we’re both just too cheap and too DIY! 😉

I must say, my favorite “fix” was taking a shiny, oddly-textured early 90’s backsplash and painting it. It was shiny, white, oddly-textured linoleum and some tiles had weird beige bundles of flowers and wheat on them. I had the idea to try bonding primer and paint, and now the once-ugly backsplash matches our beautiful walls. It was a free update because we used the paint we had on hand, and I couldn’t be more pleased. If you don’t want to spend between $500-2000 (depending on your choices) for a new backsplash, consider this easy option.

I’ll walk you through the transformation of our kitchen from the time we first moved in up through today:

ImageImageImage

See? Good bones indeed, but in need of updates.

Here’s the result after we got our paint on and rid ourselves of the headache-inducing screaming yellow:

ImageImageImageImage

The walls looked a million times nicer with the blue-grey color, but that beadboard looked even worse. The solution?

Image

SO. MUCH. BETTER.

Then we decided to paint our oak cabinets white:

Image

Really brightened things up, didn’t it?!

Onto appliances…our dishwasher and fridge were from ’91 and the dishwasher and microwave from 2000 were both not working well. The fridge was shiny black, chrome, and had cream sides. 1 fridge, 3 colors. It drove me so crazy that we painted the sides with chalkboard paint to liven it up to be something I could live with until we could replace all the appliances at once:

ImageImage

I highly suggest that update!

As far as appliances go, let me preface it all by reminding you that I’m cheap. My husband is also cheap. I may have caviar taste and like nice things, but I’m cheap! We couldn’t bring ourselves to buy appliances until Black Friday sales began popping up, as that tends to yield the best deals. I know people who spent 4 grand or more on appliances, and the thought made my heart palpitate. I came up with a budget of $2,000 for the fridge, dishwasher, over-range microwave, and gas range. The goal was good, basic appliances. We knew stainless steel was the look we were going for (sleek and industrial). Our original black-and-gray-and-white kitchen idea morphed into something with many pops of teal blue and something a lot more fun… with a punch of personality!

Home Depot had a “Pre-Black Friday” ad out and I saw exactly what I wanted at the price I wanted to pay. Furthermore, we got no-interest for 6 months (I like paying $500 a month with no interest way better than paying in cash all at once), free delivery, free haul-away, and installation for $2,000 and some tax. We went with Frigidaire. I did the best measurements I could and the fridge ended up being slightly too tall for our “built when fridges were smaller” cabinets, so hubby made a few small cuts and the crisis was averted.

Anyway, we’re more than pleased with the look. The fridge is so much bigger than the last one! Luckily for my parents, my dad was in the garage when their older-than-me spare fridge sparked a small electrical fire and died or “took a crap” in the eloquent and elegant words of my dad. Our chalk-board-sided black fridge goes to them as their new spare 🙂

Once more with “before”:

l5c660444-m5x P1070729


And now, our current kitchen:

ImageImageImageImageImage

And of course, the fun and new eat-in-area highlighted in my last entry:

ImageImage

The best part of it all is that all of these updates combined cost us just $2,500 between lots of paint, elbow grease, salvaging items for free, a Craigslisted marble-top table and chairs, re-purposing current items, and appliances. It really doesn’t even look like the same kitchen. I couldn’t be happier, honestly. “The Anonymous Kitchen” is my pet-peeve (the same one everyone has, with the dark cabinets, tile backsplash, neutral walls, beige granite, and stainless appliances), and we have one that nobody else does thanks to DIY skills, imagination, and a very small amount of money (as kitchens go). “The Anonymous Kitchen” might be gorgeous, but this one looks and feels like us! I’m a “warm” person…so this is the first cool-toned room I’ve ever had or done. I enjoy that the kitchen has so much personality and stands alone from the rest of our home without clashing from the “feel” of it, thanks to the personalized touched and unique items.

::Happy warm-fuzzies::

Until next time…

Trash to Treasure: Rocking Chair

Standard

It’s been about a week since I’ve updated the blog. Please excuse my lack of attention! Life has been extremely busy, and I’ve been celebrating a fantastic (and long-awaited) new job offer!

A week and a half ago, my husband was on his way home from work and took a shortcut through a nearby neighborhood. Someone had put this out to the curb with the trash:

Image

An old but nicely detailed hickory rocking chair. It needed tightening and some new screws, which hubby so kindly did for me!

I loved it immediately and knew I wanted to make it over and put it in my guest room/future nursery. I have reading chairs all over the house and thought this room needed one as well.

I usually always choose to refinish wood and almost never paint it! I am a wood and furniture junkie and think the grain and quality of wood comprises much of the beauty of a piece. My exception to the rule is kitchen cabinets, because I love a light and bright kitchen!

As soon as I looked at the rocker, I thought “WHITE!”. It just needed to be white, period. I got started immediately. I painted on a coat of my trusty bonding primer after rubbing the chair down with mineral spirits on a clean rag. I then used up some white trim paint that we had left but was unhappy with the coverage, which was uneven around the fine details. I then switched to Rustoleum’s spray paint/primer:

Image

The rocker was old and worn in some spots, so it did not take the paint completely evenly (and I strive for perfection), but all in all, I was pleased with the results. It got two good coats with a 3rd and final spray in some spots.

Next up was choosing a chair cover. I searched first at Pier 1, one of my absolute favorite home stores. I didn’t see anything I loved for a price I wanted to pay (I’m cheap). I then switched my search to Pottery Barn, another favorite. I got lucky when looking for clearance chair cushions. This color, the blue and white “Maia” pattern, was what I had decided on originally:Image

However, I then came across the Tiffany-blue colored “Alessandra” pattern and fell in love. It was exactly what I was looking for, and even better…less than half-price with free shipping to boot! I bought the largest size cushion because the rocker is pretty large and I wanted the whole seat covered. Let me tell you…it just BARELY fits on. It does, but any bigger and it’d have been too large. Note that if you shop Pottery Barn and find something you love on clearance, you cannot return the item.

Here are the results. Not bad for a side of the road find, right?!

ImageImageImageImageImageImage

And, of course, here are some photos of the chair in its “home”…the guest room (click to enlarge them):

P1070979 P1070980

The total cost of this project was a mere $20!

Next time you see something with real potential on the side of the road, consider taking it home and turning someone’s trash into your treasure! It’s inexpensive, easy, and you end up with a beautiful item for your home!