Ho-kay! So…
I won’t even mince words. I have done a LOT of cool things to my house since I bought it in 2013. I’m not sure why this little, silly, eccentric change is such a big deal to me, but it is! Like all great ideas, it began as a tiny ghost of a thought that snowballed and spiraled into something totally different…and far more wonderful.
The original plan was a pallet wall in the half bath, with rustic, unfinished wood. Then, I thought that maybe I should also put the pallet wood on the bulkhead where the main pipe is stored in the ceiling. Then I got to thinking I could salvage some of the pallet planks and paint them bright rainbow colors on the bulkhead. THEN, after taking the idea to my husband, he suggested scrapping the pallet wood and going for a more streamlined look with 1 x 2’s painted and placed together.
I’ve always been in love with (and truth be told, kind of obsessed with) rainbows. What’s not to love?! I am a colorful person, I love color in my house, I love all the things rainbows mean and stand for, and they simply make me happy. Once the idea of having my own, personal rainbow in my own home took hold in my mind, I couldn’t let it go.
I searched high and low, but could not find any photos of exactly what I wanted or planned on doing. Either it hasn’t been done or (more likely) simply hasn’t been posted. But this little bulkhead was the perfect place for a small but brilliant makeover. I decided early on to follow the ROYGBV color scheme, but after hubby had measured the bulkhead, he said that to sit the colors/lumber boards all up against one another, it was going to require 8 colors! After some thought (and a lot of mixing of paint), I decided to add a terra-cotta color after the red (that matched the half-bath perfectly) and a cross between robin’s egg blue and turquoise after green, for a total of 8 colors. Because the boards were pre-primed, my job was easy! I bought acrylic paints rather than latex for this project. The hardest part was spending the time to mix colors to make them exactly, perfectly “right”.
Here’s the top half of the rainbow being painted:


And the top half of the rainbow all finished:
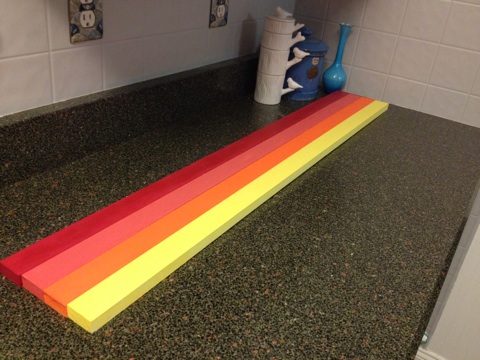
::warm fuzzies::
(Looks like a sunset!)
Then, it came time to begin the bottom half:
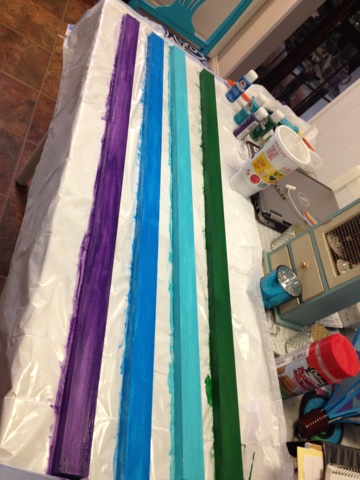
(that was after coat 1)
After a few other coats, here is the whole rainbow assembled together:
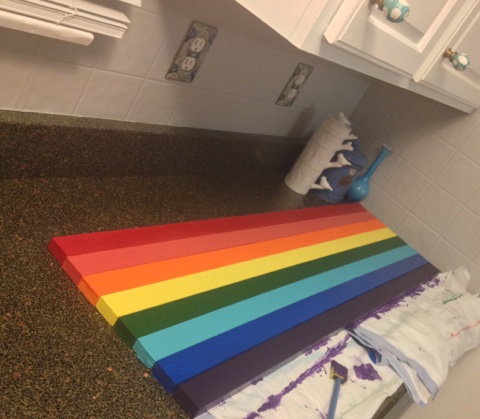
Now, let’s play “spot the problem”.
SEE THAT GREEN?! EEK. Way too dark! After several tries mixing to get the color I was going for:

That’s more like it!
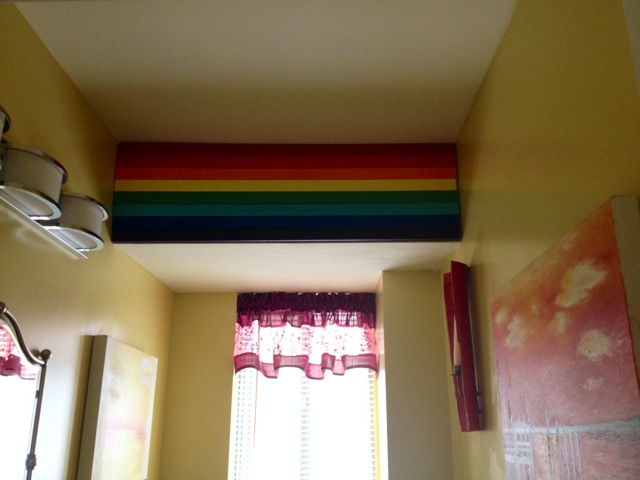
Once more, here it is with all of the finalized colors:

And ::drumroll, please:: Here is the completed accent wall, up on the bulkhead in the half-bath.
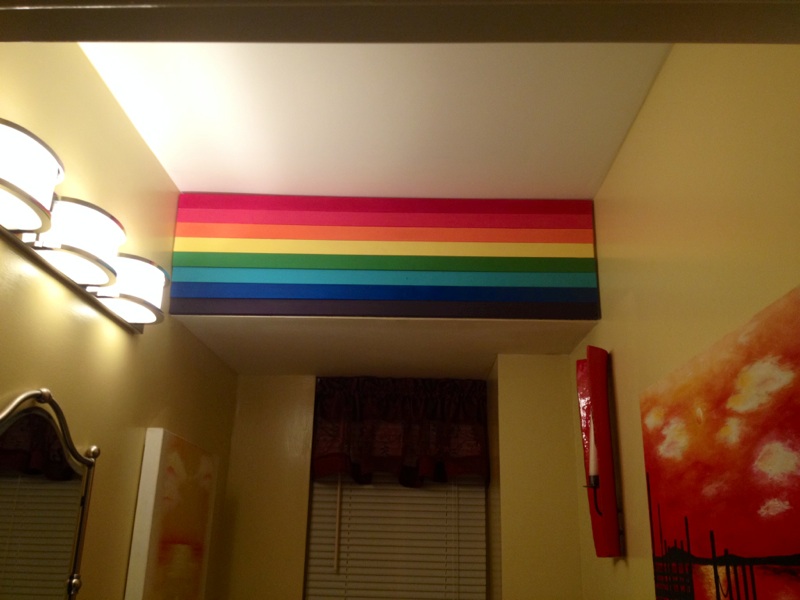
I realize that to a lot of people, I am the layman’s term for “crazy”. However, I love my rainbow accent wall and I love that I have my own rainbow at home.
One of the best parts? Between materials and paint, the whole cost of the accent wall was a mere $15! If this isn’t $15 of fun, I don’t know what is 🙂

The problem with sharing is people critique it. The problem with NOT sharing is people miss out on an idea that could be the best idea yet!
Can’t argue that logic! The key is to do what makes YOU happy, that way you’ll never care if someone else doesn’t like it 🙂
By the way, I am so happy you found your way here, because I fell in love with your blog at first sight, and I’d have never seen it otherwise. Everyone needs color and fun in their life!
That’s an awesome compliment! Love at first sight 🙂
And oh do I need colour. Thanks for popping by!
Beautiful!! Paint choice were spot on!
Thanks Mom, and thanks for your help picking them out!