When we got our house, our kitchen had extremely good “bones”. It is a nice size, there is a good amount of storage, the seller put “Granite Transformations” counters in (granite fabricated to lay over your existing counter), and there is a stainless steel sink with a fabulous faucet. The floor is a slate laminate that is newer and in great shape.
All in all, not bad and definitely workable!
Here were the downsides:
1.) Walls that were so 1973 mustard yellow that looking at them actually hurt my eyes.
2.) Dated appliances (the 1991 black fridge with creme sides and an old dishwasher that I don’t think has that much “juice” left in it). I will say that I have a fairly new black Whirpool gas range that is very nice!
3.) Oak cabinets with bright gold brass knobs. I don’t like the color of the oak, but will say that these are extremely high quality cabinets that probably cost a ton of money originally. All joints are dovetailed, the craftsmanship is excellent.
4.) An absolutely hideous “backsplash” of shiny, textured linoleum tile with tan flower bouquets on some of them.
5.) Weird, unpainted beadboard in a knotty-wood design.
It just looked really, really dated. And too dark!!! There was way too much wood and it didn’t feel cheery at all (despite the blazing yellow). And it was totally missing what is really important to me…
Whimsy! Where was the element of fun, the touch of the unique? Nowhere to be found!
So as always, here are some “before” photos for you to cringe at:
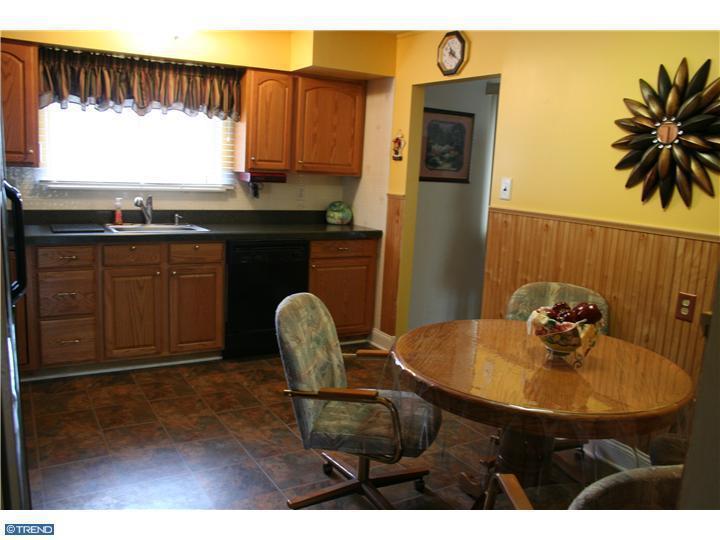


See what I mean? Good bones, bad choices. Dated, dated, dated.
I am a “warm tones” person through-and-through! Warm colors feel homey, comfy, and inviting to me. Despite this, for whatever reason, I have always dreamed of a white kitchen!
Before tackling the cabinets and the beadboard, I freaked out one day and couldn’t take the yellow anymore. Jeff and I picked out our paint and the color we went with was Olympic’s “Secret Passage”. We got to work painting the kitchen right away(which was a very challenging room to paint, by the way).
The end result was a color that is my favorite color in the house! To say I love it would be a major understatement. It is a thousand times better, and I no longer want to shove bamboo shoots in my eyes every time I enter my kitchen.
Here is what our kitchen looked like after we painted:

HUGE improvement!
To keep the proverbial ball rolling right along, we decided to paint the beadboard white as our next kitchen project. We had some leftover bonding primer from the den and leftover trim paint from the baseboards and trim on the stairs. Here was the result: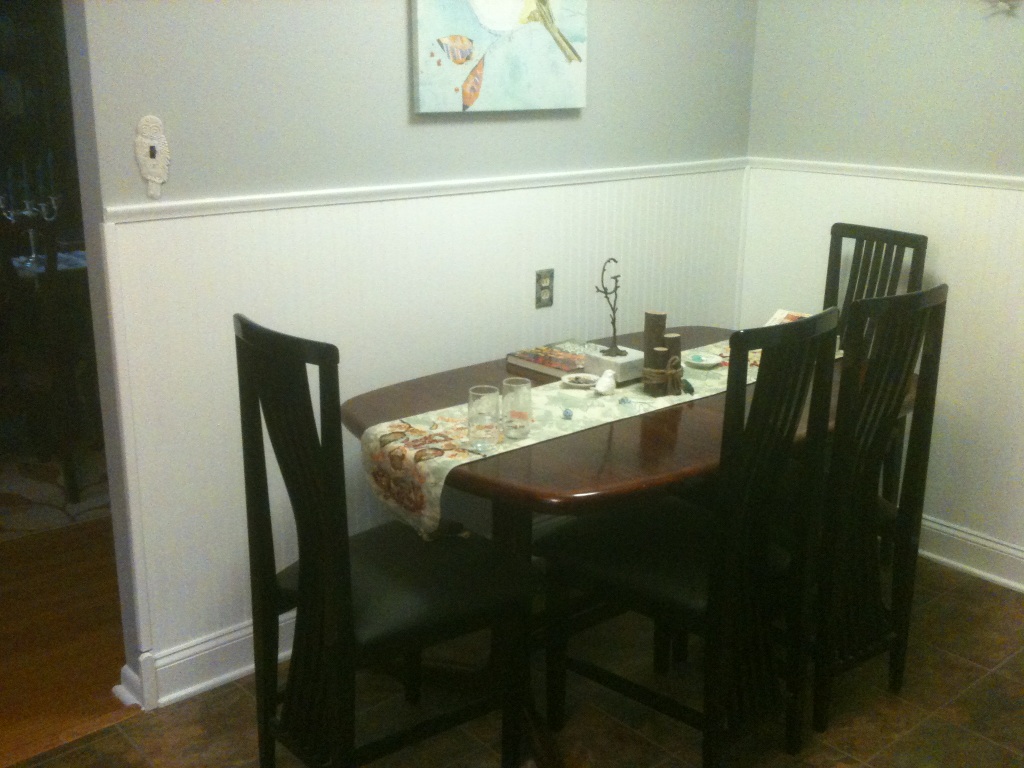
It already looks like a different room! Notice my owl switchplate cover (I named her “Hedwig, naturally), the outlet cover that is gorgeous but too small in the photo to see, the bird print, the brass “G” monogram tree centerpiece, the runner, and the 3 small tree stumps wrapped in twine. In earlier photos you will notice the aqua blue and white knobs that look like Super Mario turtle shells. Remember earlier when I said the kitchen needed some whimsy? That’s what I meant.
After this, we were planning to wait a while to do our cabinets, but in the Greenberg household, that seems to translate to “next week”. Hah!
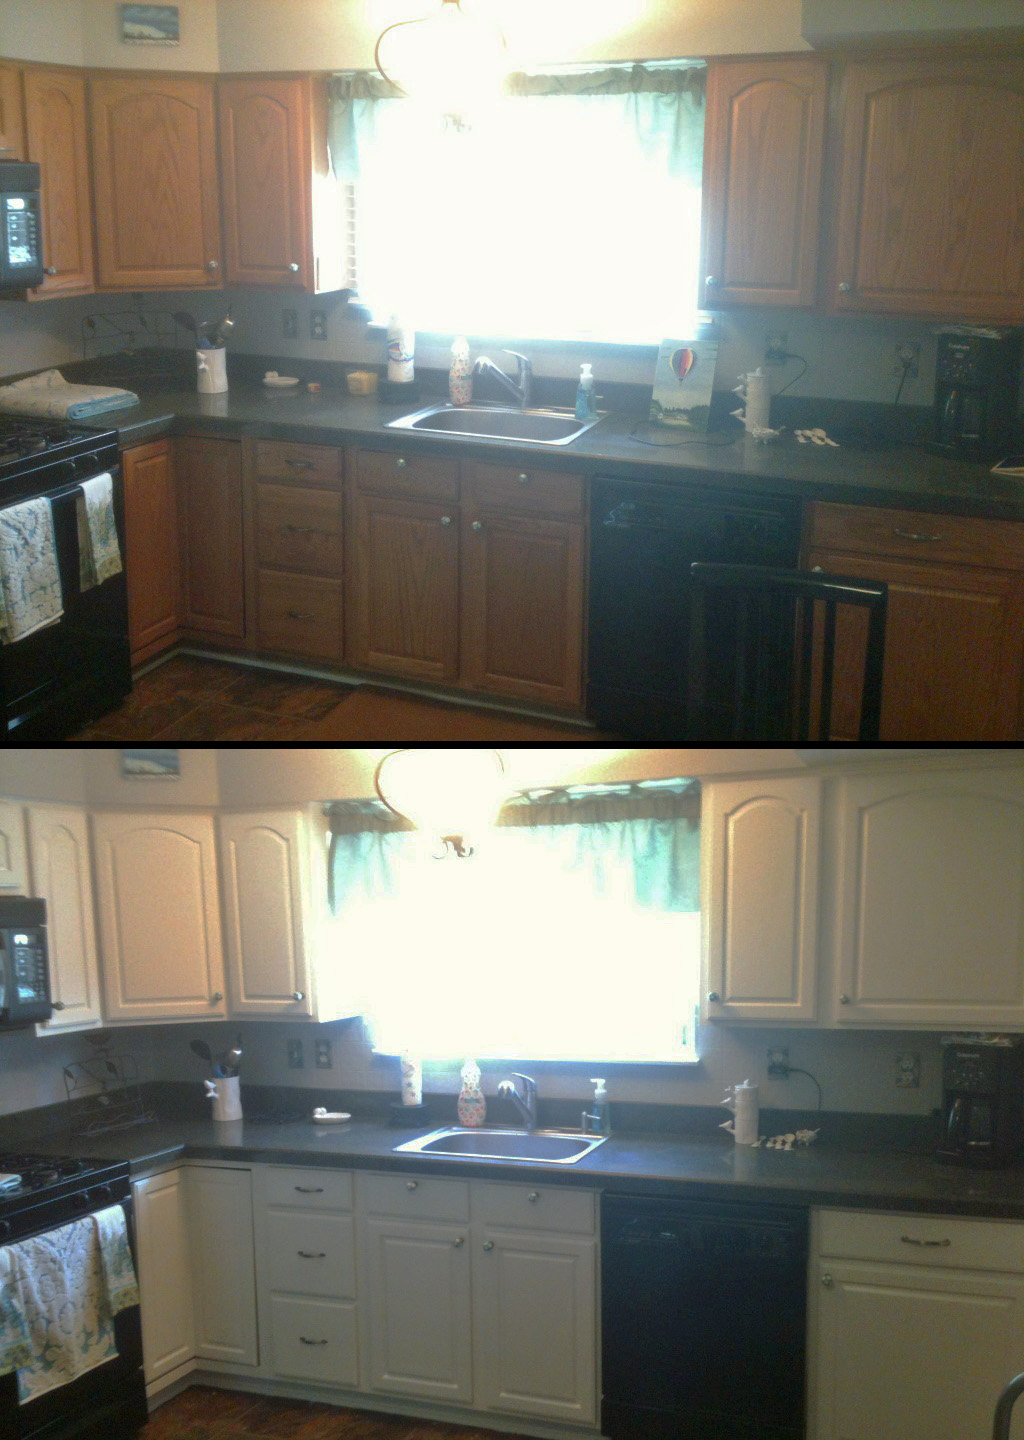
So we went for it! We first got clean cloth and wiped down all of the cabinets with mineral spirits to dull the lacquer and give the paint a better surface to adhere to. With our trusty Valspar bonding primer, we gave the outside of the cabinets 2 coats and the inside of the doors got 1. We chose semi-gloss paint (nice and easy to scrub), and the color was Behr’s “Snow Drift” so that it was a little softer than straight trim paint. We did them while hung, but most people remove the cabinets and hardware. We took off the knobs and taped over the hinges. We found that tiny 4-inch rollers and 2 inch trim brushes (with a tiny brush for details) were all that we needed to give the cabinets a smooth, non-streaky finish. The small rollers really did an amazing job making an even finish, while the trim brushed filled in the grooves where the roller could not reach. Here’s a photo of what you need:
Let me note that you CAN get spray paint. You can find a special paint made for wood and cabinets, but be aware that this is a pricier option (though also easier). Our goal was “as cheap as possible”, so we chose the traditional paint method.
Now for the most fun part…the results, the transformation, the “WOW” factor that white gives a kitchen. You will never believe it’s the same room:
And
Here
We
Go


(Last one is blurred due to the natural sunlight coming in, sorry about that).
WOW, WOW, WOW, RIGHT?!
It does not look like the same space! We are ecstatic about it. It’s bright, light, cheery, and feels even larger. Talk about doing it on a shoestring budget! This “update” was as cheap as it gets.
All right, now for…
The cost comparison:
DIY: $100 for materials that include bonding primer, paint, and supplies.
Professional: A good ballpark estimate for refinishing cabinets is about $2,000. There is a very slight chance it would be lower, but it’s more likely to be even higher.
The future for our kitchen holds:
1.) Stainless appliances.
2.) A glass mosaic tile backsplash.
3.) The wall knocked down to open it to the dining room, leaving a small partition to hold a custom-made island that is both table for 4 and prep/storage space. THIS will not come cheap. We can do most of the demo ourselves, but we will need a professional to move electrical work and finish it off perfectly. My contractor will build me the island, white finished hardwood with a large granite or cement top.
4.) Perhaps furthest into the future, a new floor. My heart is currently set on good wood laminate that looks like driftwood. If not, I will likely go for a medium-colored Pergo. I am not a fan of tile, so laminate it is!
My very fervent hope is that we can get all of the above for between $5,000-6,000, and that is all the money I ever want to put into the kitchen. Compared to what most homeowners spend on kitchen remodels, this is ridiculously cheap. I think we can do it!
But for right now and while money is tight, I love my kitchen.

Okay, seriously, you need to come to MY house! The kitchen looks awesome!
Cannot wait to try this in our kitchen! Thanks for all the tips!
You’re welcome. Just give me a ring if you want some help ❤